The deadlift is a compound movement that can build total body strength, hypertrophy, and improve athletic capacity. Beginners can benefit from the deadlift, if and only if they take the time to develop positional strength and proper lifting technique.
In this article, we will offer beginner lifters (and coaches) a few beginner-friendly deadlift variations that can be used to develop necessary deadlift mechanics and abilities to help progress beginners towards more advanced and heavier forms of deadlifting, as well as:
3 Reasons Why Beginners Should Deadlift?
In our Deadlift Exercise Guide, we discuss the deadlift and why it is a fundamental movement for lifters, athletes, and fitness-goers alike. Below are just a few of the top benefits that beginners gain expect to gain when performing any of the beginner deadlift variations below.
1. Increase Back Strength
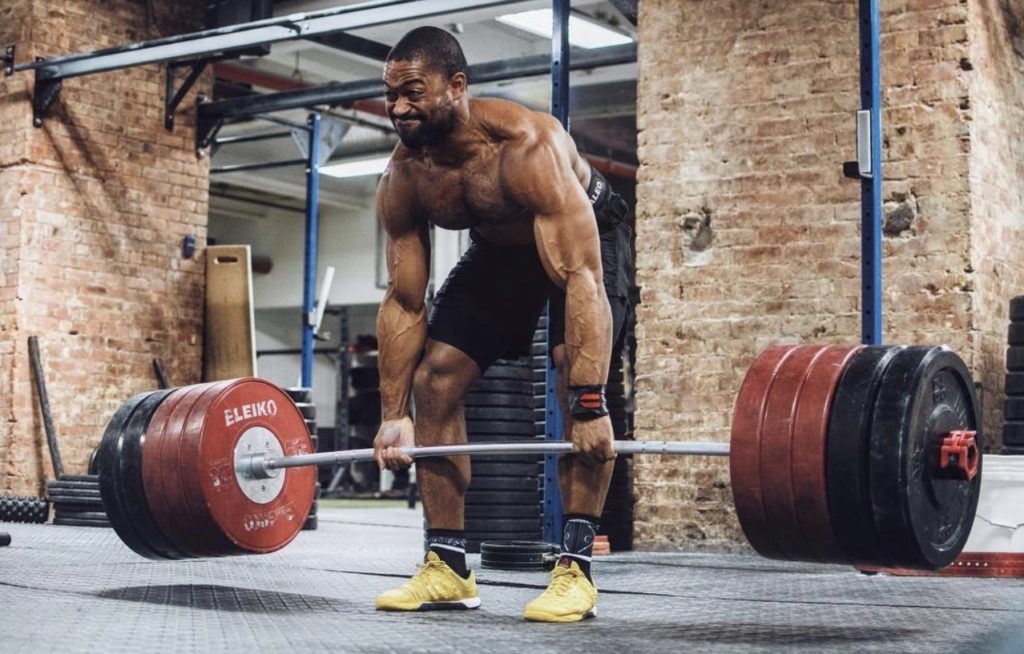
Deadlifting is a total body movement that can build serious total body strength and develop the musculature of the posterior chain (back, hips, hamstrings, etc).
Experienced lifters and beginners are drawn to deadlifts for the opportunity to build bigger lats, increase athletic potential (sports, sprinting, jumping), and gain muscle mass necessary for strength, power, and fitness sports.
2. Improve Athleticism
The deadlift increases strength and muscle hypertrophy of the glutes, hamstrings, and back muscles. These muscle groups are collectively referred to as the posterior chain.
The posterior chain muscles are responsible for many athletic movements like springing, jumping, and explosive-based movements.
3. Build Total Body Muscle
When looking to gain strength and muscle mass, beginners can benefit from selecting compound movements like squats, deadlifts and presses.
These movements stress a high amount of muscle mass at once, increasing overall metabolic stress on the body, improve neural firing, and can do so in a time efficient manner.
Muscles Worked – Deadlifts
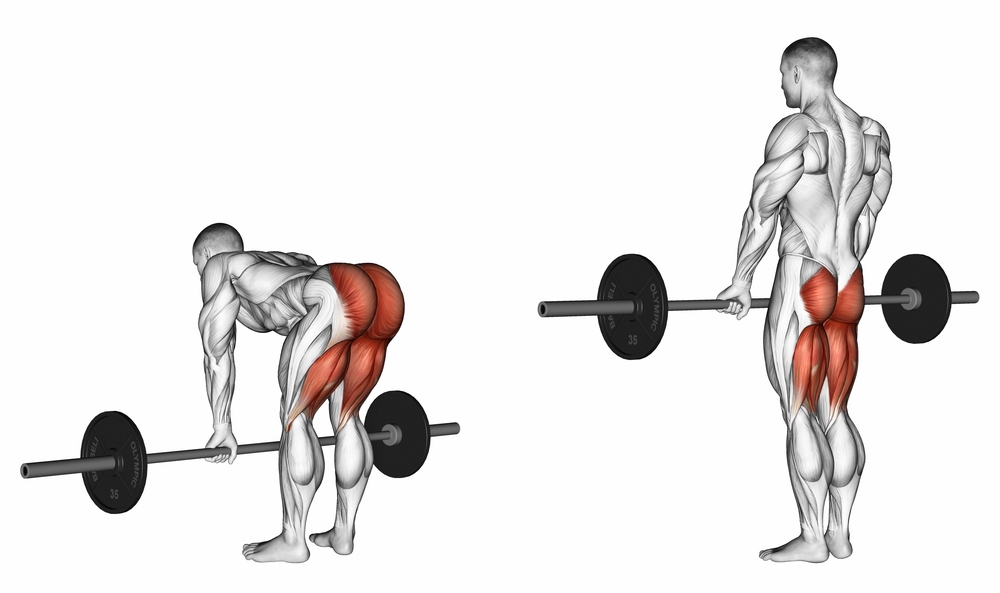
The deadlift is a compound, total-body movement that recruits a vast amount of muscle groups at once. The deadlift is highly dependent on posterior chain strength, postural awareness, and neural recruitment. Below are some of the more primary muscle groups involved in the deadlift.
Back
The back, which includes the latissimus dorsi muscles, rhomboids, and trapezius (upper, middle, and lower) are all stressed during the deadlift. The main function of the back in the deadlift is to assist the gluteus maximus and hamstrings by reinforcing proper positioning of the torso.
Hamstrings
The hamstrings are responsible for hip extension, assisting the gluteus maximus during the deadlift. Some deadlift variations, such as those that keep the lifter in a more upright torso position decrease the amount of hip flexion in the bottom of the deadlift, slightly decreasing hamstrings engagement. Nonetheless, the hamstrings are highly active in most deadlift patterns.
Glutes
The glutes, specifically the gluteus maximus, is primarily responsible for extending the hips during the deadlift. The glutes work in unison with the hamstrings and back muscles to perform the deadlift.
Erector Spinae
The erector spinae, also known as the lower back muscles, work to assist the glutes, hamstrings, and upper back muscles in the deadlift. The erectors are responsible for stabilizing the spine and resisting spinal flexion under load.
4 Beginner Deadlift Variations
Below are four (4) beginner deadlift variations beginners can use to build muscle mass, develop total body and deadlift strength, and reinforce proper movement patterning necessary for more advanced deadlift training.
1. Rack Pull
The rack pull is a partial range of motion deadlift. This can be done either in a power/squat rack or performing a deadlift with the weights on an elevated surface like plates or blocks. By performing the deadlift from a higher starting point, you limit the strength and stability needed at deeper flexion angles.
In doing so, you can minimize hip flexibility and lower back strength/stability demands. Check out the video featuring 6x IPF World Champion Kimberly Walford for more details about the rack pull!
This can be beneficial for beginners to learn proper deadlift patterning and increase glute and back strength while minimizing stress to the lower back.

1.
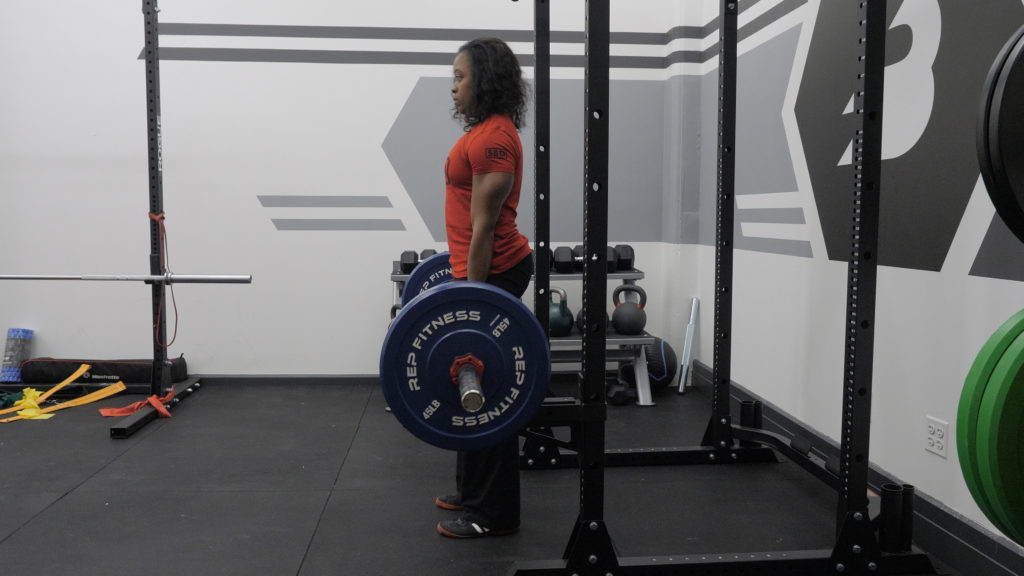
Set Your Rack Height
Set your rack pull height based on your personal lockout sticking point.
- If your sticking point is below the knee, then set the height just below the knee.
- If you sticking point is above the knee, then set the rack height in-line with the tear drop quad muscle.
Coach’s Tip: When progressing with the rack pull, increase the weight and not the physical rack height.
2.
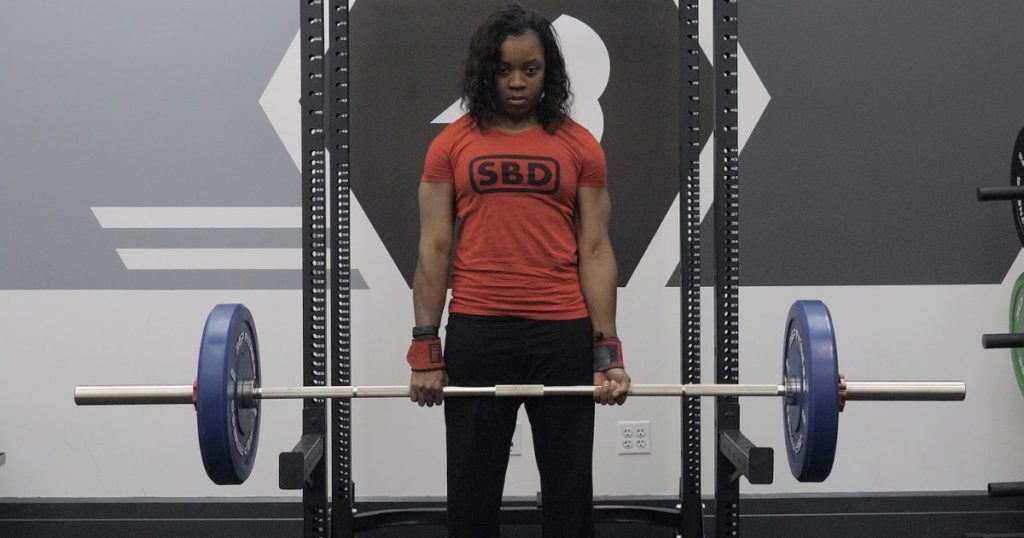
Grip and Full Body Tension
Take a grip that’s similar to what you perform with your normal deadlift training and in competition.
Set the back, pull the bar close to the body with the lats, and think about the hands being hooks. Take a deep breath and grip the floor, then drive the feet through the floor.
Coach’s Tip: Spend a lot of energy focusing on the hip extension at the top, as this movement is designed to supramaximally load the hips for carryover to your normal deadlift.
3.
Stay Tight and Hold
After you’ve set the back and hit a strong hip extension, keep the lats contracted and hold the weight for a second at the top.
This is essential for improving grip strength and creating a neural adaptation in the body when working with supramaximal loads.
Coach’s Tip: When applicable, try to hold the weight for a slightly longer period at the top for increased grip strength carryover.
2. Trap Bar Deadlift
The trap bar deadlift, also known as the hex bar deadlift, is a deadlift done with a specialty bar. This bar allows a lifter to maintain a more vertical torso positioning if desired. In doing so, this deadlift variation can help keep beginner lifters in a more upright position which can decrease the need for lower back strength and positional awareness as compared to the conventional deadlift.
Coaches can use this to progress beginners to fuller ranges of motion deadlifts with a barbell, increase back and hip strength, and progress into more advanced and deadlift movements. Note, that while trap bar deadlift can be done using a more vertical torso positioning, this variation can still be done using a hamstring and glute dominant patterning if the lifter reduces the amount of knee flexion in the lift.
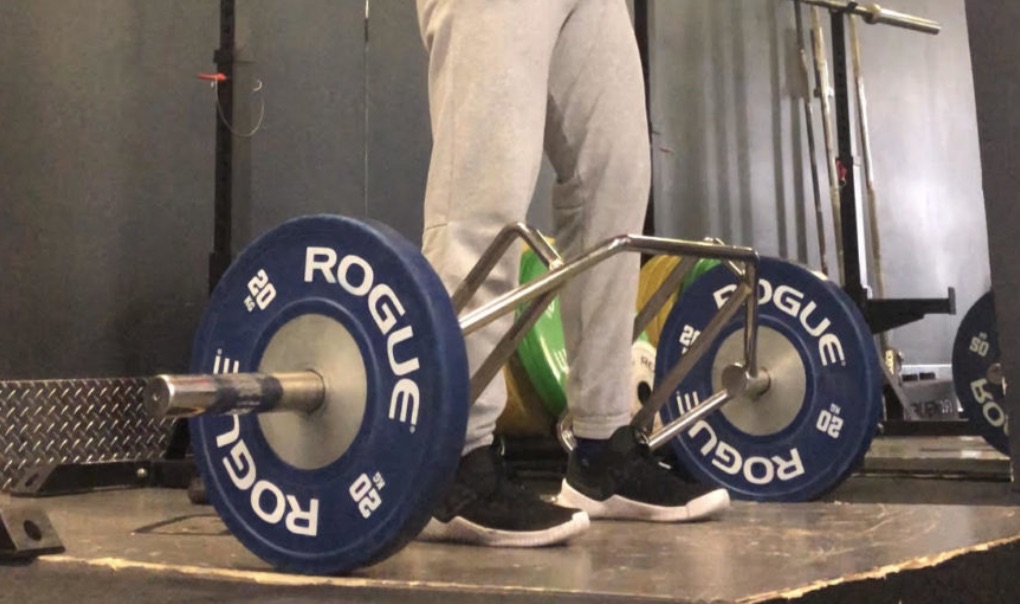
1.
The Setup
Start by assuming a hip width stance with the toes pointed forward (in line with the knees).
The stance width will vary, however generally speaking, the width should allow for the athlete to have the shins perpendicular to the floor with the back flat and shoulders directly above the bar.
Coach’s Tip: Think pushing the hips back and keeping the shins vertical (however they can be slightly forward if you are allowing the hips to drop (see training modifications in next section).
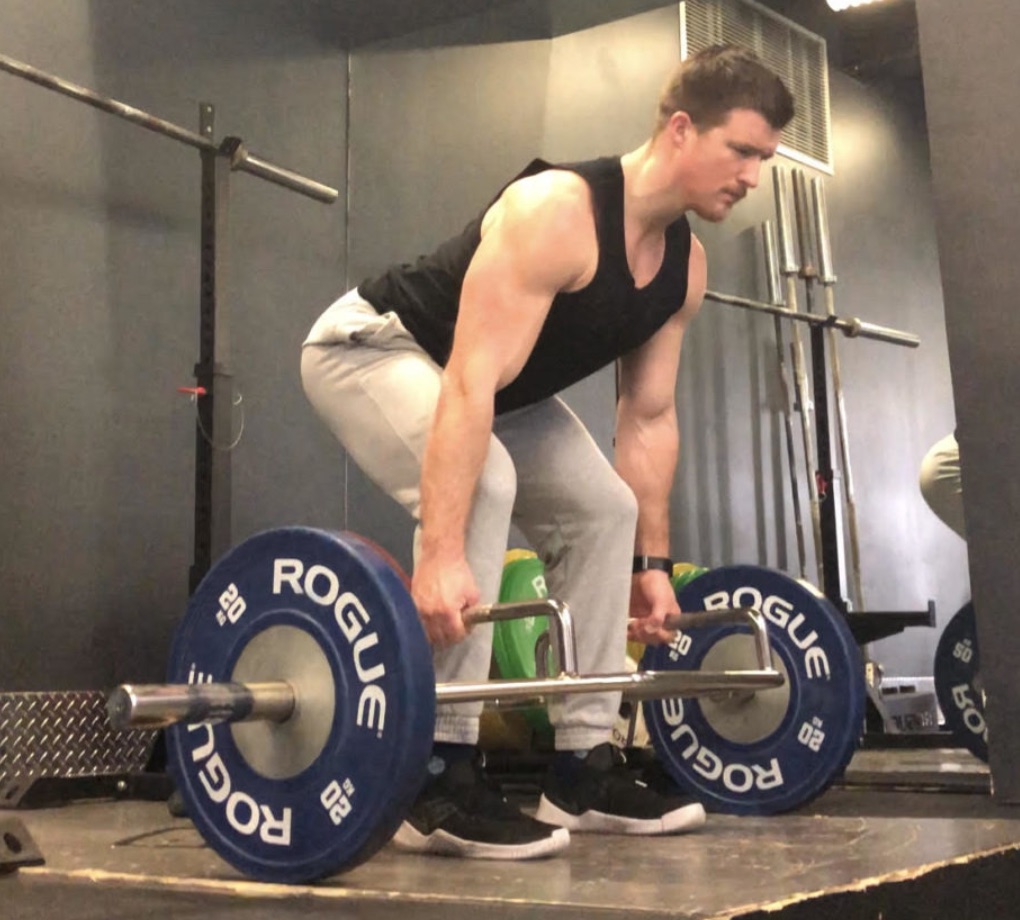
2.
Load the Pull
Squeeze the bar as you pull the shoulderblades down the back, allowing the chest and shoulders to get pulled upwards.
Without lifting the bar, find full pressure in the foot as you start to load the pull.
Coach’s Tip: Flex the triceps and pull the back taunt.
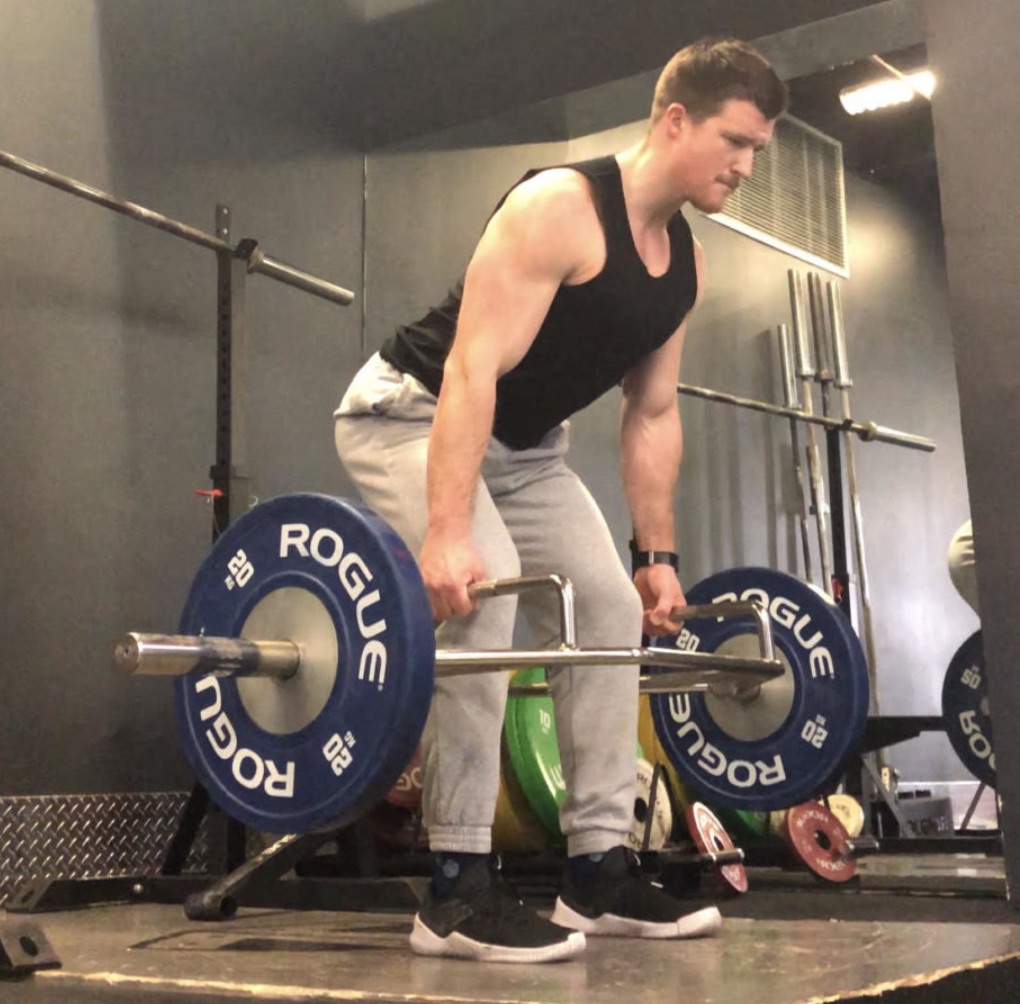
3.
Push Through the Floor
Push downwards into the floor with the legs, and keep the chest up.
Focus on feeling the knees and hips extending as you drive your feet into the ground.
Coach’s Tip: Push through the floor (with the legs).
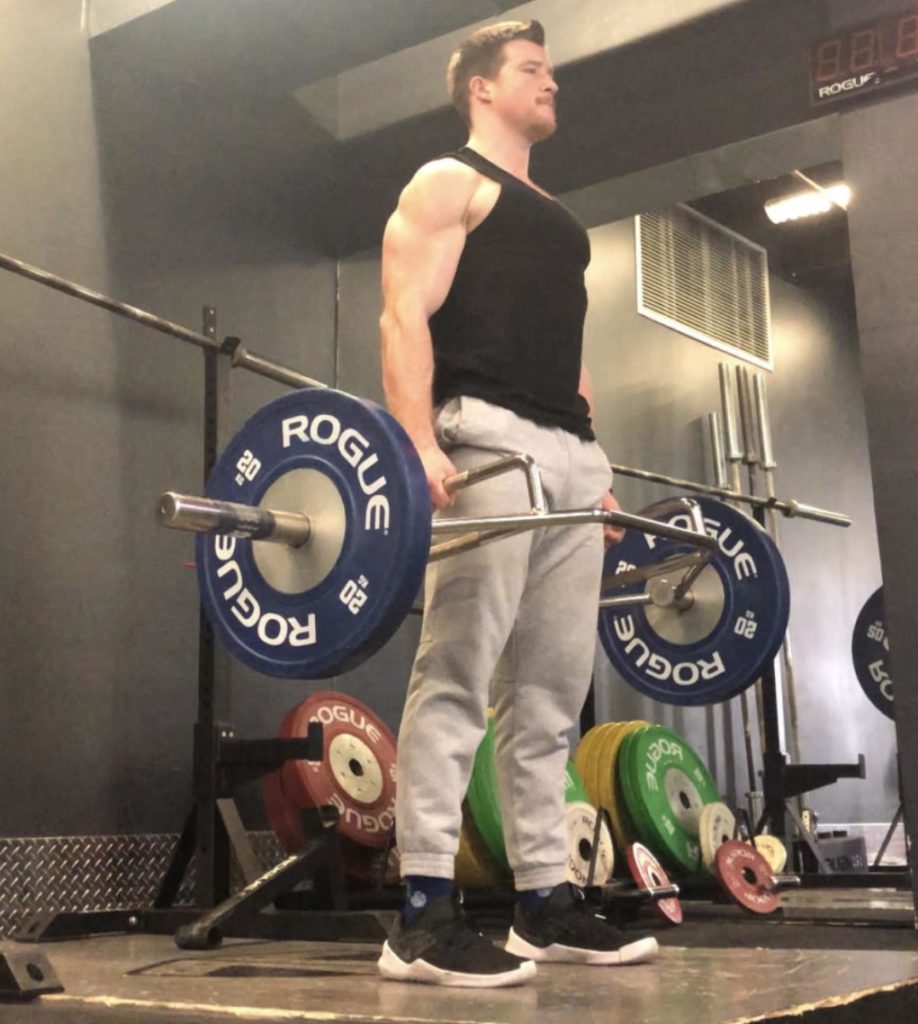
4.
Stand Strong
Assume a vertical position with the pelvis neutral (no lumbar extension/flexion) and the upper back set.
The shoulderblades should be down the back, with the load being diserpse between the upper back, traps, glutes legs and grip.
Coach’s Tip: Squeeze the glutes at the top.
3. Sumo Deadlift
The sumo deadlift can be used as a beginner deadlift variation to increase glute and back strength, reduce lower back strength and control demands, and improve athletic capacity. The sumo deadlift has a lifter take a wider stance, which allows them to stay in a more upright position.
This stance may also be more comfortable that conventional deadlifting for some beginner lifters/athletes, mimicking everyday movements and athletic stances.
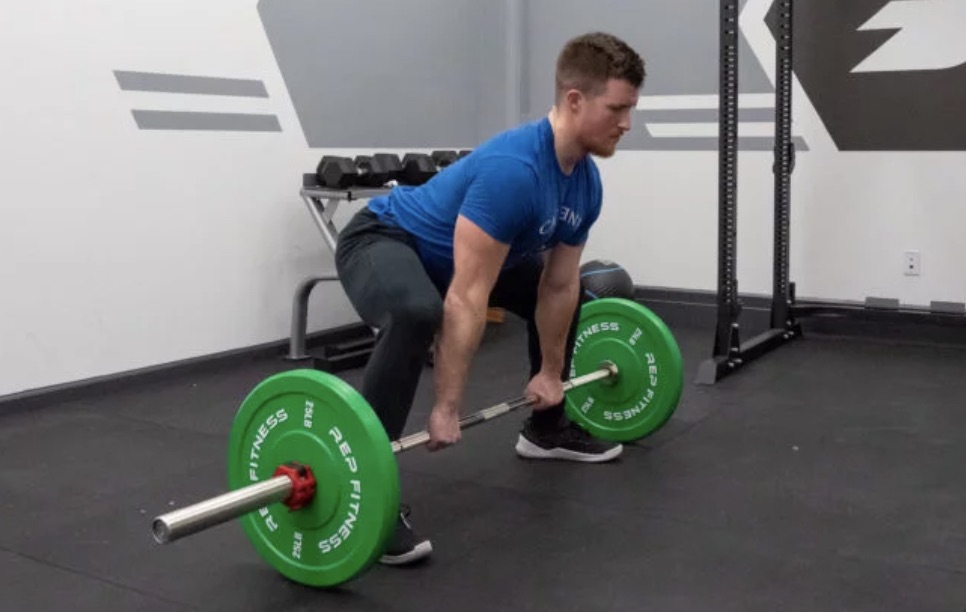
1.
The Setup
Start by assuming a wide stance with the toes pointed out. The stance itself should be wide enough to allow the arms to be extended downwards, inside the knees (elbows inside the knees).
The stance width will vary, however generally speaking, the width should allow for the athlete to have the shins perpendicular to the floor with the back flat and shoulders directly above the bar.
Coach’s Tip: Think about pulling the hips down to the bar, keeping to core tight and braced. The knees themselves need to be pushed out wide to allow the torso to stay slightly more vertical than a conventional deadlift.
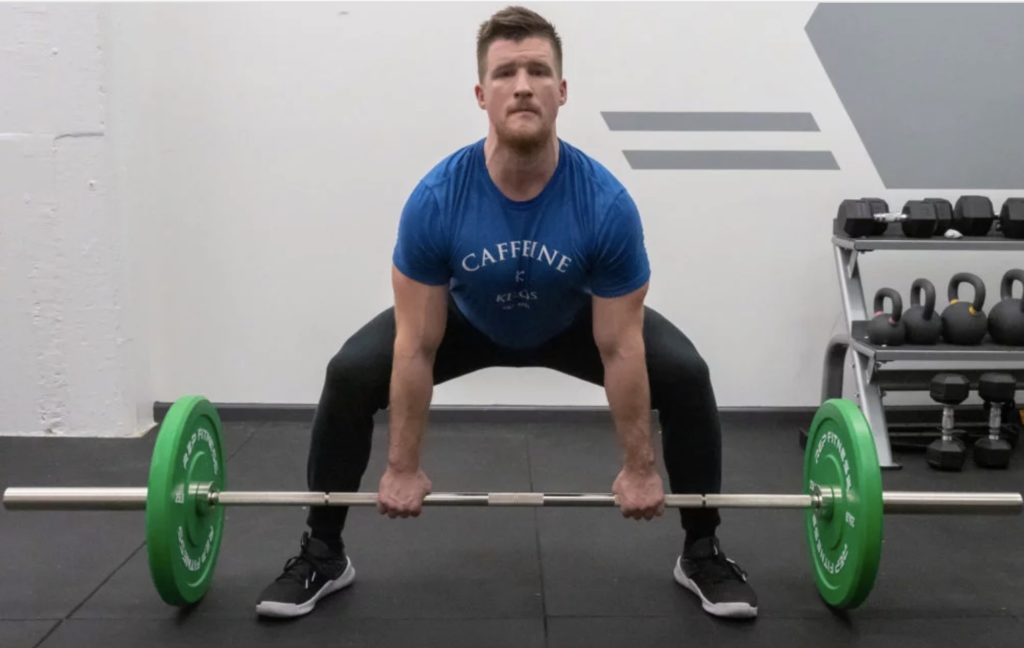
2.
Zero Slack
Once you have set your positions, start to build pressure throughout the body to minimize any slack in the arms, legs, and back.
This can be done by slightly pulling up on the bar and pressing the legs through the floor (without moving the bar yet). Once you have found your best tension position, set the breathe once more and proceed to step 3.
Coach’s Tip: Visualize pressure rising in the body before every pull, with all the muscles being engaged and ready to fire at once.
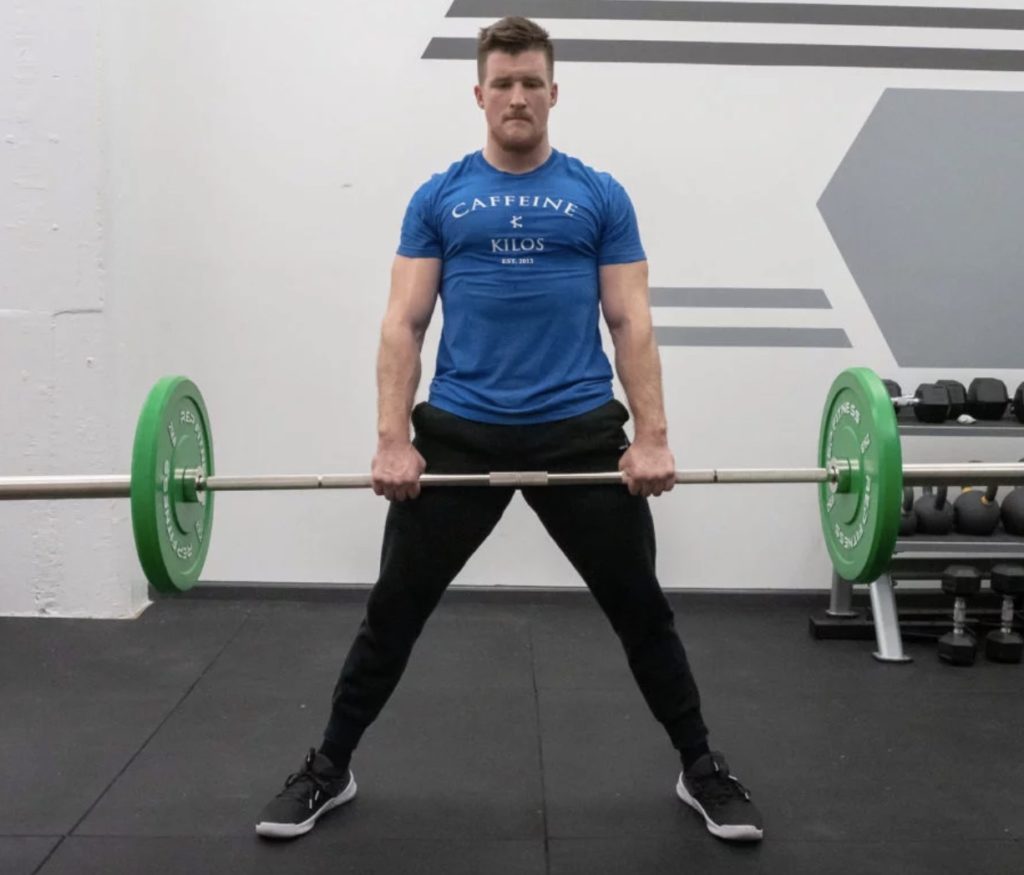
3.
Push with Legs and Pull Up
Now that you are in the correct positions and have no slack in the body, its time to attack the barbell by simultaneously driving through the feet and pulling up on the bar.
The key here is to not allow the chest to fall or the hips to rise in the pull, but rather to have the barbell stay close to the body as you stand up.
Coach’s Tip: Keep the chest up, the bar close, and pull.
4. Pause Deadlift
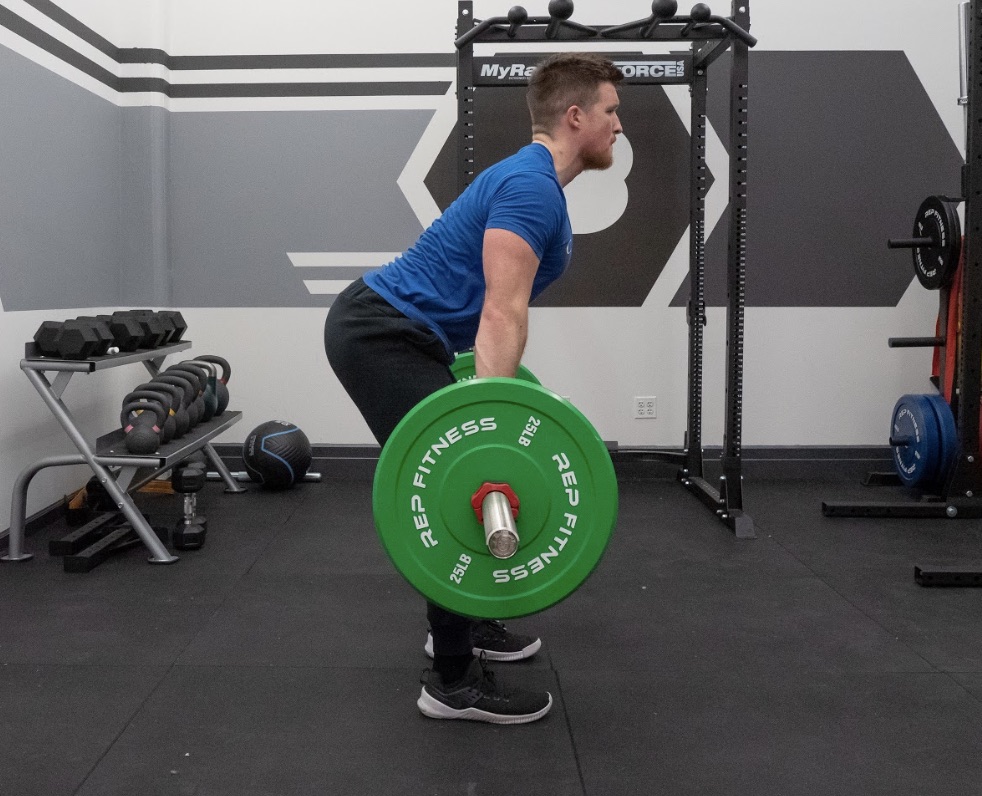
The pause deadlift is a great variation to reinforce proper positional strength and awareness in the deadlift. Many beginners may rush through challenging positions, allowing the lower back to take over and/or lose spinal integrity. By forcing pauses at various positions (two inches off the floor, below the knee, high thigh, etc) you force a beginner lifter to establish greater body control and balance while still addressing strength and muscle hypertrophy.
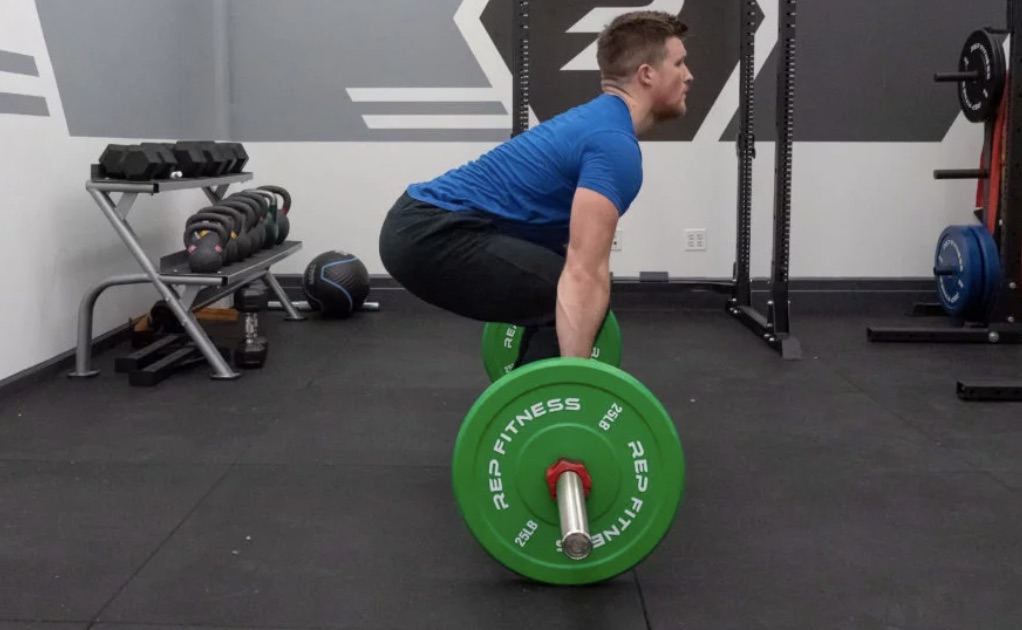
1.
The Setup
To begin a paused deadlift, start in a position similar to what you would use with a conventional deadlift. The feet should be around hip width apart, the lats contraction, and the back should be set.
Coach’s Tip: Ensure you are bracing properly to compete the initiation of this movement without early form breakdown.
2.
The Pause
Determine before lifting the weight where you’re going pause. Typically, the mid-shin and just below the knee will be the most common areas to pause, as these will create a higher demand for maintaining a set back.
Keep the bar close to the body and try your hardest to maintain a set back with contracted lats to avoid the barbell drifting away from the body.
Coach’s Tip: Start light and work to build proper form when utilizing deadlifts tempos with pauses.
3.
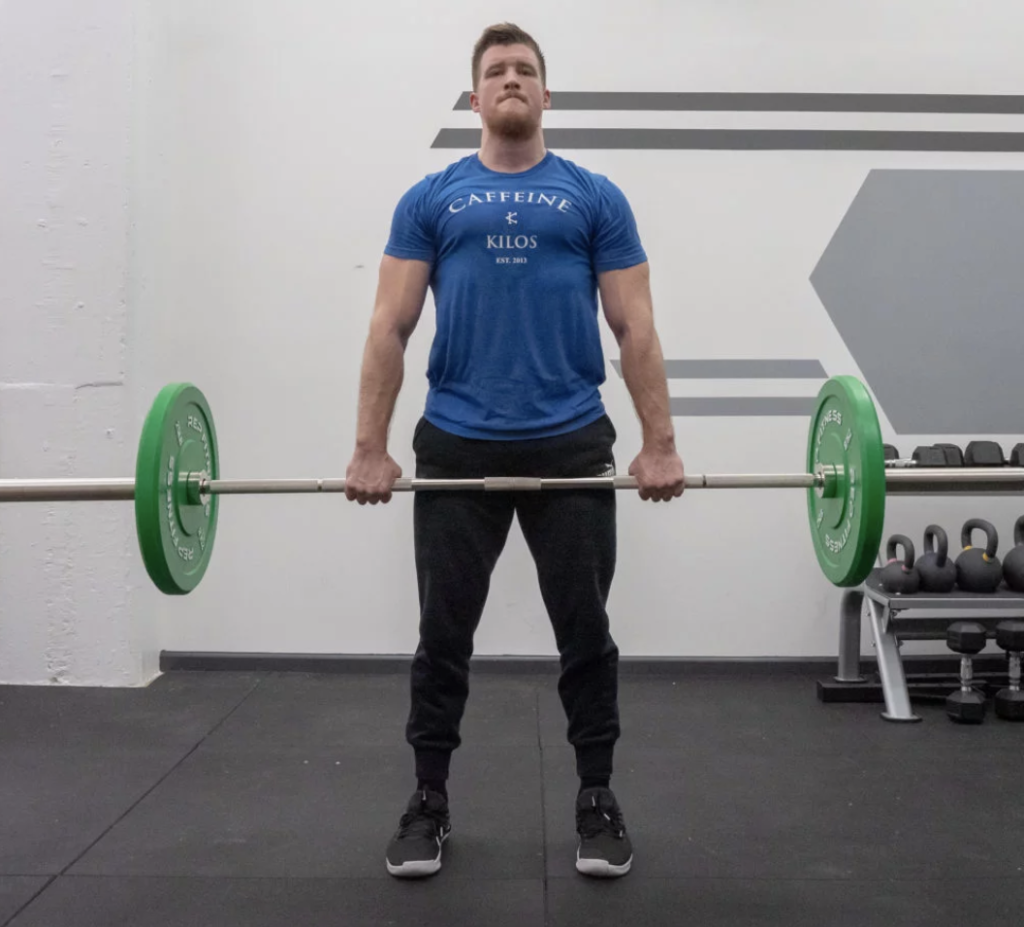
The Final Pull
Once you’ve held positioning for the set amount of time, then you’ll keep the deadlift by extending the hips and maintaining a locked out, neutral position.
Coach’s Tip: The goal is maintaining lifters postures and increasing time under tension, so start light and perform lower rep sets until you’ve mastered this movement.
Want to Learn More About Deadlifts?
Looking to develop a 500lbs deadlift? Want to improve deadlift technique to minimize injury? Check out the below articles and get training!
Feature Image from Leszek Glasner / Shutterstock