Foam rolling is one of the many go-to methods for myofascial release (which is release or loosening of the thin sheath that covers our muscles) before and after a workout. A couple of the most common areas athletes tend to roll out are the upper and lower back. These areas contain multiple layers of muscle, which can result in a tight, or locked up feeling, and this can be especially true for those who lift, then sit at a desk all day.
It can be difficult to effectively roll out these areas and reach the deeper muscles, so we reached out to Matt Moskowitz, Head of Training at Hell’s Kitchen Wellness, to learn about his go-to movements for these purposes. Check out the video below, along with more detailed movement descriptions below in the article.
Note: All motions shown are for informational purposes only. The information in this article and video is not meant to prevent or cure any disease or injury. It’s always a good idea to consult with a medical professional or trainer before attempting any new training methodology. If you experience any sharp pain while foam rolling or exercising, discontinue movements immediately.
[Have a foam rolling question? We probably have the answer. Check out our in-depth foam rolling guide to learn the ins and outs of myofascial release.]
Understanding the Upper Back
The upper back is possibly one of the toughest areas to roll out on the body. Why? This area contains multiple small muscles and becomes easily tight from strenuous workouts and poor posture. Below are a few of the smaller muscles we’re trying to release from the foam rolling exercises in this article.
- Trapezius
- Teres Minor/Major
- Rhomboids
- Infraspinatus
- Latissimus Dorsi
[Ready to get rolling? Check out our special deal on the BarBend 2-in-1 Foam Roller today!]
Understanding the Lower Back
Our lower backs are much less complex compared to the upper, but should be cared for with the same considerations. This is the area of the body that you should pay a lot of attention to when rolling: it’s easily accident prone. Below are a couple of the lower back muscles we’ll be targeting in our exercises.
- Erector Spinae
- Quadratus Lumborum
Understanding the Anterior Musculature
One thing Moskowitz likes to focus on when rolling out the back is focusing on the anterior, or front of the body, as well. He feels that rolling out both sides of the body is key to creating an even harmony in fascial release. A few of the anterior muscle we’ll be hitting today are listed below.
- Serratus Anterior
- Rectus Abdominus
- Psoas
- External Oblique
1. Serratus Extension

The athlete begins in a prone position with the foam roller sitting right below the collarbones and arms supporting your weight. The athlete pushes through the toes and slides forward over the roller until they’re around the area of the third rib. Once there, they press their hips into the ground and push away from the arm to achieve extension. Hold this position for 20-30 seconds.
2. Psoas Release

From the third rib position, the athlete continues to bring the roller down their body by sliding their pelvis over it. Once the pelvis has passed the roller, they press the hips into the ground and hold for 20-30 seconds.
3. Extensor Stretch

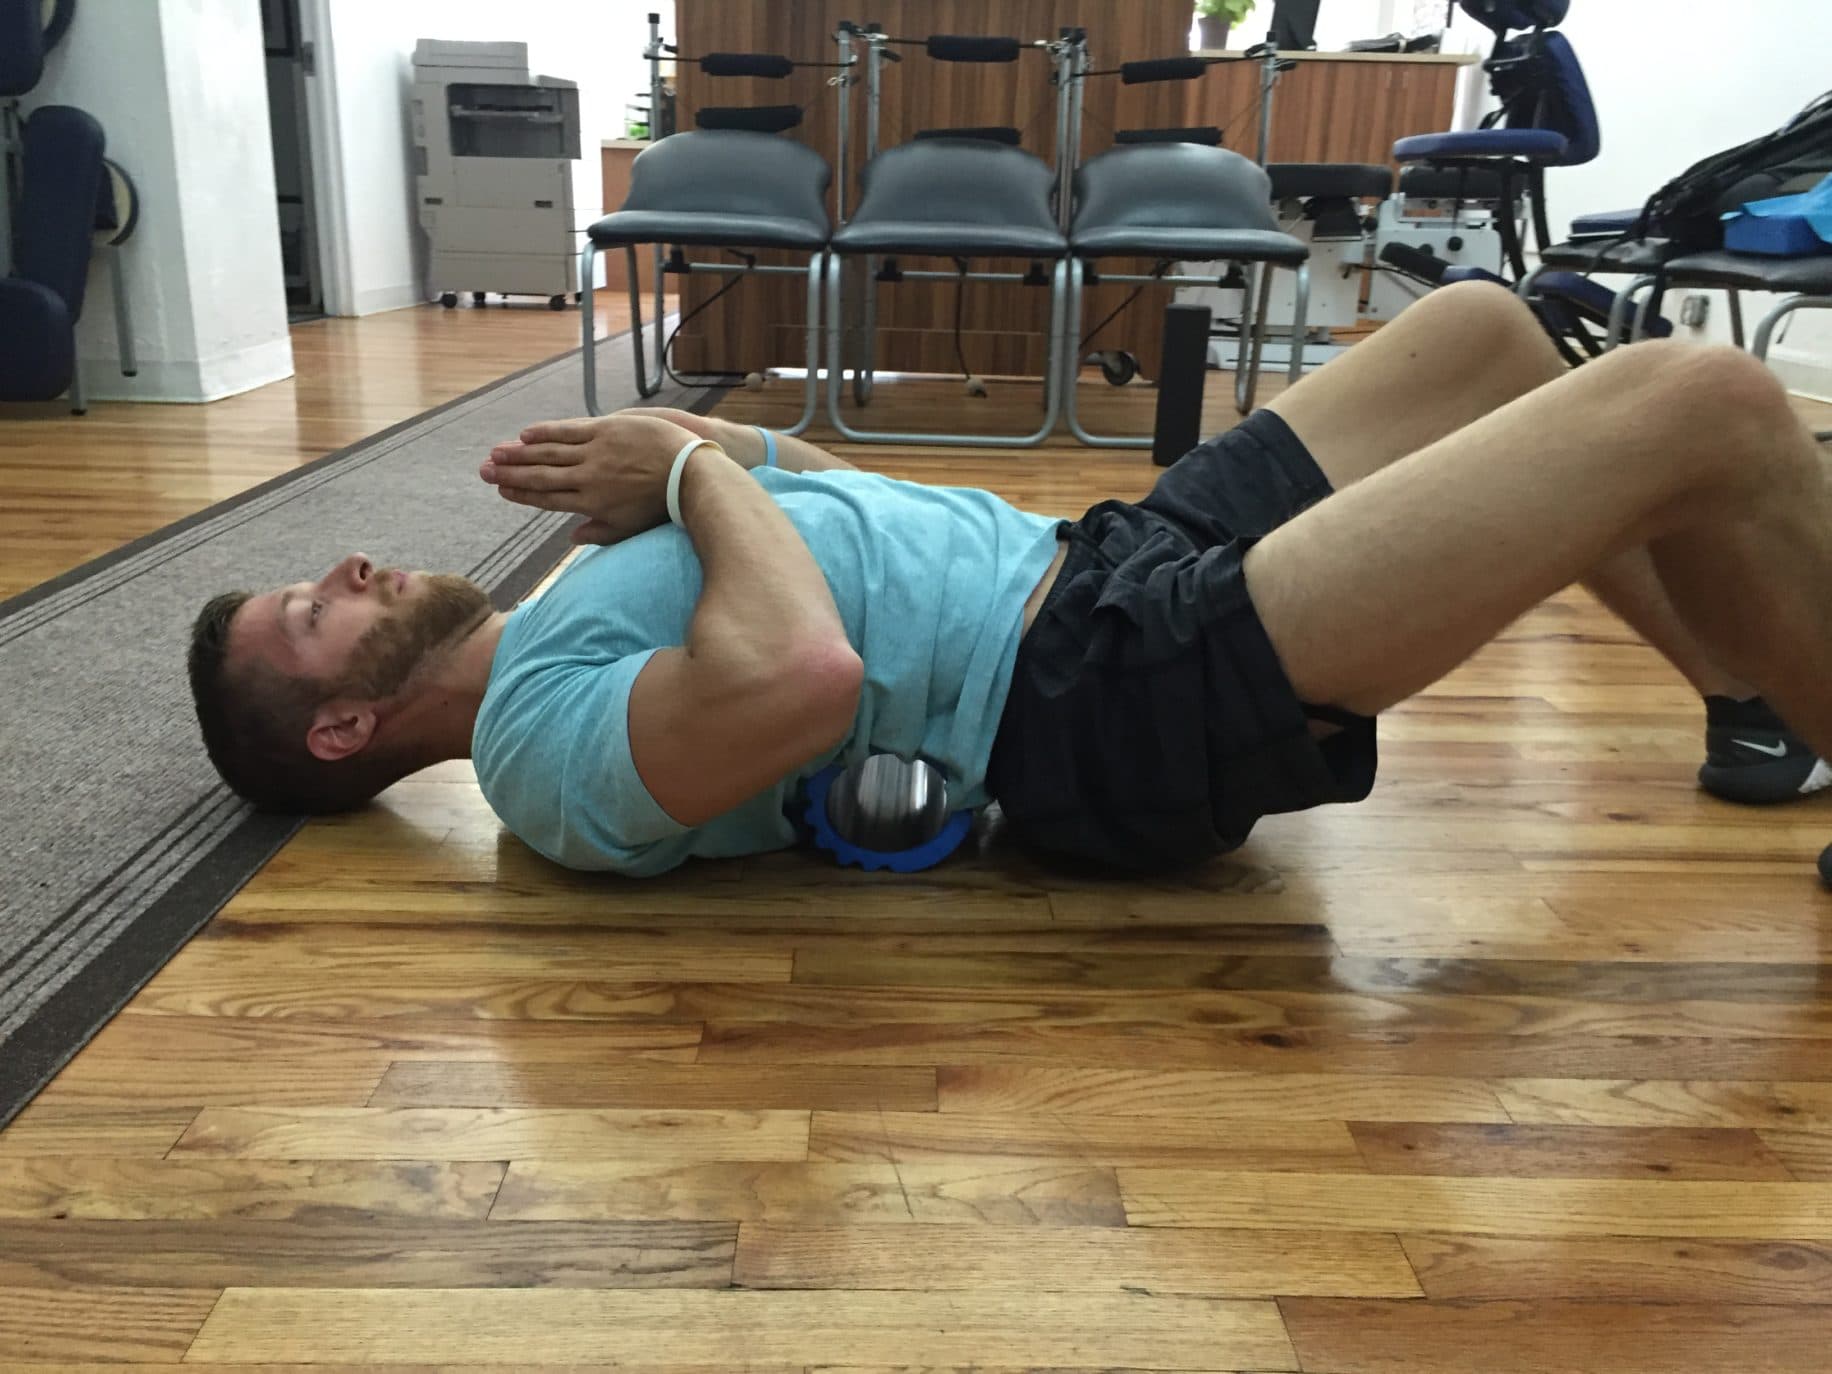
The athlete now rolls onto their back and places their tailbone on the ground. Clasping their hands in a prayer position, they slowly extend the torso over the roller, emphasizing placing the weight into the abdominals and working to stretch the upper body as far as they can over the roller. If they have the strength, the athlete maintains this stretch while holding their body off the ground for 20-30 seconds.
3.5. Extensor Stretch (Less Advanced)
They begin with the upper back on top of the roller and gently slide the roller down the back and extend the upper body. Bringing the pelvis off the floor, they maintain pressure in the abs and extending over the roller, hold this position for 20-30 seconds.
4. QL Release

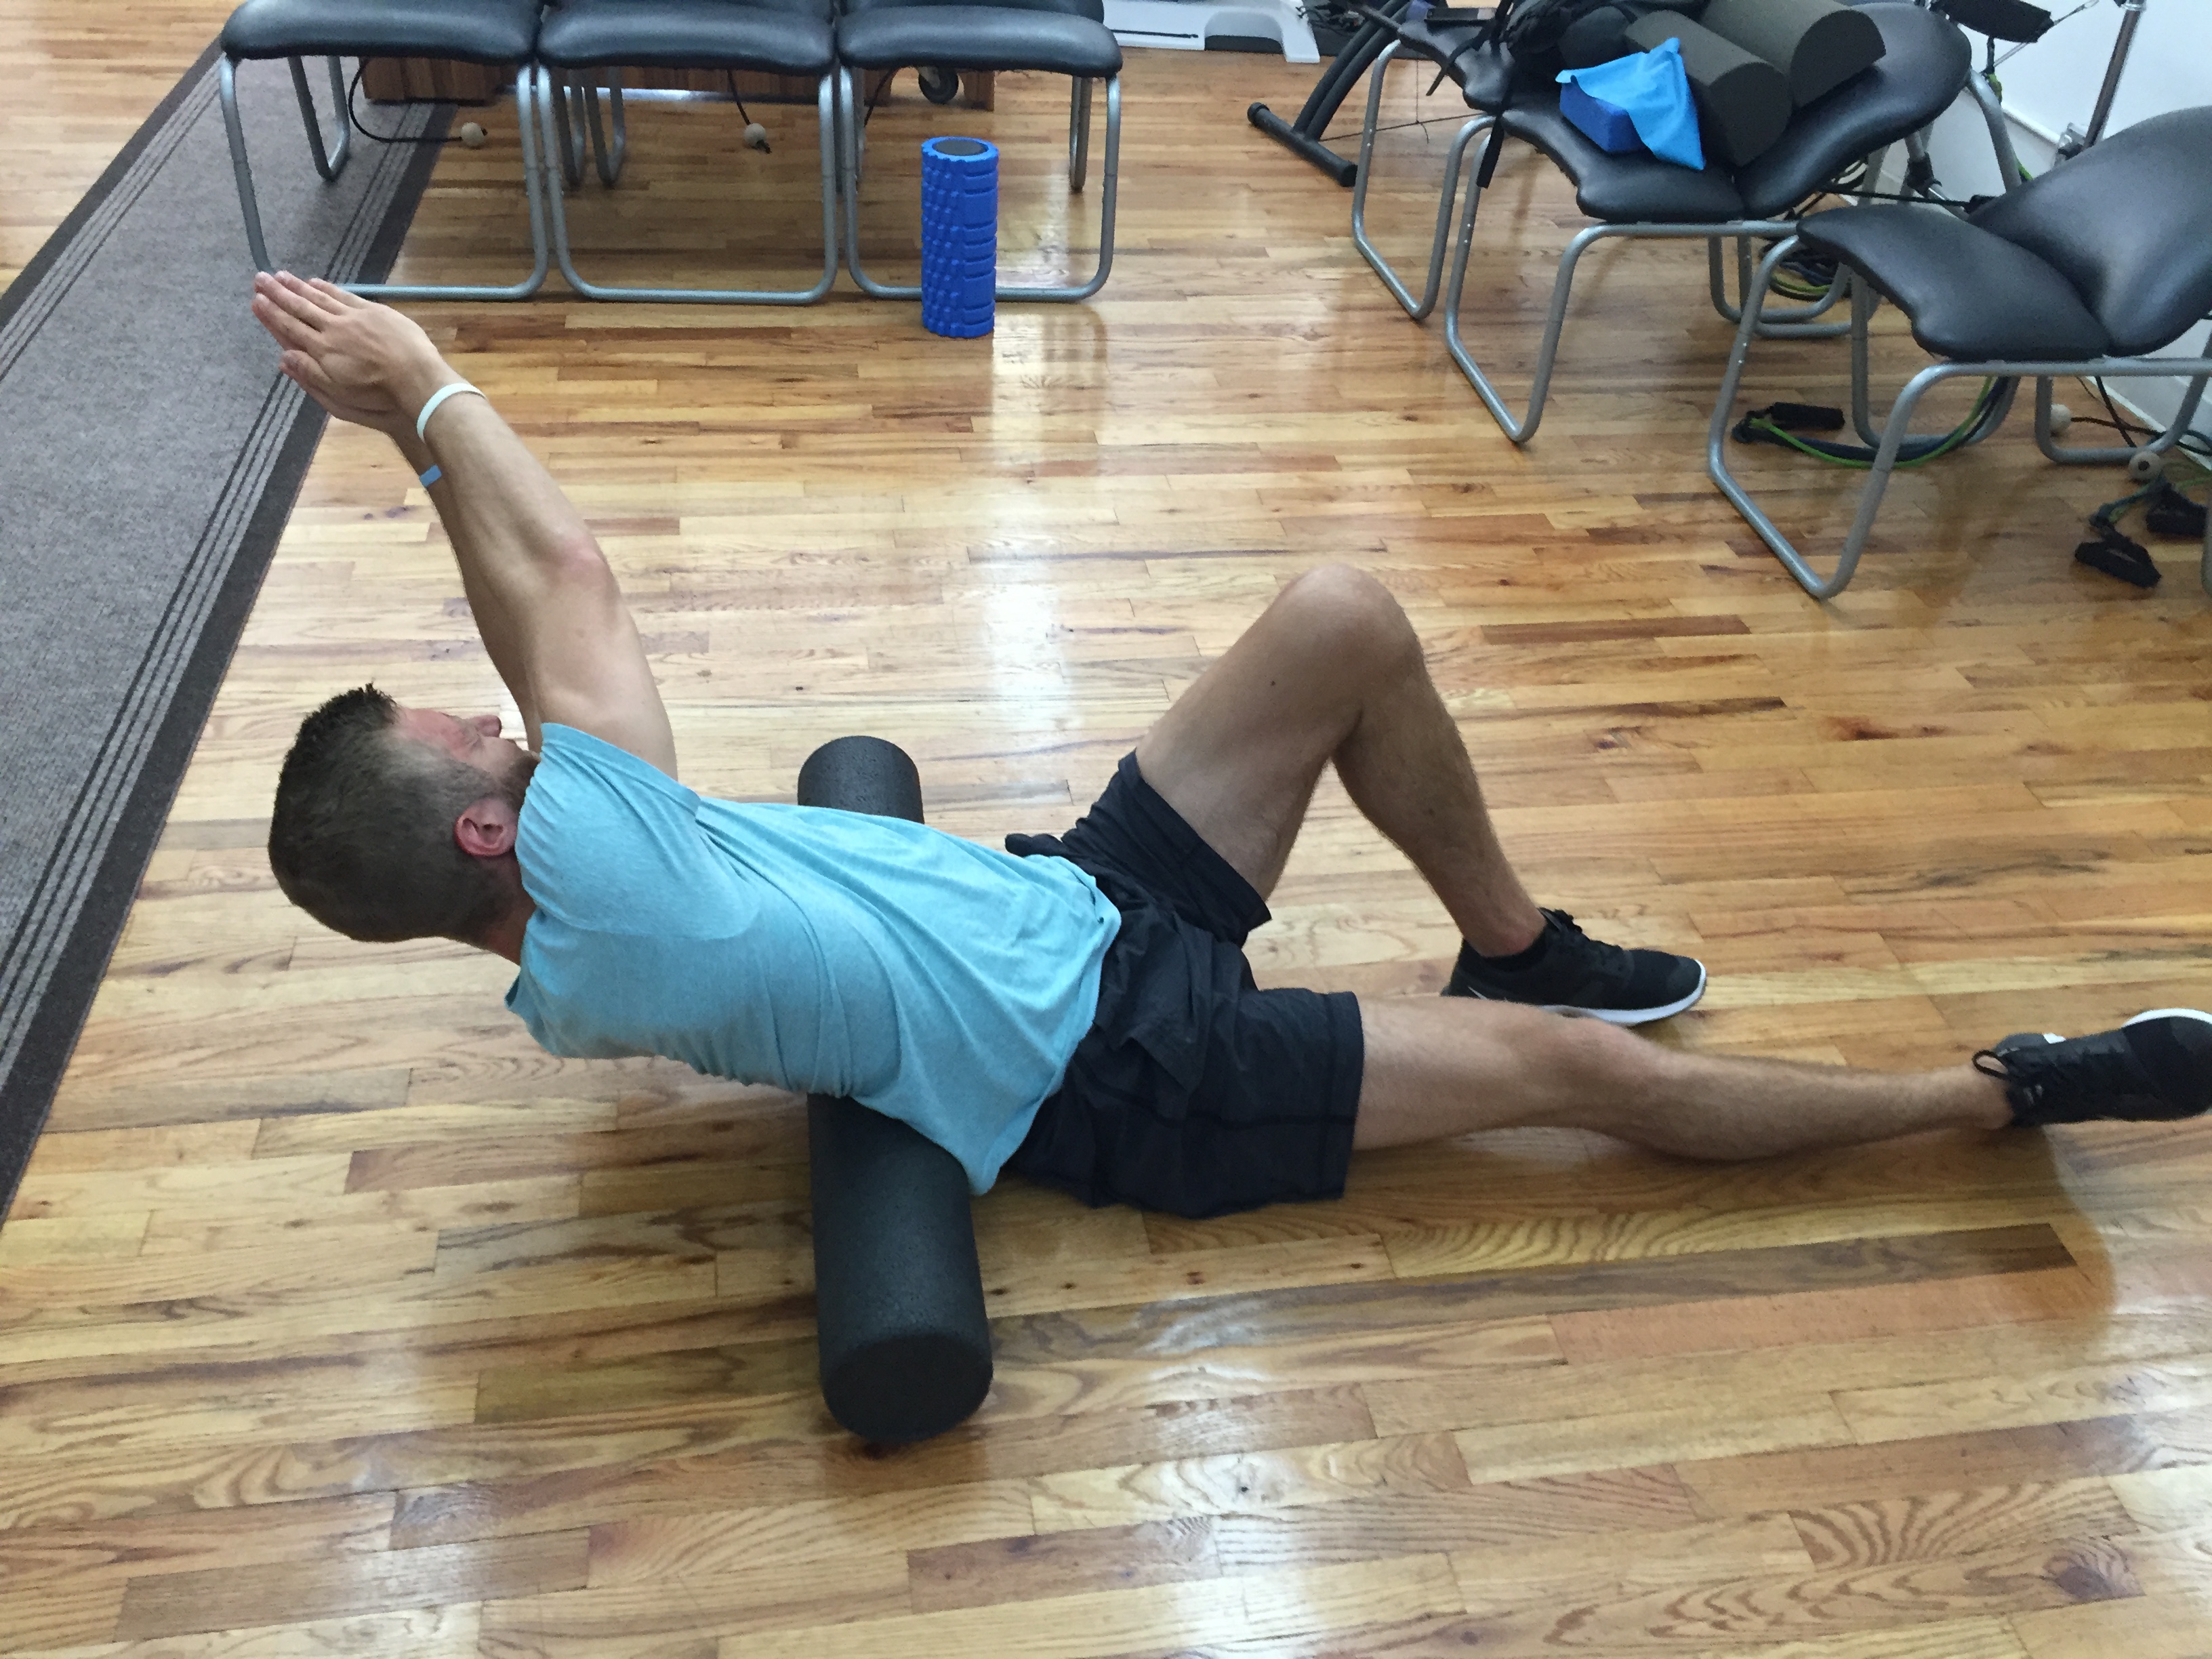
Begin with the roller just above the lower back and press the hips into the ground. Bring the arms to an extended position in front with hands flat together. The athlete then brings the left leg up to a 90 degree angle, then twists the upper body over their left shoulder and holds this for 10 seconds. Come back to center, reverse the legs, and repeat on the right side for 10 seconds.
*Some find it beneficial to use a longer and softer roller for this stretch.
5. Lat Reach

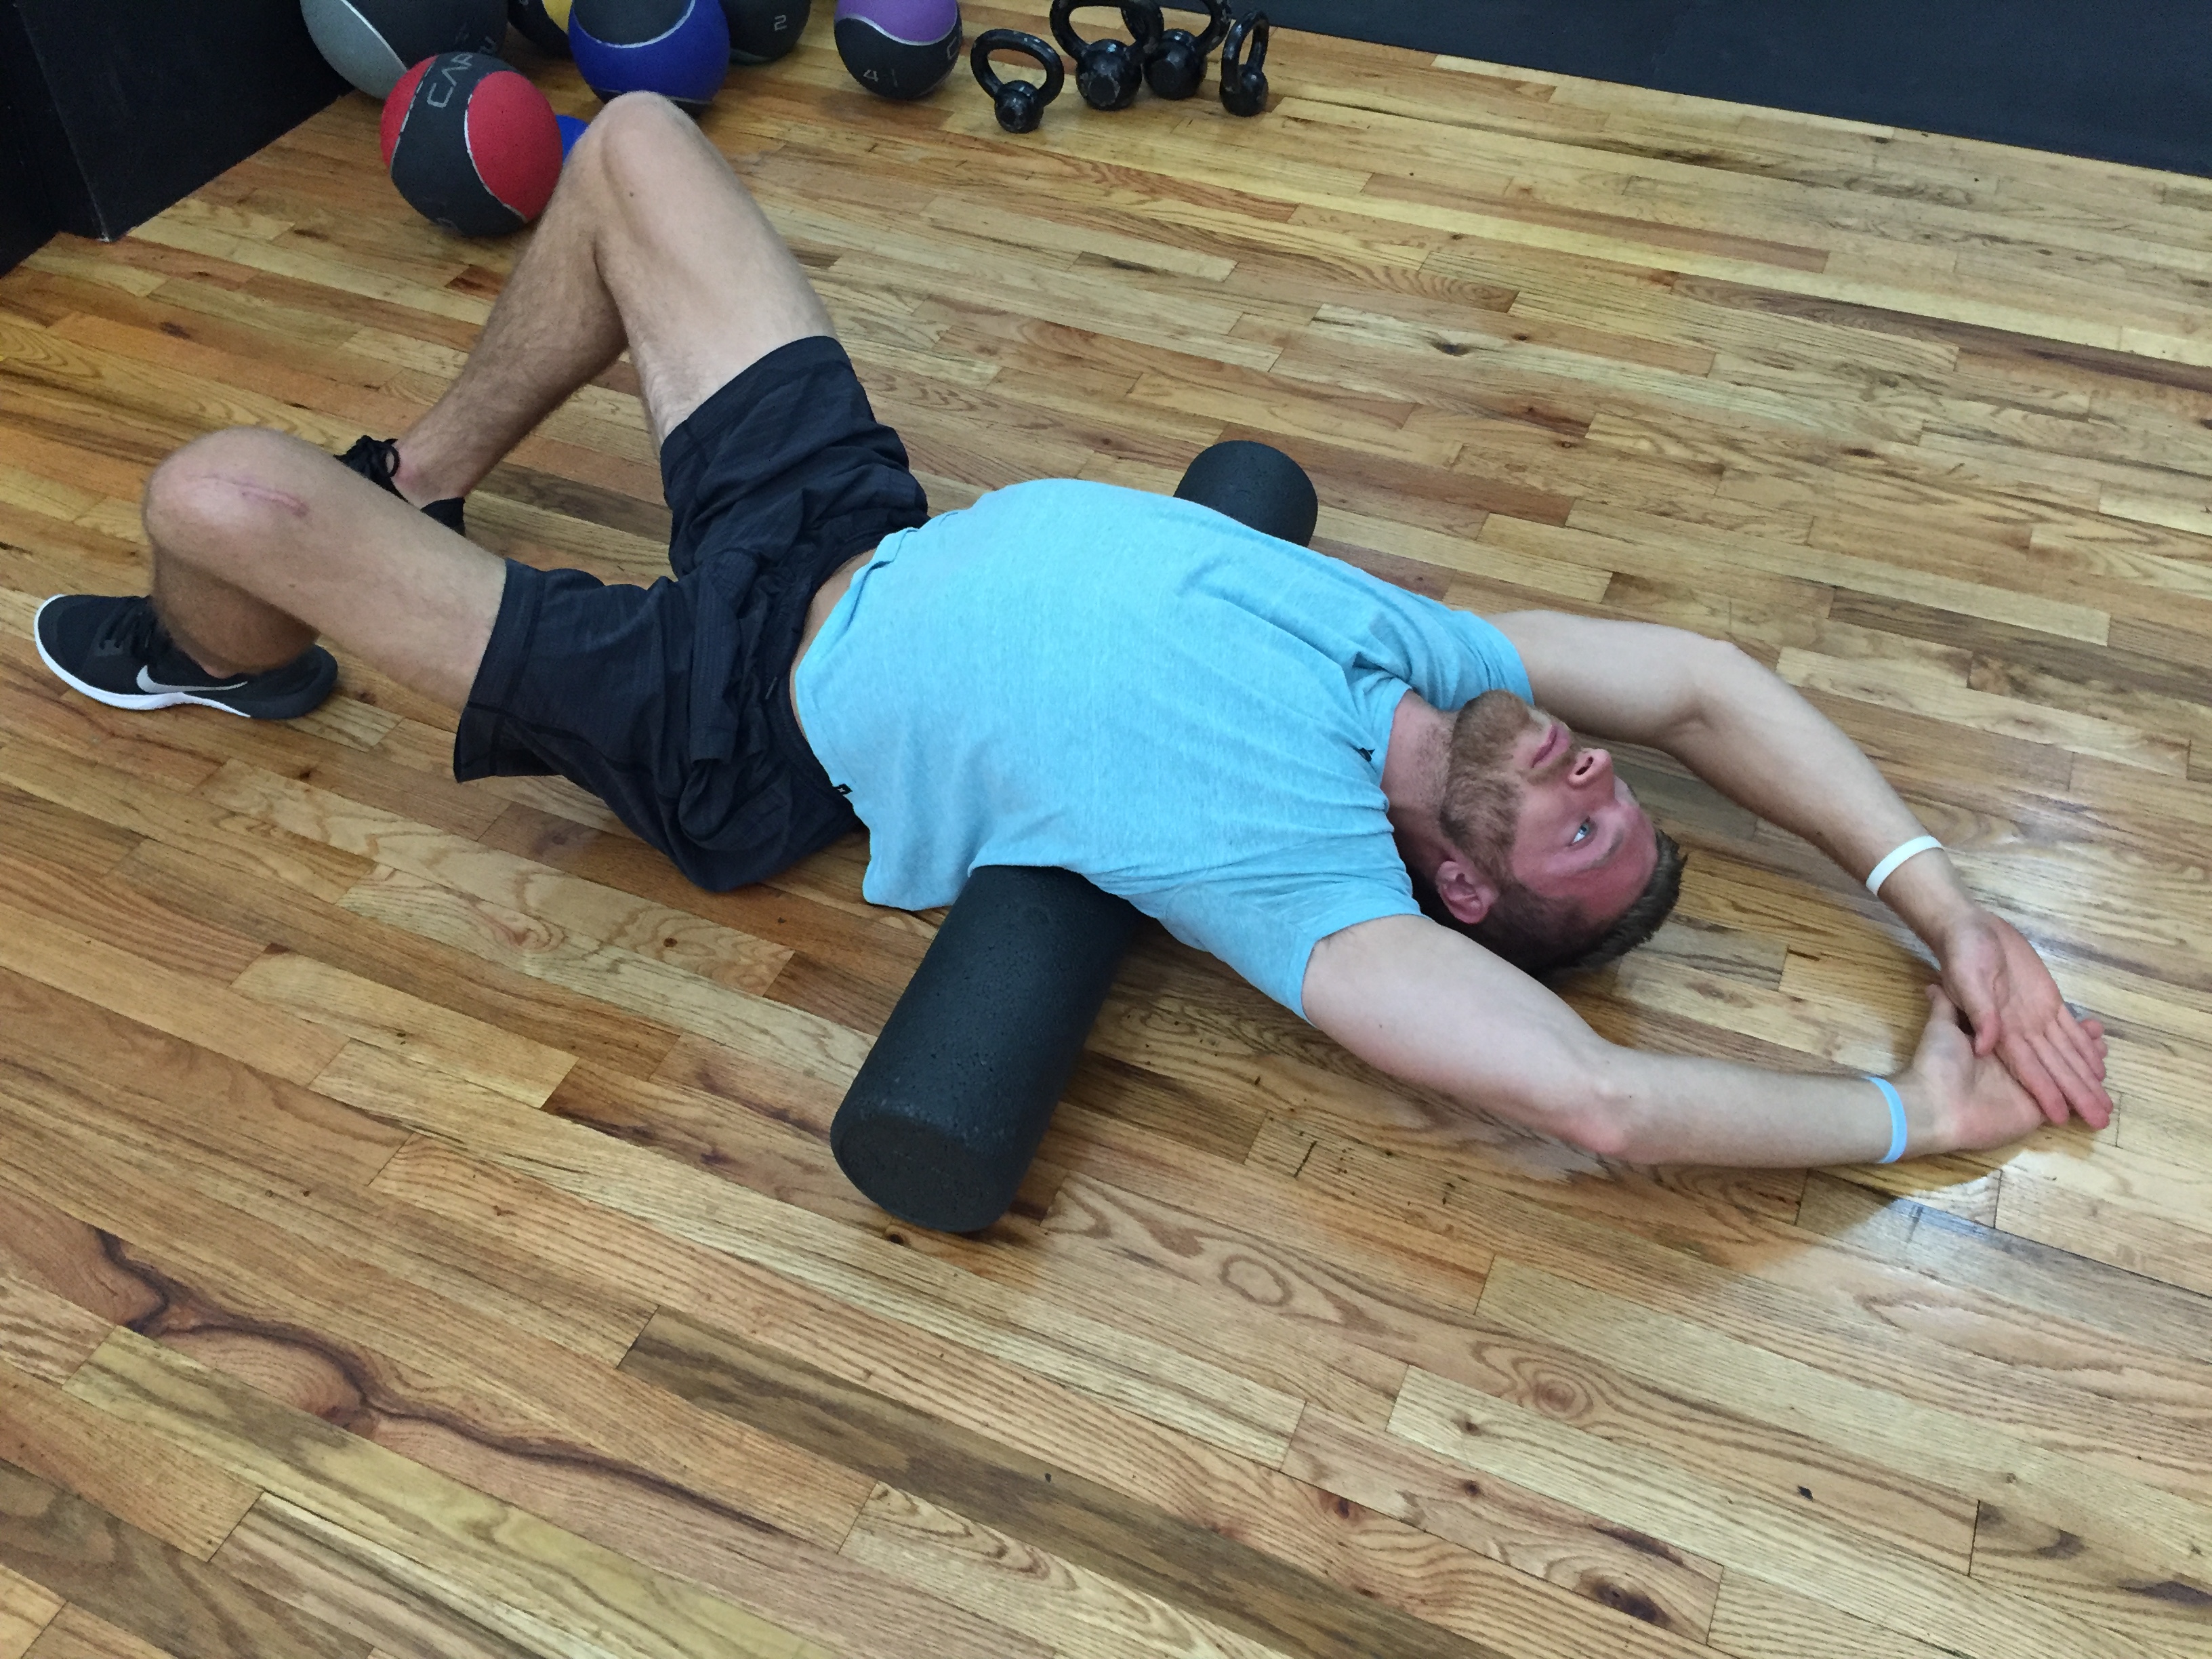
Place the roller just under the shoulder blades and extend hands in front of. The athlete takes one hand and puts it on top of the other, then brings them over their head to stretch the lats. Maintain a neutral head position and hold this for 10-30 seconds trying to open the chest.
6. Long Roller Thoracic Stretch

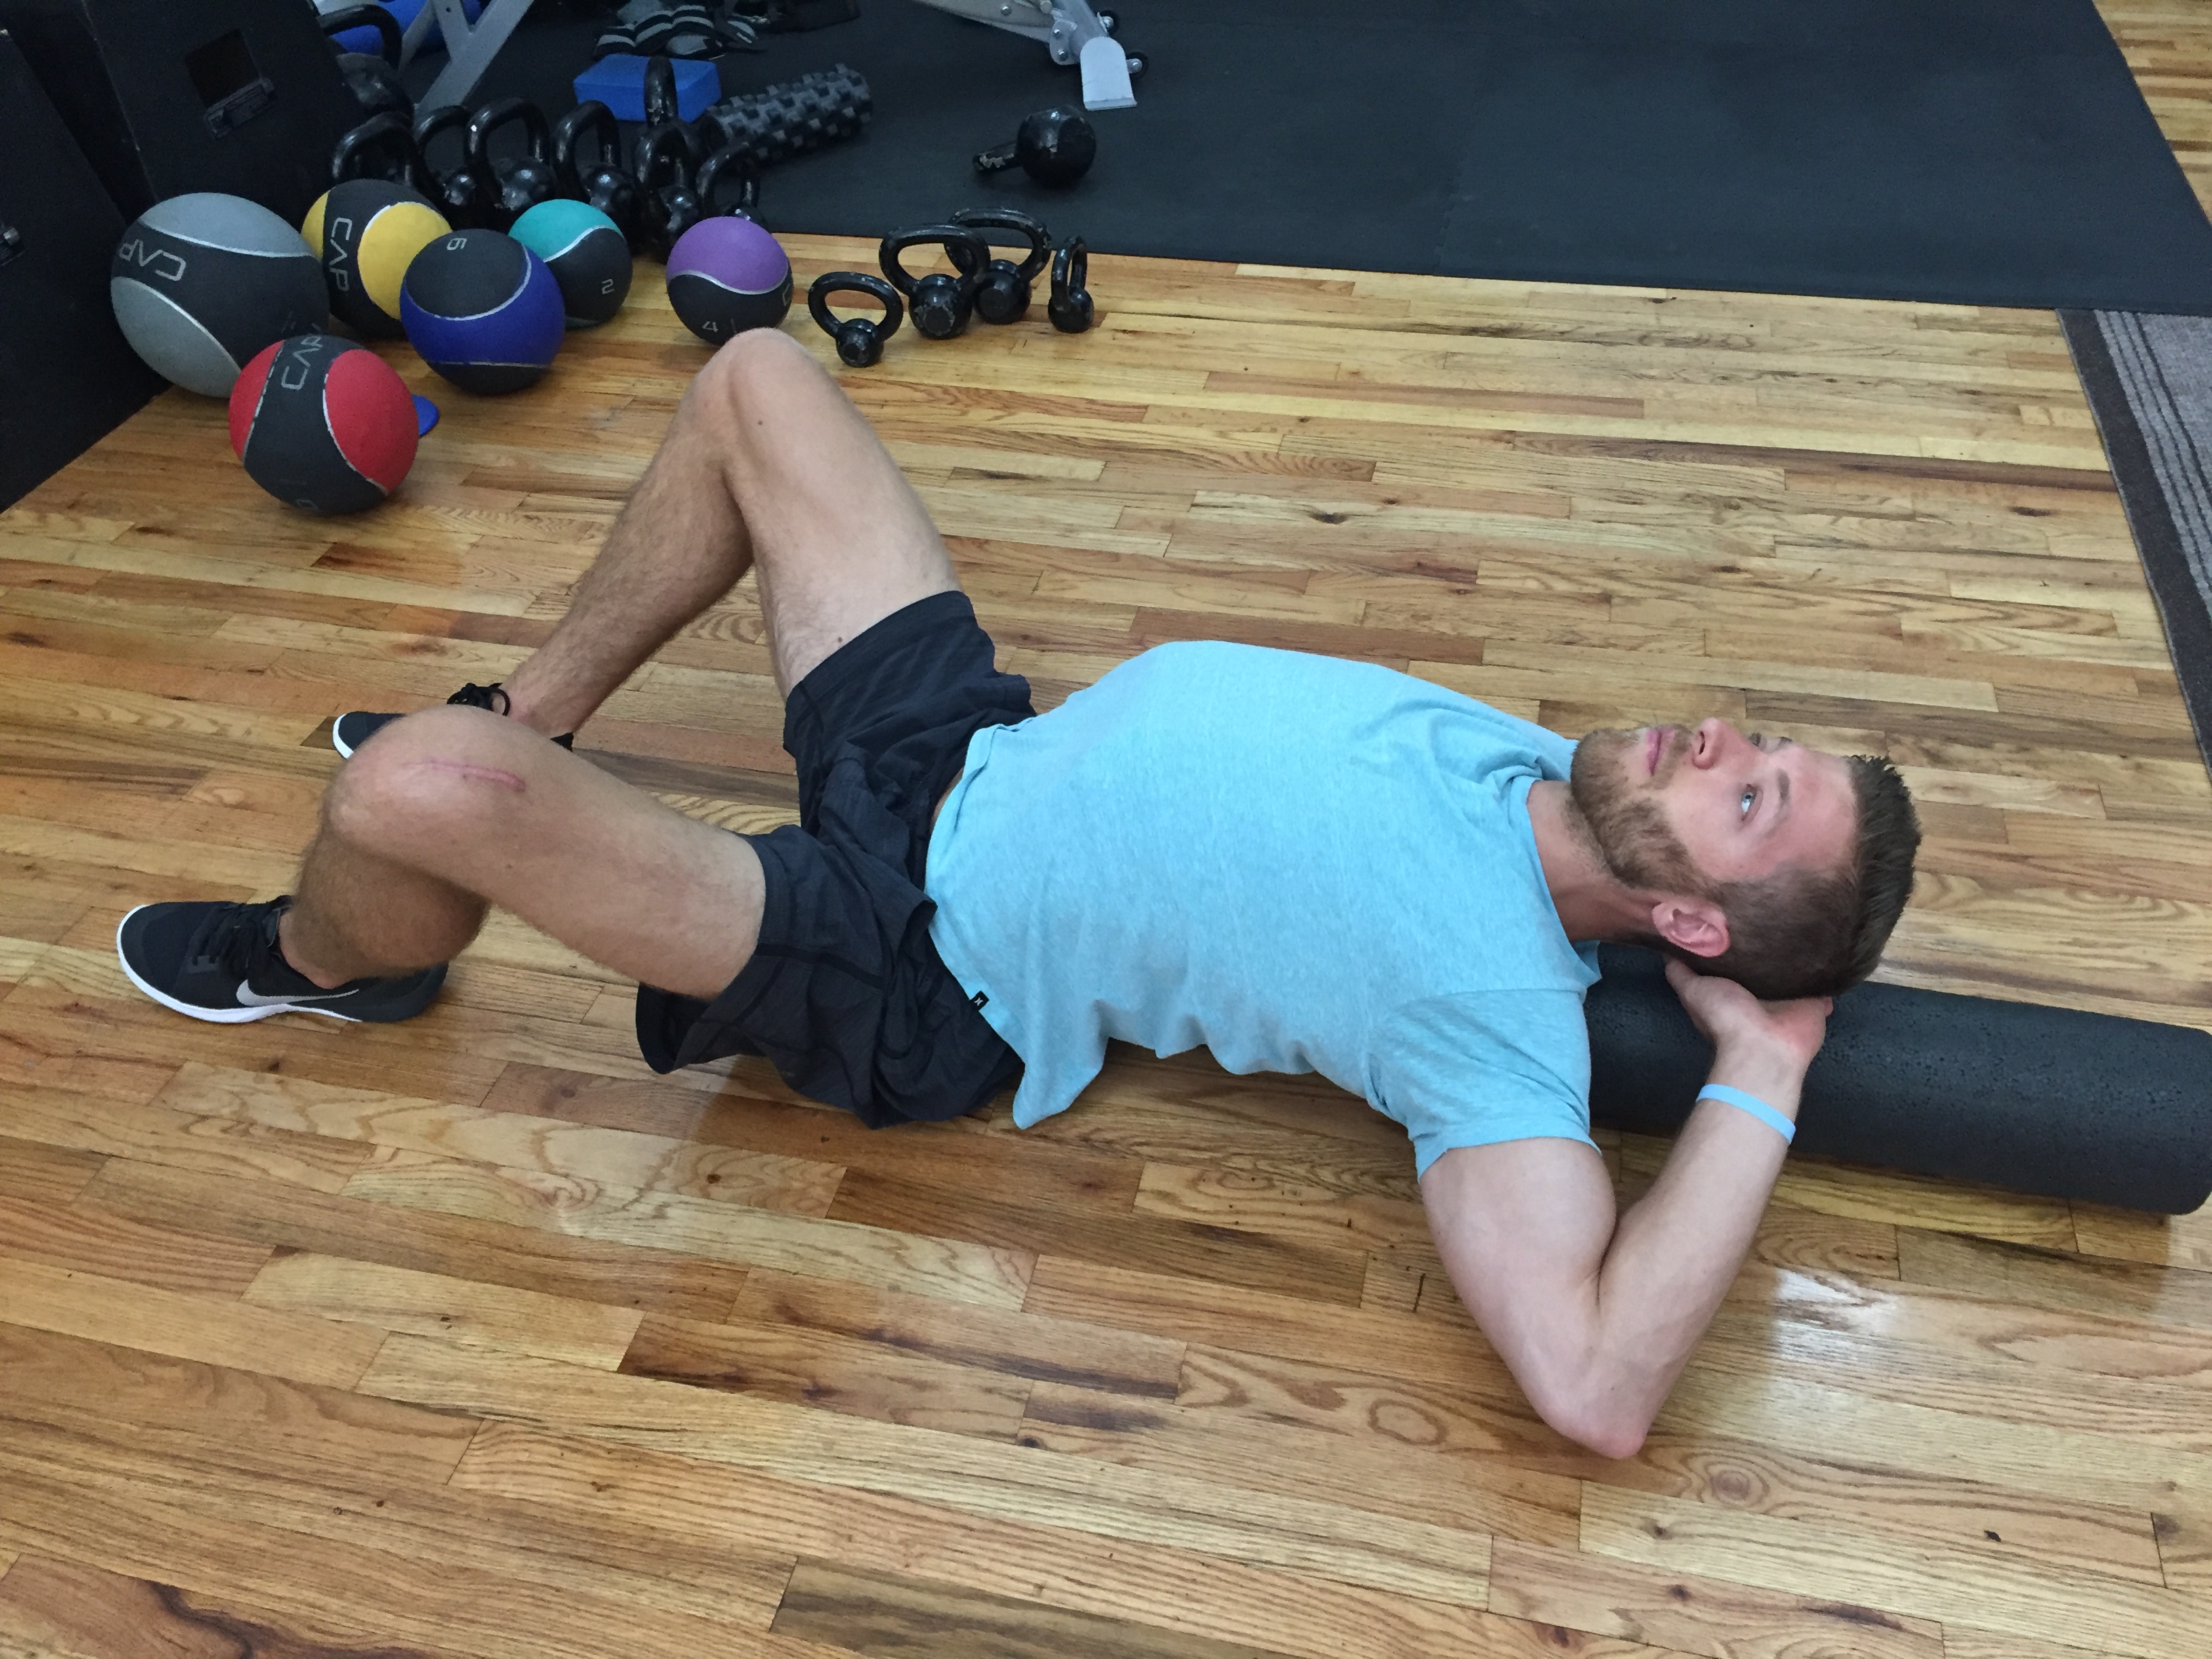
Placing the foam roller in its longest position and sitting to where the edge is positioned in contact with the tightest area on their back, the athlete extends over the roller with hands behind their head until the back is flat on the roller. Once there, the athlete brings their elbows to the ground and holds for 20-30 seconds.
In Conclusion
Foam rolling can be a great method for loosening up tight fascia, supporting mobility, and aiding recovery time post workout. An issue with complex areas of the body like the back is that athletes are sometimes unaware of flowing through movements that are interconnected. These six movements aim to work and flow from the anterior portion of the torso, to the upper back, and then finish with the lower back giving you an even full torso release.