Bodyweight squats are great — you barely need any room and they’re a simple, effective move for when it’s the middle of your workday and you just need to kick start your blood flow and energy levels. Whether you’re traveling, quarantined, or warming up for leg day, bodyweight squats are a great way to go. Variations on the bodyweight squat theme, though, can bring your leg day game to the next level.
When you’re training with the goal of bringing up the poundage of your favorite lift, integrating bodyweight work is a safe, effective way to work on your weak points and imbalances. By dipping into different positions and planes of motion, you’ll be able to target the parts of your barbell squat that need improvement. Your ego might tell you to fix your squat with weight on the bar — and sure, that’ll definitely be part of it. But making sure you get in the right kind of bodyweight work will give you a stronger foundation to build on, which is exactly what you want when you’re chasing your next 1RM.
Breathing Through Bodyweight Moves
It’s easy to dive into bodyweight squats — or any bodyweight work, really — without paying attention to your breath or to bracing your core. Sure, you don’t need to get super tight like you would with a 300-pound barbell on your back — but when you’re training specifically to get back to barbells, you still should try to simulate it those heavy conditions as much as possible. Throughout all these movements, challenge yourself to engage your entire body so that your core is braced and you’re breathing like you would for lifting, not for cardio. Take a good inhale at the top, use that power to fuel your brace, and take another quick breath before sinking into your next rep.
Especially if you haven’t actually been under a barbell for a while, you need to train your body to remember what it feels like to move efficiently. The first part of that is your breath. You tend to breathe more evenly when you’re doing bodyweight work, especially with exercise videos that are combining strength and cardio (they’re not bad things — it’s okay to admit you’ve been using them during quarantine). Note: not breathing easily, but breathing evenly. When you set a clock and bang out as many bodyweight squats as possible, for example, you’re breathing like you’re engaging in cardio (because you are, if you’re doing sustained work) — in and out, in and out. When you’re squatting with a barbell, though, you’ve got to breathe to brace — in, pause pause pause, explosive out, in-super-quickly, pause pause pause, explosive out… etc.
So if you’re doing a bunch of lunges and squat variations to keep your legs and heart in good shape, that’s awesome! Breathe the even cardio way — legit, that’s exactly how you should be training for that goal. But, if you’re training some days to make sure your squat stays strong under a barbell, you’ve got to breathe like you’re lifting. That might mean reps take longer, but if you simulate bracing (and the breathing patterns that come with it) through your bodyweight training, your mind will be much more psychologically prepped to deal with weight on your back (your body will be more ready, too).
As you’re moving through these squat variations, breathe to brace on the days that you’re training for strength. On the days or parts of your session dedicated to cardiovascular conditioning (and you should include these in your program), breathe as cardio-style through these movements as you want! Just because it’s bodyweight work doesn’t mean you shouldn’t have different training styles for different days — and no matter what moves you’re doing, all of it starts with your breathwork.
[Related: 15 No-Equipment Moves for Lower Body Hypertrophy]
The Moves
You can integrate any of these movements into your current program, depending on your needs. Are you only typically only moving in the sagittal plane (think regular squats)? Integrate some frontal plane (side to side) and transverse plane (rotational) exercises to prevent imbalances and injury. Do you want a quick and dirty bodyweight leg day? Pick half of these moves and roll through them with a 45-second rest between each. However you integrate these squat variations into your practice, be mindful about your form at all times.
1. Squat to Lateral Leg Raise
Start off with your regular bodyweight squat — whatever foot width you would use for your barbell squat, to keep greasing the groove of that pattern — then when you return to standing, grind down into your left foot. Root through your left leg and raise the right leg laterally out to the side, as far as your straight-legged range of motion allows. With control, bring your right foot back to squat position. Squat again, and when you return to standing, repeat the same lateral raise with your left leg. Squeeze your glutes and activate your core so that your torso stays upright throughout the move, as opposed to shifting to lean away from your lifted leg.
Training Recommendation: 4 x 12 reps per side, 30-second rest
Dumbbell optional!
2. Shuffling Sumo Squats
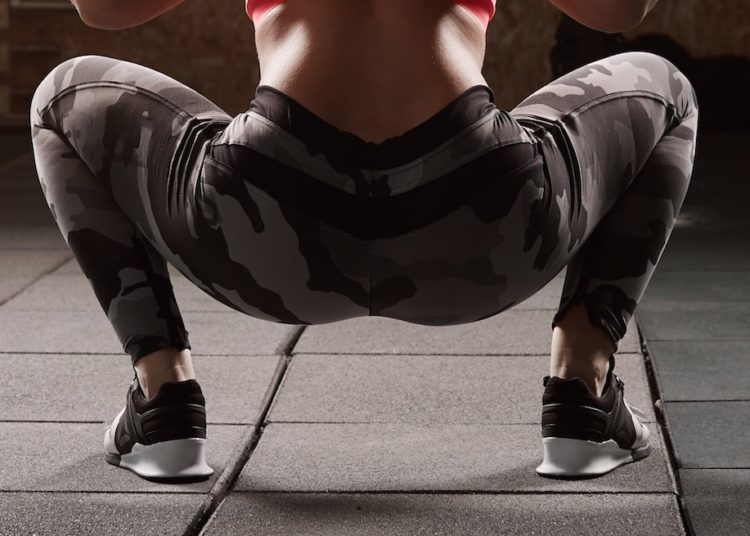
Set yourself up for a sumo squat (not quite as wide-stanced as you’d be for a sumo deadlift, but wider than your regular squat). It’s okay to play around with your foot position before you find whatever’s optimal for your body — just make sure your knees don’t splay laterally outside of your toes and that you can sit back fully into your squat. Complete one rep. When you come back to standing, shift your weight to your right foot. Step your left foot in line with your right. Step your right foot back out away from your left, to sumo stance again. Squat. This time, step your left foot out to sumo stance, and squat. Alternate back and forth. This lateral step in between your sumo squats will increase lateral stability and help your ankles stay more stable during all types of squats.
Training Recommendation: 4×12 reps per side, 30-second rest
3. Lateral Squat
These are similar to lateral lunges, except your feet are staying still. Step out into a long lateral lunge position, taking your time to find a position where your knees track over your toes (without spilling out over the side) but where you can still find a nice hip hinge to sit back into your squat. Hinge down to your left side, straightening your right leg as you sit as far back as you can. Press through your left leg and shift your hips toward your right side, straightening your left leg this time and sinking into a squat on your right side. The uneven distribution of your weight will not only help with your balance and mobility, but also with evening out any imbalances that will mess you up under the barbell.
Training Recommendation: 4×12 reps per side, 30-second rest
4. 3D-Lunges
Alright, so technically these guys aren’t squats, but they’re similar to lateral squats (with even more of a balance and core stability element) and will also get you moving in the transverse plane — so they’re a worthy inclusion. Start with a forward lunge, stepping into it with your left leg. Return to standing. Place your left leg out to your side, and sink into a lateral lunge. Return to standing. Then — here’s the transverse kicker — plant your left foot at a 45-degree angle behind you (assuming your lateral lunge was at 90, take it back a foot or two for this one). Sink into this transverse lunge, keeping your chest tall the entire time. Return to standing and repeat the sequence with your right leg.
Training Recommendation: 4×6 per side (one rep = 3 lunges, as described above), 45-second rest
[Related: 10 Lunge Variations to Build Leg Strength]
5. Squat Jack
Sink low into a squat, but not quite as low as ass-to-grass. Aim for more of a 90-degree/parallel angle, and find that sweet spot where it feels like a weak spot/sticking point. That spot might be a little higher or lower than parallel for you, depending on your training and body. Keeping this low squat position, try not to stand up as you jumping jack your feet out wide (like… you were doing a jumping jack), and then hop them back into a closer-stance squat position. Repeat. Keep your torso upright and make sure you’re breathing. If jumping isn’t what’s best for your body (or if you have a downstairs neighbor), feel free to quick-step into and out of position.
Training Recommendation: 4×20, 60-second rest
6. Four-Figure Squat (one knee crossed)
You know how you sit with your ankle crossed over your knee sometimes? Well, usually you’re on a chair — this time, you won’t be. (Please have a chair or something else sturdy available if you’re not used to this move, though — it’ll develop your single-leg strength and stabilizers quite nicely, but it’ll also challenge your balance.) Stand tall, then bring your right foot up so that your right ankle is crossing over your left knee (around your lower thigh). With your arms out in front of you for balance (or holding on gently to something), sink down into this four-figure squat. Unless you’re holding something very stable, don’t feel the need to break parallel — as you continue to practice this move, you’ll get stronger and more stable, and will be able to sink deeper. This serves the dual purpose of opening up your hips, by the way, which is going to help a lot when you get a loaded barbell on your back. Make sure to keep your reps even on both sides.
Training Recommendation: 3×6-8 per side, 45-second rest
7. Jump Squat
Ah, the jump squat. The trick here is landing softly — the trick, really, with any healthy plyo move is landing softly. Sink right back down into your squat after you use the momentum of your first to blast off the ground, contracting your glutes and then your calves as you’re transitioning into the jump. Try to keep the movement as fluid as possible while keeping your torso upright and your face relaxed. If you live above neighbors or your joints aren’t happy with you jumping around, try descending into a squat very…. very…. Slowly. Try a long count of six as you sink down into your squat — when you reach depth, contract your quads hard, blasting yourself back to standing, squeezing your glutes and calves for good measure at the top. You don’t leave the ground, but you’ll simulate the effect in your muscles.
Training Recommendation: 4×20, 60-second rest
[Related: When Should Weightlifters Use Jump Squats?]
8. Pulse Squat
Finally — you’re receiving permission to do a half squat. Sort of. Sink into your regular squat depth, then rise halfway to standing. Then… sink back down. Rise halfway to standing… and sink back down. Without giving your muscles the break that is standing upright, these pulse squats will get your heart rate and muscles going all at once. Just make sure you stay as tight as you would with a barbell on your back.
Training Recommendation: 4×15, 45-second rest
9. Toe Hold Squat
With your feet a little narrower than they normally would be, sink to your usual squat depth. If that’s not too deep yet, when I say ‘wrap your fingers around your toes,’ you’ll wrap your hands around the backs of your calves. So, at the bottom of your squat, wrap your fingers around your toes. Find a position where your fingers and toes are almost interlinked, so it doesn’t feel like you’re stepping on yourself. Once you’ve got that, send your hips up and back behind you with a neutral back, almost like you’re rising into a deadlift. You’ll feel a nice stretch in your hamstrings. Only raise your hips as high as feels comfortable, then sink back down into your full squat. Rinse, breathe, and repeat.
Training Recommendation: 4×12, 30-second rest

10. Pistol Squats
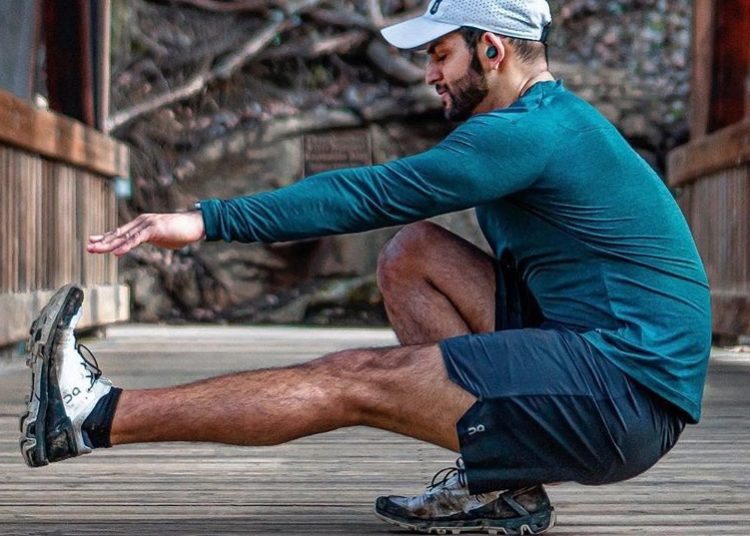
Can’t do a pistol squat yet? No problem. Tie a knot in a bedsheet and secure the knot above a closed door (tug to make sure it’s stable). Or, find another super stable surface for you to hang on to. Alternatively, place a chair behind you and use that for assistance. However you need to set up your pistol squat, you know the drill — place one foot out in front of you and use the other to sink into your single-legged pistol squat. If you’re using a chair, feel free to rest and re-brace your body for a moment before bursting back up. Make sure to keep the number of reps even on both sides.
Training Recommendation: 4 sets to failure (per side), rest as needed between sets
[Related: 7 Progressions for Nailing the Pistol Squat]
11. Overhead Squats
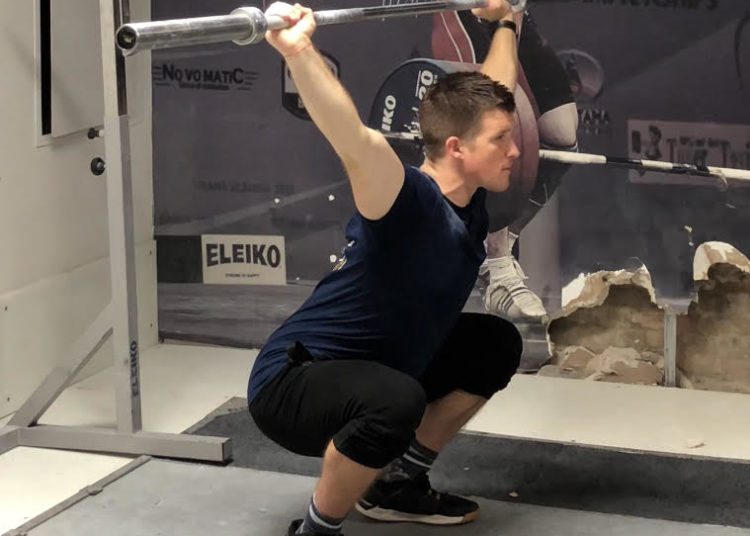
You don’t need a barbell to get in some great overhead squat work. A stable broomstick or PVC pipe will do, or that (sanded down) length of wood you’ve got lying around, unused from a previous project. Or, you can imagine you’re holding a barbell above your head, reaching your arms out with straight elbows in a “Y” position. Keeping your torso upright, really engage your lats to hold your imaginary barbell (or broom) in place above your head and very slightly behind you. Sink into a full squat and stand it back up. This will challenge your entire body, so make sure your shoulders are extra warmed up before diving in.
Training Recommendation: 4×8, 45-second rest
12. Overhead Pause Squats
You’re going to set up the same way as you do for overhead squats, except this time, you’re going to sink down to your point of tension — that might be where your quads feel most fired up, or it might be where your traps want to give and let your chest cave forward (don’t let that happen). Wherever that sticking point is for you, fight to stay there (keep breathing) for as long as you can.
Training Recommendation: 4 sets to failure, 60-second rest
13. Feet-Together Squats
If you’ve got tight ankles, you’re really going to have to put in some time to this one — but it’ll be well worth it. The ankle flexibility and core stability that these squats will produce can translate really well into your barbell squats, letting you get deeper without tilting forward on the come up. Start in a standing position with your feet as close together as you feel comfortable attempting. Keeping your torso upright (your arms can be out in front of you as a counter-balance), squat down as low as you can without letting your heels peel off the ground. Stop wherever that point is for you, even if it’s not very deep. It’ll get deeper with time and practice.
Training Recommendation: 3×10, 30-second rest

14. Barbell Squat — Without A Barbell
Here’s where we circle back to the importance of breathwork. Sometimes, there’s just nothing like simulating an actual lift with your entire body. So: no squat rack? No problem. You’re going to play pretend for a while. Set your body (and mind) up like you’re about to step into the squat rack. Go through whatever rituals you do for approaching the bar. Find your grip (in the air) and duck under the bar like you would if it were… actually there. Brace and stand to unrack. Take your steps back as carefully as you would if you were holding a bar. And remember — you’re pinning the bar into place by activating the hell out of your lats the whole time. Take your brace-breath, sink into a squat — keeping that same tension the entire time — and go through your set. When you’re finished, don’t let the imaginary bar collapse. Step forward to unrack it and duck back out from under it. It seems silly, but it’ll keep your body in a tighter headspace. The tighter you keep your body, the less force leakage you’ll have. And while that may not seem like a big deal when it’s just you and your bodyweight, it’s a huge deal when you’re training with the bar — so it’s definitely valuable to bring that discipline home with you.
Training Recommendation: 4×8, 30-second rest
Not Just Squats
Add more variety to your bodyweight training and more versatility to your movement repertoire — it’ll help keep you safe from injuries and bolster your lifting prowess that much more. Whether it’s visualized barbell squats or overhead pauses, you’re well on your way to greater squat strength.
Featured image via Veles Studio/Shutterstock
