Split, power, and squat jerks all are effective ways to hoist heavy loads overhead. Many lifters, however, find themselves struggling to properly move heavy loads from the front rack to the lockout position overhead.
To best address a lagging jerk, we must first determine what the potential limiting factors are contributing to sub-optimal jerk performance. From there, we can take a dedicated approach to addressing mobility, technique, timing, speed, and strength required for the jerk.
In this article we will discuss:
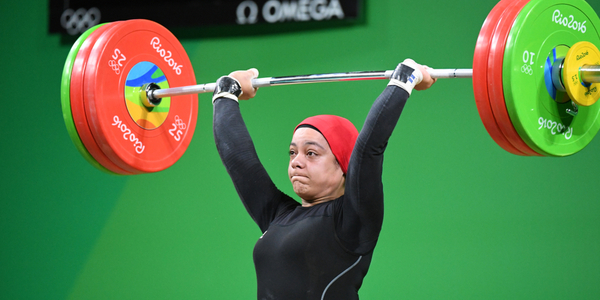
6 Reasons Why Your Jerk May Be Lagging
Below are 6 reasons why your jerk may be lagging. Note, that they below six reasons are not an all-inclusive listing as to why you jerk may be lagging, however the are covering the large majority of culprits. For best results, analyze your jerk and then choose the solution that best addresses your limiting factor(s).
1. Limited Shoulder and Thoracic Mobility
Before addressing stability and strength limitations, it is important to rule out limitations in shoulder and thoracic mobility and/or facility. If a lifter cannot achieve a proper overhead position without load, the coach/athlete should not load this movement. Failure to address shoulder and thoracic mobility concerns in the beginner phases often leads to compensation patterning and setting an athlete up for serious injury down the road.
2. Incorrect Bar Placement
A common issue with the jerk is that many lifters are not driving the barbell into the correct overhead position, leaving it usually out front of the body rather than in a supported position over the midline of the hips. From the side angle, the barbell should be directly inline vertically with the wrists, elbows, shoulders, and heels. If a lifter is in the split, this is usually over the center of the base of support. Another way to look at this is that the barbell should be slightly behind the head, often over the back of the neck/traps.
3. Incorrect Dip and Drive Sequence
Timing in the jerk is key, as the lifter must flex the knees, hips, and ankles in unison, dipping downwards in a vertical manner roughly 3-6 inches. At the bottom of the dip, some lifters will lose control often resulting in their chest falling forwards, allowing their heels to lift up, and elbows to drop. Additionally, lack of reversal strength and elasticity to rebound and drive upwards with speed and aggression can impede bar height in the jerk and timing underneath into the receiving position.
4. Poor Set Up and Positional Strength
Lack of rigidity in the jerk is often one of the easiest things to fix with lifters who have a poor jerk. Often, lifters will slouch under the loads, allowing the upper back ro relax, hips to come forward, and elbows to cave inwards. Instead, think about standing tall with your back against the wall, with the legs and glutes flexed, chest high, and the barbell sitting as high as it can on the shoulders. The elbows do not necessarily need to be parallel to the floor. Placing them to upwards can actually result in loss of tension in the shoulders in the jerk. Instead, drop them slightly downwards if you can, still maintaining a good rack position.
5. Lack of Leg Drive
Most lifters rely too little on their lower body and torso in the jerk, which can result in slow movements, weak extension, and press outs. Lifters need to aggressively drive the jerk off their body, starting with the legs and finishing through the arms.
6. Weak Overhead Stability
Poor overhead stability and strength can impact a lifter’s ability to maintain proper positioning with the load overhead. Additionally, lack of strength can translate into lack of confidence in being able to withstand heavier loads overhead. If an athlete is not confident in their abilities overhead, they will often (though self-preservation) not allow themselves to aggressively attack and be fast driving themselves under the bar.
5 Exercises to Help Improve a Lagging Jerk
The below movements can be used to address jerk timing, bar placement, aggression, and overhead stability in the jerk.
1. Behind the Neck Jerks
The behind the neck jerk is a great jerk variation for beginners and high level lifters alike. For beginners, this simplifies the jerk and allows them to focus on using the legs to drive the bar upwards while also minimizing the need to place the barbell up and back (as if it was from the front rack position).
For more advanced lifters, the behind the neck jerk is a great variation to overload the jerk movement (often lifters can performing behind the neck jerks with more weight than they can from the front).
This also helps reinforce proper vertical dip and drive sequencing for all lifters.
How-To-Guide: Behind the Neck Jerks
- Step 1: Place a loaded barbell on the upper back, in the same spot you would perform a high bar back squat. The hands should be at your clean and jerk grip width, with the feet in the same stance you would take when performing a jerk.
- Step 2: Dip downwards, keeping the foot flat and chest upwards, in the same manner you would perform a jerk.
- Step 3: Drive the ball off the upper back aggressively as you rebound out of the bottom of the dip phase, and move yourself into the jerk receiving position (split, power, push, quat).
2. Block Jerks
The rack jerk is any style of jerk performed from support blocks. The difference between performing block jerks vs rack jerks is that the lifter can simply drop the jerk from the overhead position onto the support racks, instead of having to control the load down and absorb the stress onto the body.
While the rack jerk can and does serve a purpose, it can be highly stressful and challenging for more advanced lifters. For safety purposes, as well as preserving energy, the block jerk can be done to help lifters train more frequently with heavier loads in the jerk.
If you are a lifter who has relatively sound jerk technique, yet struggle hitting heavy jerks, block jerks should be something you insert into you training (rather than rack jerks). Not needing to lower the load can limit stress on the body, help you commit to heavier lifts (since if you miss it, you simply drop on blocks and try again), and can help improve your training volume while minimizing unnecessary stress on the body.
How-To-Guide: Rack Jerks
- Step 1: Set support blocks or platforms at a height that allows you to descend into the bottom of your jerk without hitting the blocks. This should be at about chest or torso height.
- Step 2: Perform any style jerk from the blocks, dropping the load after you finish the lift rather than lowering back to the front rack. If you are performing multiple reps per set, drop every repetition of the blocks and reset quickly between reps.
- Step 3: If you miss a rep, simply drop on the platform and try again.
3. Jerk Recoveries
The jerk recovery can be done from high blocks or within a power rack rack. This exercise can be helpful to overload the upper body and core. Additionally, many lifers will need to perform this exercise to improve footwork recovery in heavy jerks and understand how to maintain rigidity and positioning as they step out of the split.
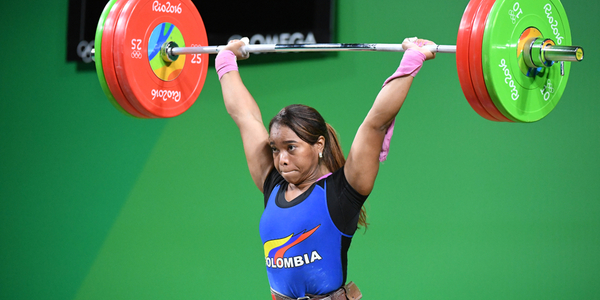
How-To-Guide: Jerk Recoveries
- Step 1: Set pins or blocks to a height that when the barbell is supported on them the bar is roughly 2-3 inches above your head.
- Step 2: While standing underneath the babell, grab the barbell with your jerk grip and drop yourself aggressively into the split, power, or squat jerk receiving position.
- Step 3: Apply pressure into the barbell by locking the arms, upper back, and core, and stand up in the exact manner you would recover from a split jerk, squat jerk, or power, jerk.
- Step 4: Lower the load back onto the supports or blocks and repeat.
4. Pause Jerks (in the dip)
The pause jerk can be used to help lifers establish greater control in the deep phase of the movement, while also improving the rate of force development and usage of the legs in the drive phase.
How-To-Guide: Pause Jerks
- Step 1:Perform a jerk as usual, however, at the bottom of the dip in the jerk, which should be roughly 4-6 inches downwards, pause for 3 seconds.
- Step 2: While paused, be sure to fix your position if needed, making sure your feet are flat, pressure is in the heel and midfoot, back is vertical, glutes are active, and chest is up. As discussed above, the elbows do not need to be parallel to the floor as long as the chest is up and the barbell is not sliding forwards off the shoulders.
- Step 3: When ready, aggressively use the legs and then the shoulders to jump the barbell off your body, finishing into the jerk stance of choice (split, power, squat). It is important the after pausing in the bottom of the dip, you do not dip further to gain momentum for step 3.
5. Push Press (in front or behind the neck)
The push press is more than just an upper body strengthening exercise. While it can be a great exercise for lifters who lack upper body strength and mass it can also be used to develop power and timing for the jerk. Note, performing these from the behind the neck position can also help increase upper back strength and reinforce proper bar placement.
How-To-Guide: Push Presses
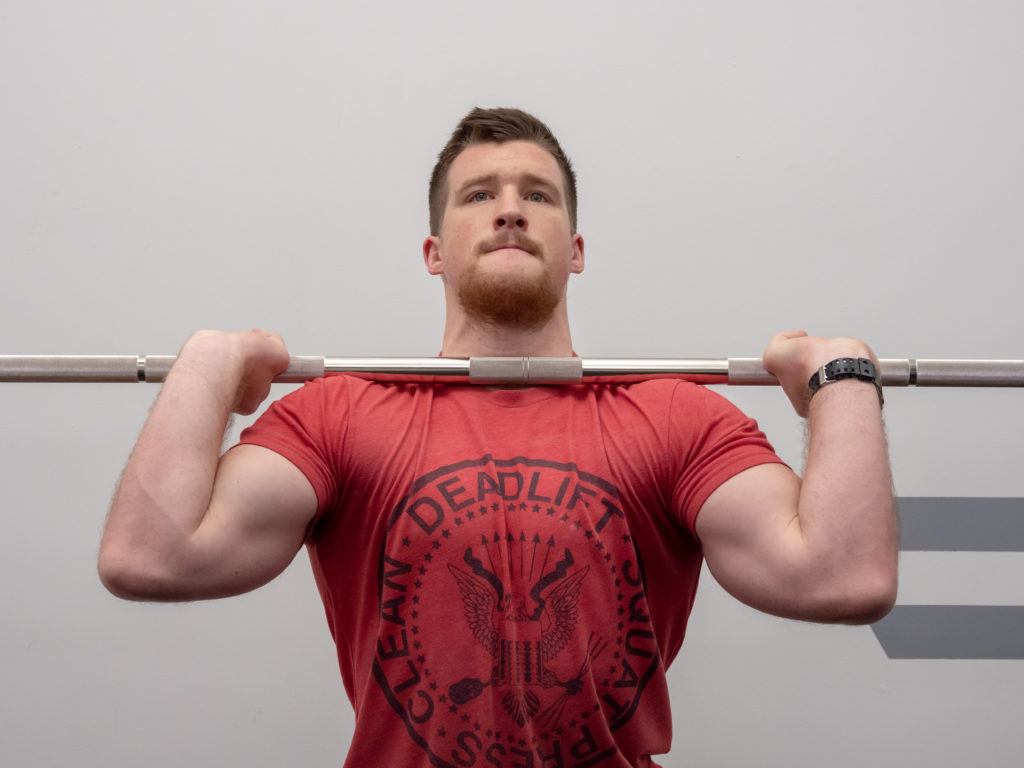
1.
Assume an Upright Front Rack Position
Start by assuming the same front rack positioning you would take in a jerk or front squat.
To do this, grab the barbell with a full grip (not fingertips) slightly wider than shoulder width. Squeeze the barbell and press the barbell close to your body as it sits on top of the shoulders. The chest, chin, and elbows should remain pressed upwards in front of the barbell to combat forward movement (rolling) of the barbell.
Coach’s Tip: Think about pushing you chest up through the bar to keep the weight of the barbell from collapsing your upright position.
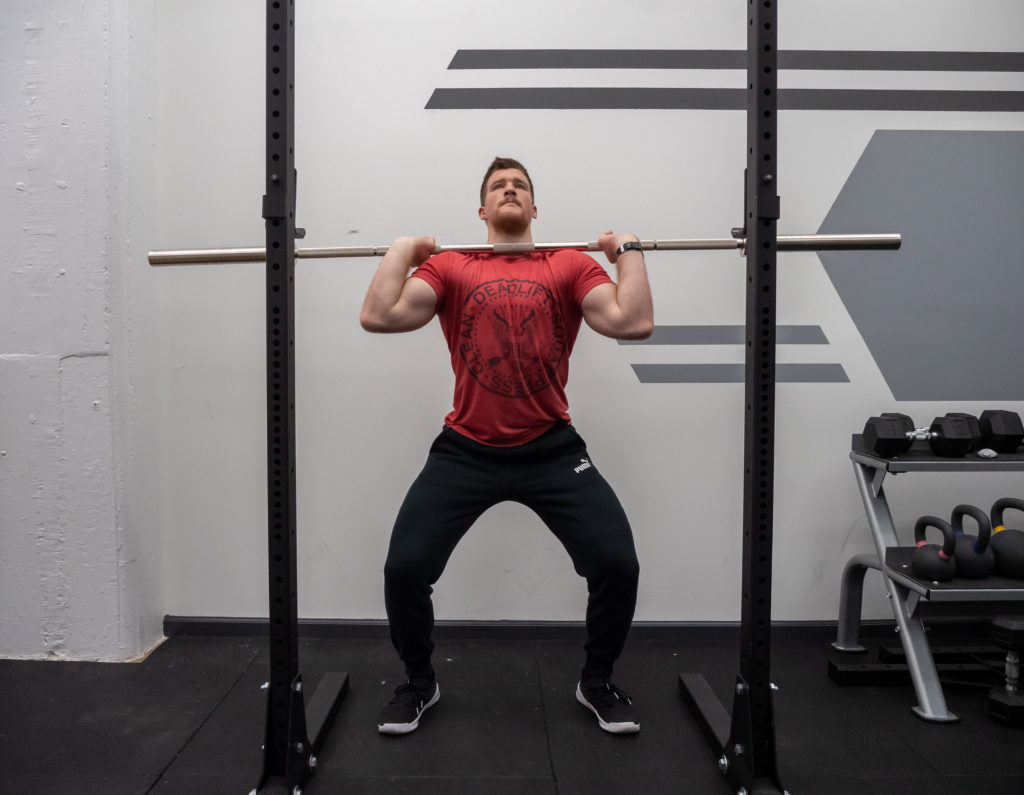
2.
Smooth Dip
The dip phase of the push press is identical to that of the split, power, and push jerk. The lifter must assume a perfectly upright torso position (think about keeping the body up against a wall as you dip) as dip downwards 4-6 inches. The dip should be balanced throughout the foot with the knees and hips bending together, so that the glutes stay directly above the heels.
The dip does not need to be extremely fast, however it should be smooth and fluid to allow the lifter to remain in control of the positioning during the deep and seamlessly change directions into the drive phase.
Coach’s Tip: You must remain in this locked and upright position throughout the dip – loading of the legs) phase. Any forward or backwards collapsing will negatively impact steps 3-4.
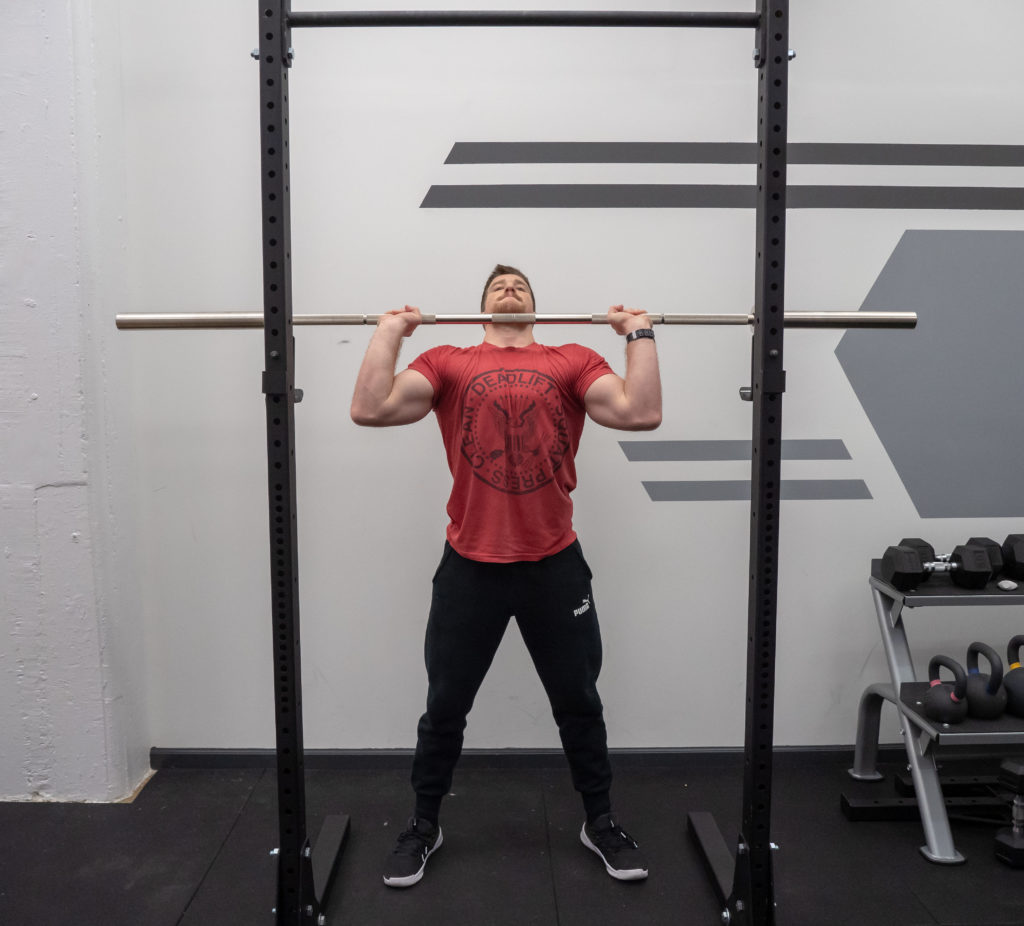
3.
Aggressive Drive
Once you have completed the dip, you should aggressively change directions by pushing you torso and chest upwards through the barbell and using the legs forcefully drive yourself upwards. The arms and elbows should stay locked in the original set up position until the barbell as been pushed off the shoulders (by using the power and strength of the legs and hips).
As you stand up, think about pushing the chest and shoulders up through the barbell.
Coach’s Tip: The key to the drive up phase is to master the tempo and depth of the dip. The better you can assume an upright and stable position in the dip while adding on some downwards acceleration in the dip will allow you to use the stretch reflexes of the muscles and joints of the lower body to further enhance push press performance.
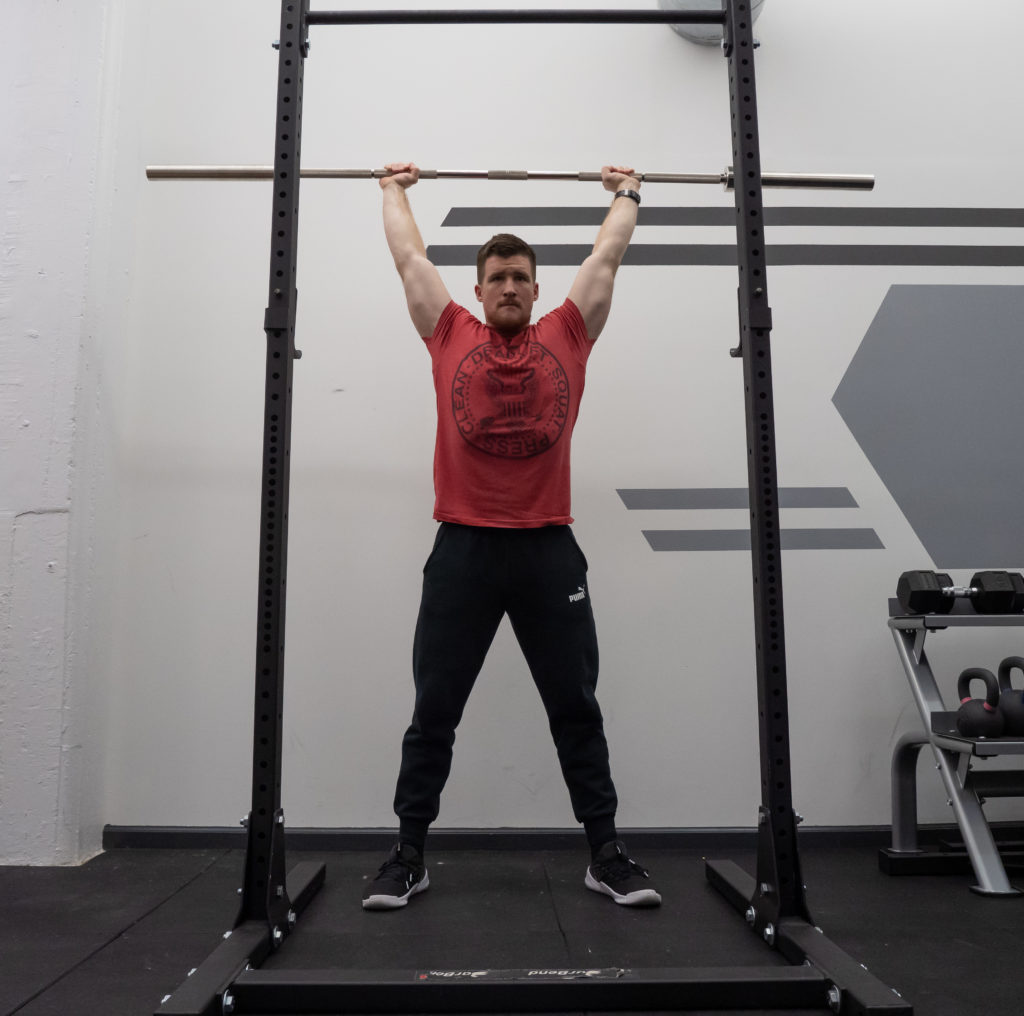
4.
Strong Lockout Position
Assuming you have stayed upright in steps 2 ad 3, this final press out phases should begin with the barbell just about face level. You need to push through the barbell with all of your upper body strength (without bending the knee) to assume a locked out overhead position.
Once overhead, the barbell should be placed slightly behind the head, over the back of the neck. This will allow you to use the bigger muscles of the bar (traps and upper back) to help support the load.
Coach’s Tip: To ensure the completion of the final lockout phase, all three previous steps must occur in sync. If you are having issues with the final lockout position, be sure to review steps 1-3 and/or address more triceps specific exercises (close grip bench, dips, etc).
Build a Better Jerk
Here are some exercises and workout ideas to build serious shoulder strength, mass, and overheads performance.
- Is Your Split Jerk Holding You Back? Try These 4 Drills!
- 5 Common Mistakes in the Clean and Jerk – and How To Fix Them!
Feature image from By A.RICARDO / Shutterstock.