
Kinesiology tape has grown in popularity in strength sports over the last decade. Many athletes utilize this unique tape to promote recovery, create additional stability, and enhance performance. When it comes to taping for stability, it’s a common misconception that tape alone will create full joint stability. In reality, tape enhances our body’s proprioceptors along the skin to produce a feeling of stability.
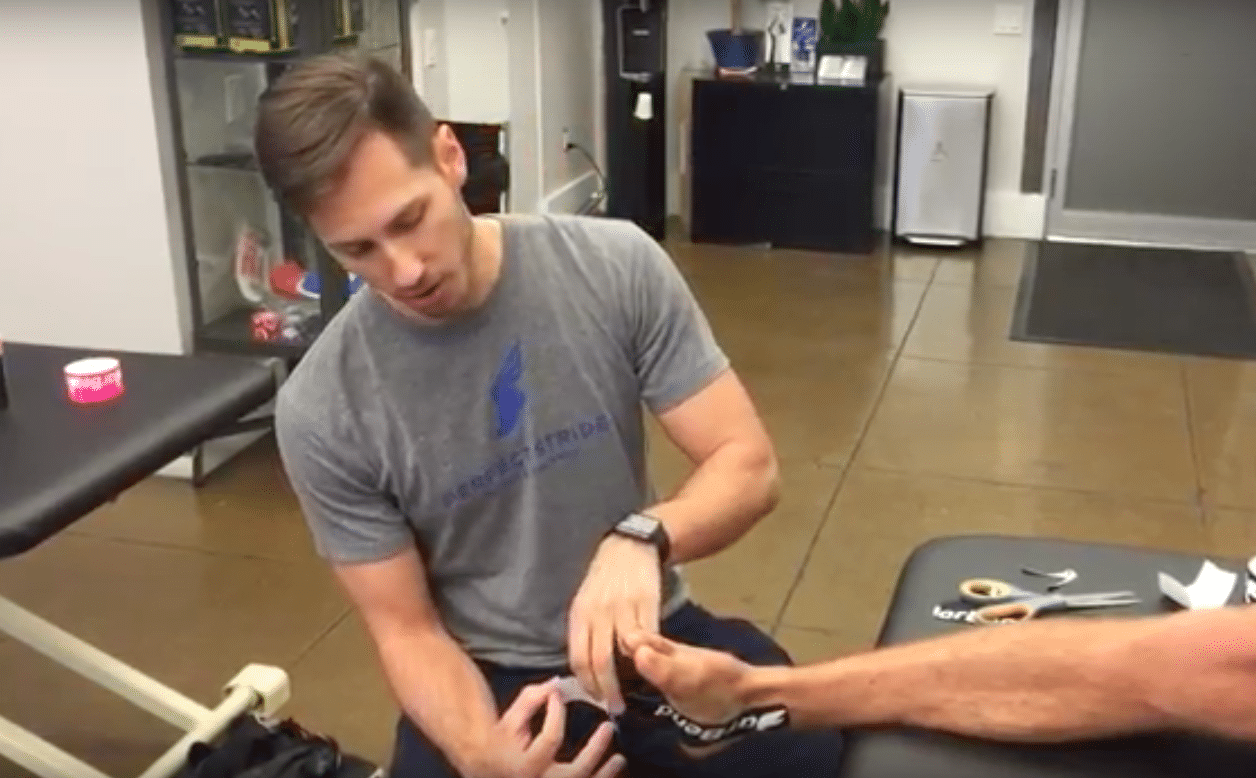
Self taping can be a tough task, so we caught up with Joe Gambino, PT, DPT, and CSCS at Perfect Stride, New York City to learn more about taping the ankle . Check out the video below where Gambino teaches us how to tape, while also providing scientific reasons behind tape’s usefulness.
Note: All motions shown are for informational purposes only. The information in this article and video is not meant to prevent or cure any disease or injury. It’s always a good idea to consult with a medical professional or trainer before attempting any new training methodology. If you experience any sharp pain while exercising, discontinue movements immediately.
[Looking for the perfect tape to fit your strength sport needs? Check out our Best Kinesiology Tapes of 2017 to find your perfect match!]
Why Tape the Ankle?
Athletes who lack the initial feeling of ankle stability, whether it be in a strength, cardio, or power based movements, may benefit from taping the ankle. The taping method utilized by Gambino covered a few key parts on the body that make up the ankle, which include:
- Achilles Tendon
- Medial/Lateral Malleolus (bony structure on inside/outside of your ankle)
- Calcaneus (heel bone)
- Talus (the bone that sits on top of heel bone)
- Anterior Talofibular Tendon (the tendon you feel on the top of ankle when you flex your foot toward the sky)
Gambino recommended that for ankle tape to be truly useful, an athlete should pay attention to a few key taping methods. Some of these include the angle in which you turn your foot, and the level of stretch you apply for tightness. Below is an easy-to-follow guide Gambino showed us for taping the ankle.
2 Simple Steps to Tape the Ankle
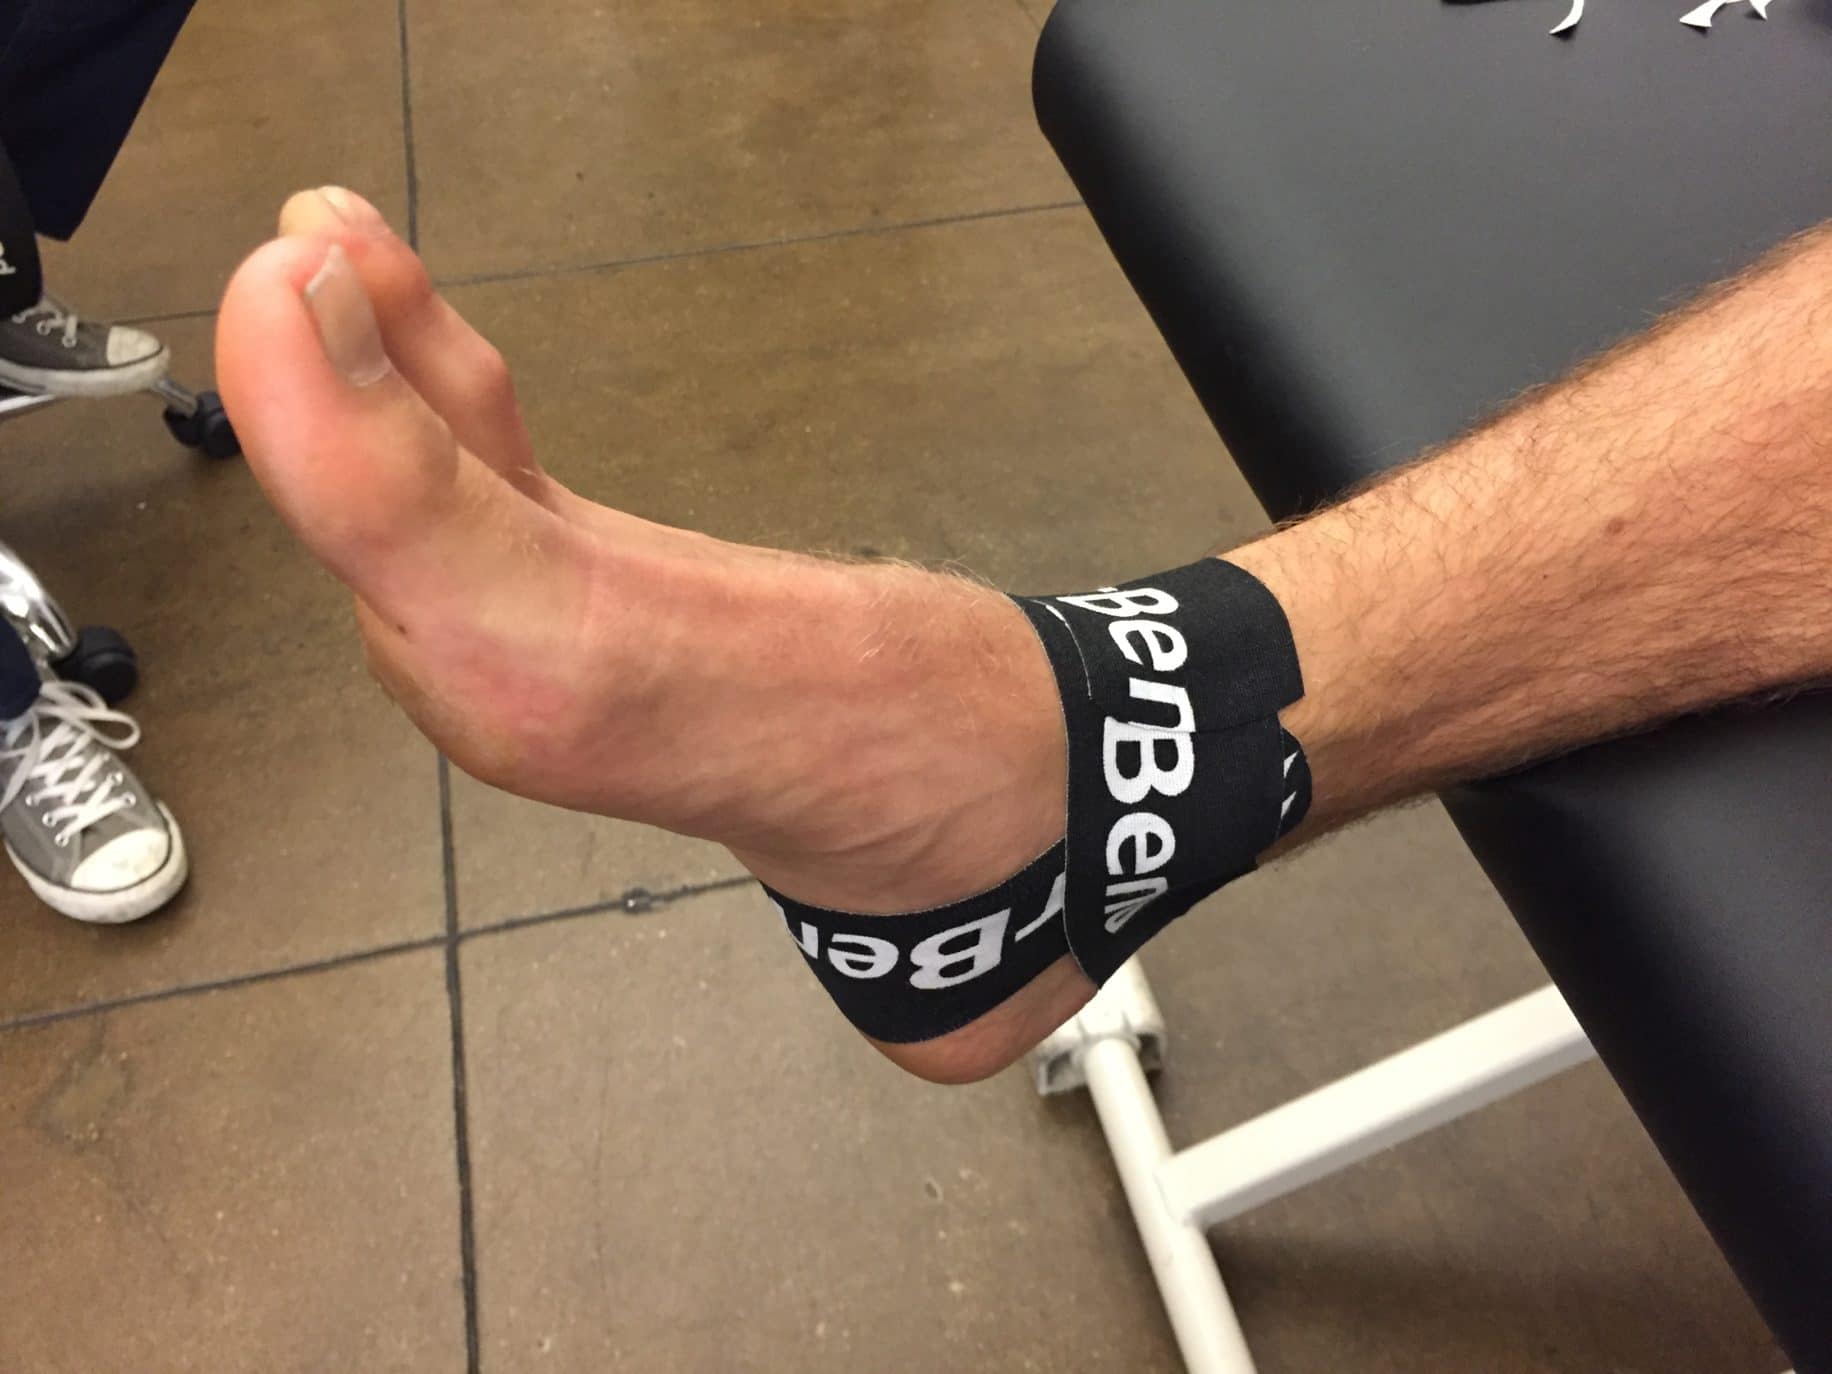
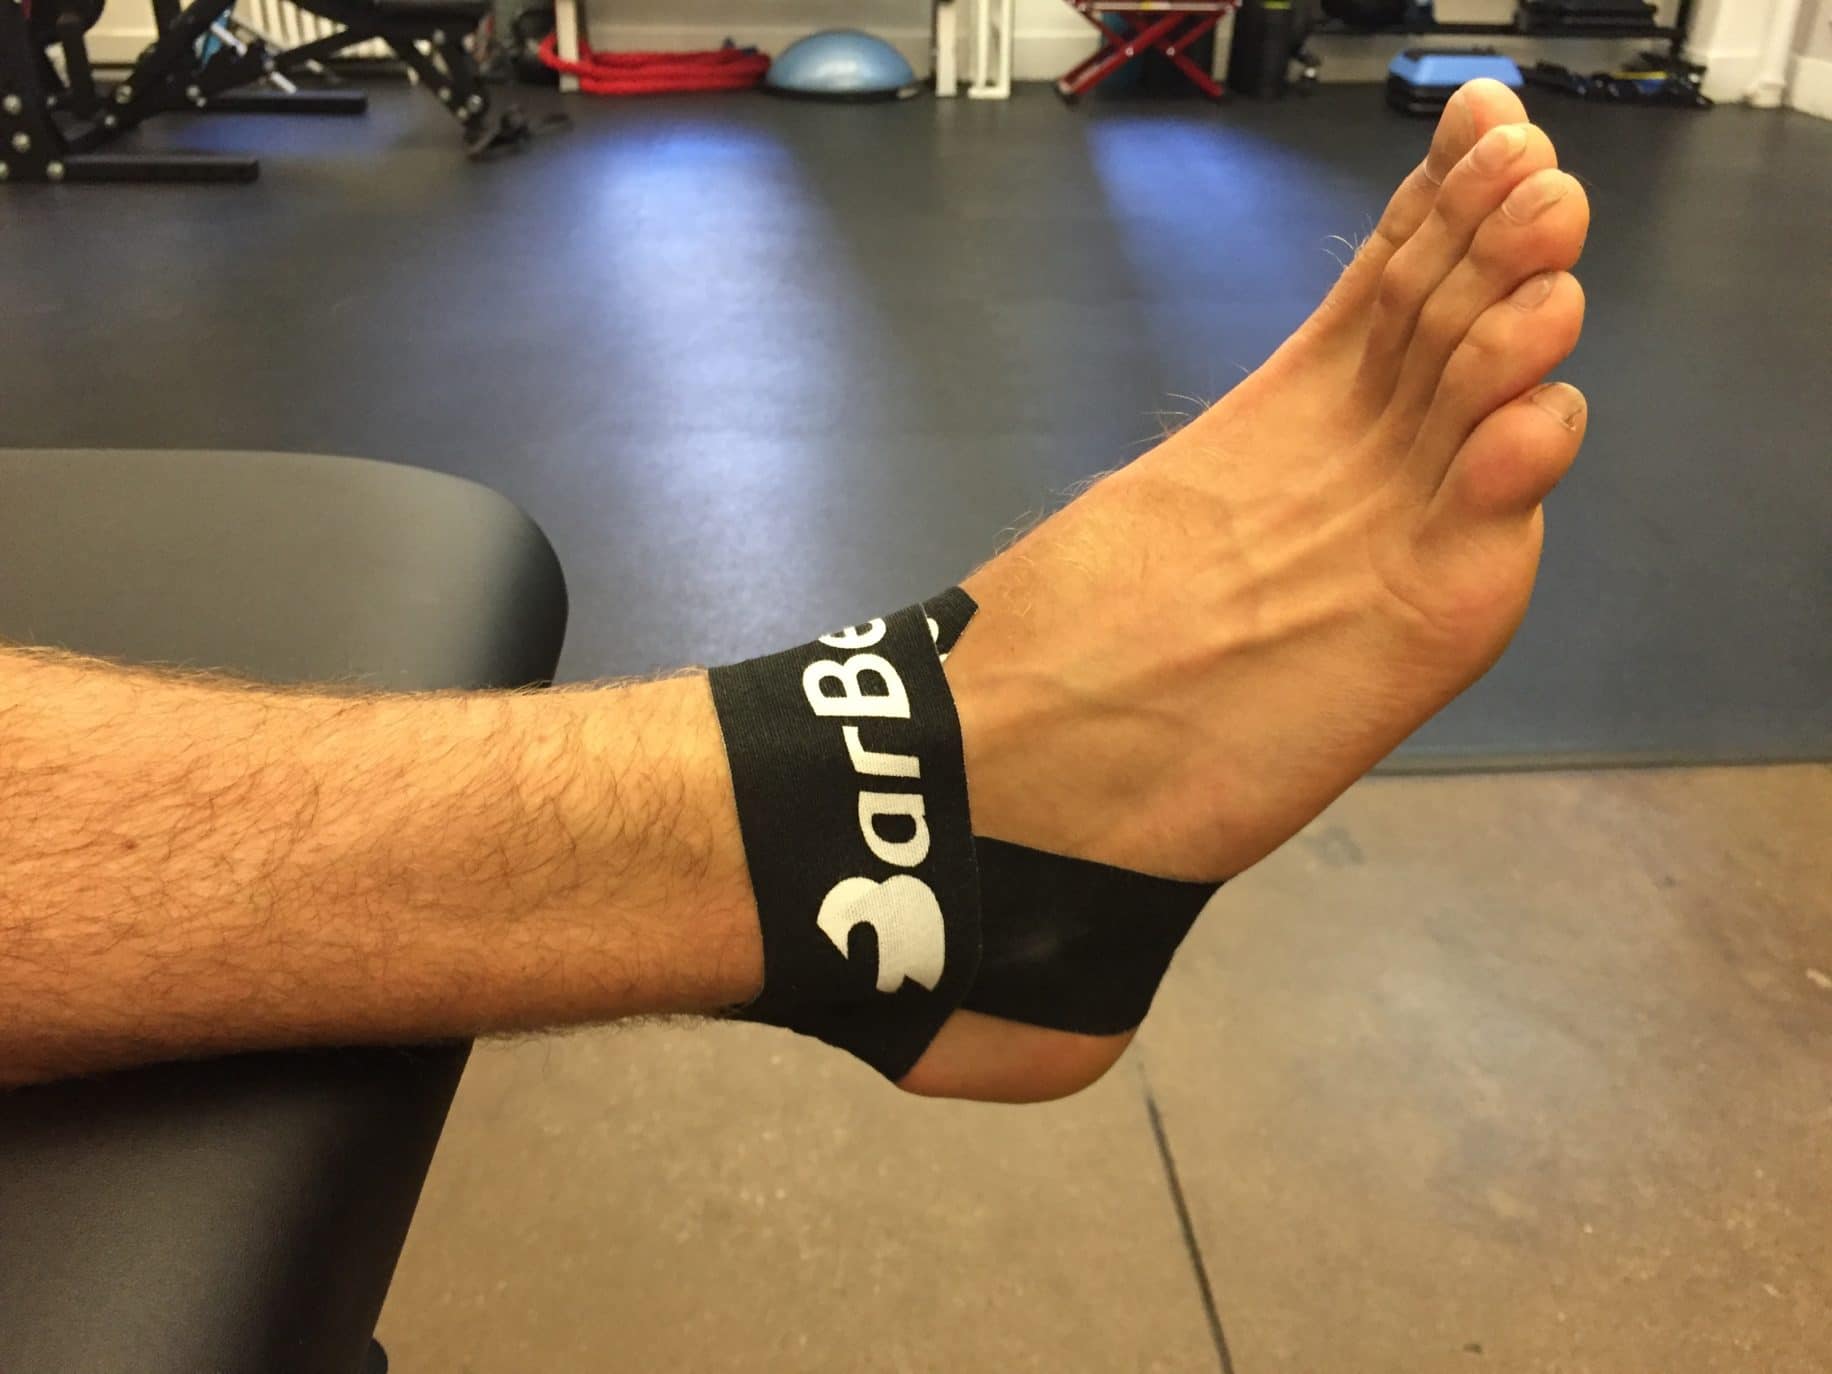
1. Bottom of the Heel to Medial/Lateral Malleolus
For this step you’ll begin by ripping the tape slightly in the middle, and gently twisting it until you have what looks like a tape band-aid. Once you’ve done so, you’ll put your ankle at a 90 degree angle, and place the middle part of the tape on the edge of the heel towards the mid-foot (feel around for the meaty ridge before your arch).
The next step involves placing the sides of the tape. You’ll start by using only one side of the tape, and then abduct/adducting your ankle in the opposite direction of the tape you’ve chosen to start with. Turn your ankle away from the side you’re first applying it to, this creates a feeling of constant tension when applied (if you started with the inside tape, then you’ll turn your foot to the outside).
You want the tape to be applied on stretched skin, so it applies tension and moves with the joint. Pull off the paper slowly while placing your fingers on the areas where adhesive has skin exposure. This will create a tape that’s fully sticking to the skin, and avoid giving you air bubbles. You’ll work your way up until there’s no more paper on the tape and it’s covering the bony heel structure.
Repeat on the opposite side with the similar ankle turning technique.
2. Achilles Tendon Over the Talus
For the final step you’ll rip the tape down the middle like you did in the first step. Once you’ve created the band-aid effect, you’ll apply the tape on the Achilles tendon (just above the heel bone).
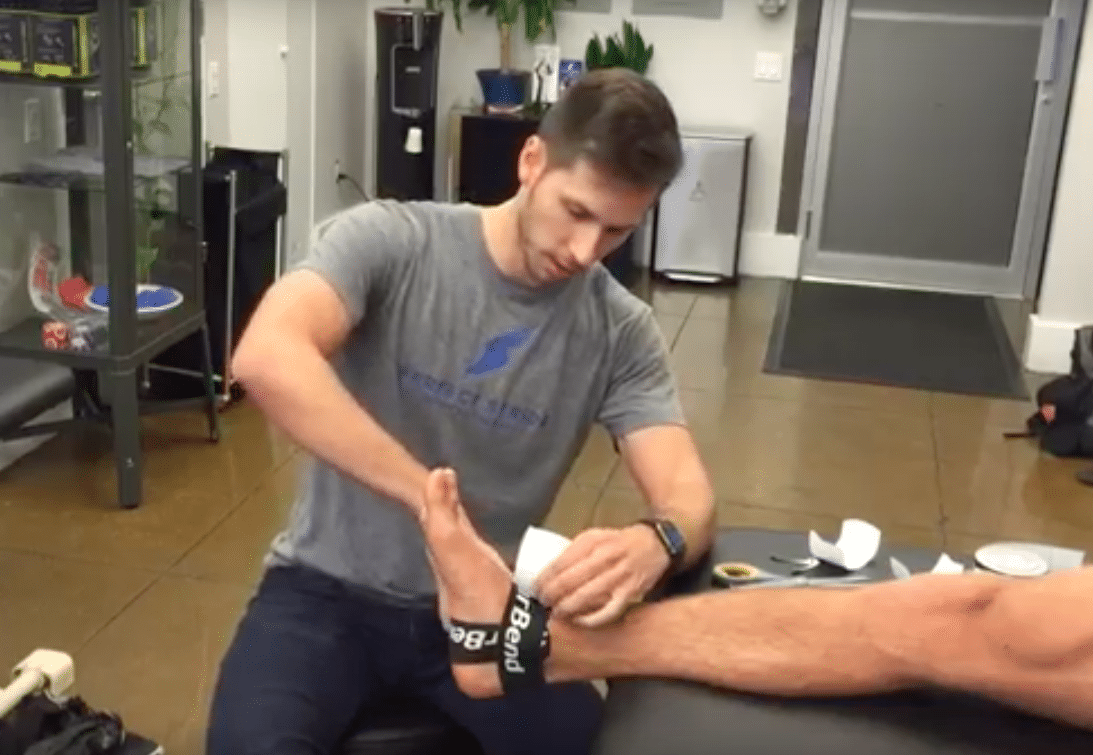
Start with one side keeping the ankle at 90 degrees, and wrap the tape around the initial side of your choosing covering the malleolus and finishing the top of the foot. You’ll repeat on the second side. Try to have the tape finishing on skin, so it doesn’t prematurely come off.
Tips for Ankle Taping with Kinesiology Tape
Gambino provided us with a few taping tips that some athletes don’t account for, and may not know. Below are five important tips that can aid you when self applying kinesiology tape.
- Create Tension: Pay attention to how the joint moves and create tension with the tape by moving your joint away from the tape application. For example, turning your foot out when taping the inside portion of the ankle. This stretch will help provide an extra amount of tension that will support stability.
- Proprioception: Gambino stated that tape itself isn’t the cure for joint instability, but it’s a facilitator for the body’s perception of it. The skin is very sensitive and the tape’s ability to create tension will give the brain feedback to increase stability in the joint being taped.
- Stretch: Another aspect Gambino talked about was the amount of stretch for stability. He said that research is conflicted on how much stretch you need, and he usually does 20-50% stretch to enhance the additional proprioceptive feedback.
- Hair and Taking It Off: If you’re excessively hairy in a specific area, then you’ll pull off little pieces at a time, and use your hand to gently repeatedly chop the tape off (in a karate chopping motion). You can also pinch the skin to release some of the tapes tension, while taking it off in a partitioned manner.
- Cut the Edges: The final tip was the cut the edges of the tape, so it’s rounded. This will prevent the corners from getting caught on edges of clothes and shoes.
Final Taping Considerations
Taping can provide some additional support performance and promote recovery, but it’s not a fix to an underlying health issue. If done properly, then tape can be a great asset to your gym bag. Tape works to provide the skin with feedback and create a feeling of support through proprioception.