Kinesiology tape is used by many athletes to provide themselves with the perception of extra support and to assist with acute pain in various areas on the body. Tape’s main purpose is to provide the body and mind with proprioceptive feedback to increase stability, or decrease one’s pain via the pain gate theory. The rotator cuff can be a bothersome area for athletes, especially for those who frequently do overhead work, or have had a previous shoulder injury.
To learn methods for taping the rotator cuff, we caught up with Joe Gambino, PT, DPT, and CSCS at Perfect Stride Physical Therapy, New York City. Check out the video and descriptive explanation below on how to properly tape this area.
Note: All motions shown are for informational purposes only. The information in this article and video is not meant to prevent or cure any disease or injury. It’s always a good idea to consult with a medical professional or trainer before attempting any new training methodology. If you experience any sharp pain while exercising, discontinue movements immediately.
[Looking for the perfect tape to fit your strength sport needs? Check out our Best Kinesiology Tapes of 2017 to find your perfect match!]
Why Tape the Rotator Cuff?
The rotator cuff is composed of many tendons and muscles that work to support the shoulder joint. In unison, these components work to ensure the humerus’s head remains tightly attached to the shallow socket joint of the shoulder. For athletes with previous or nagging shoulder injuries, rotator cuff pain can be a nuisance for performance. Below are a few of the anatomical landmarks this taping method will make contact with.
- Acromioclavicular Joint
- Tricep
- Medial Deltoid, Anterior, Posterior Deltoid
- Supraspinatus Tendon
- Subscapularis Tendon
- Biceps Brachii
Gambino pointed that taping the rotator cuff won’t cure, or remedy a true injury, but may assist possible nagging pain and instability. For cuff tears, and other serious issues, he recommended seeking a medical professional for assistance.
[Need a consistent kinesiology tape for multiple purposes? Get yours here!]
2-Step Rotator Cuff Taping Method
1. Placing the First Rotator Cuff Strip
Before an athlete will begin taping the rotator cuff, they must measure out two strips of tape that will cover the top of the shoulder to the mid-tricep. Once those two strips have been measured, then the athlete will cut the edges of the tape to avoid getting caught on clothing.
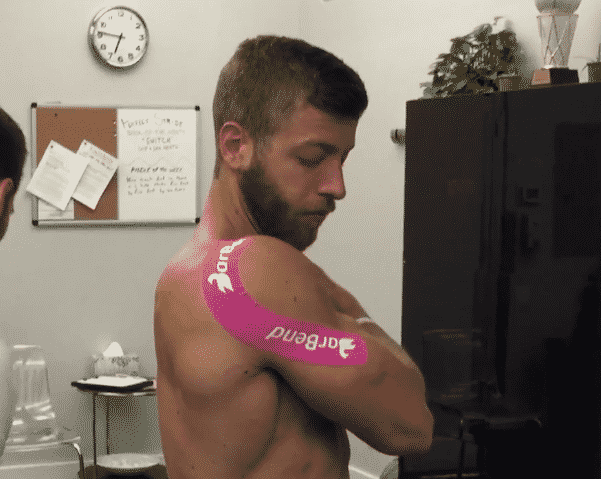
The first strip of tape will require an athlete to wrap their arm across their body to the opposite shoulder to produce tension on the skin. After the athlete’s arm is wrapped, then the first strip of tape will be place on the back of the shoulder (near the top) with a two-inch taping anchor.

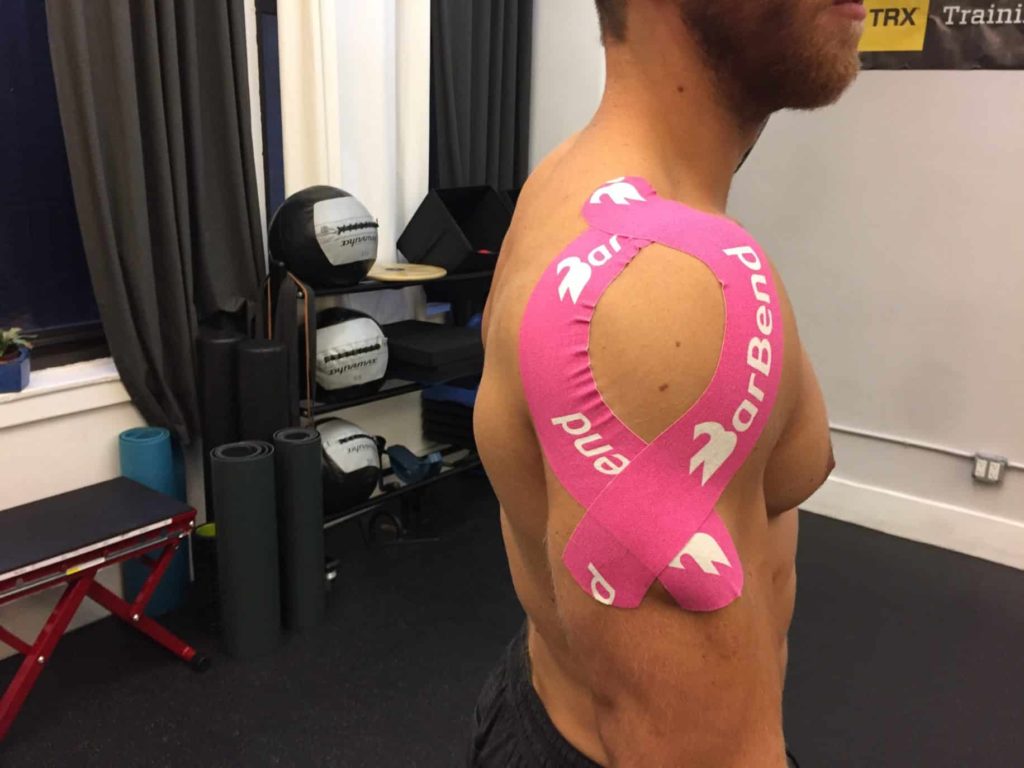
An athlete should angle the two-inch anchor slightly downward, so the tape can wrap in a C-like fashion around the deltoid. With the arm still across the body, the athlete will tape around the deltoid with a 20-50% stretch, and finish with the tape crossing diagonally over the tricep. To finish, the athlete will rub in the tape so the adhesive optimally sticks.
2. Placing the Second Rotator Cuff Strip
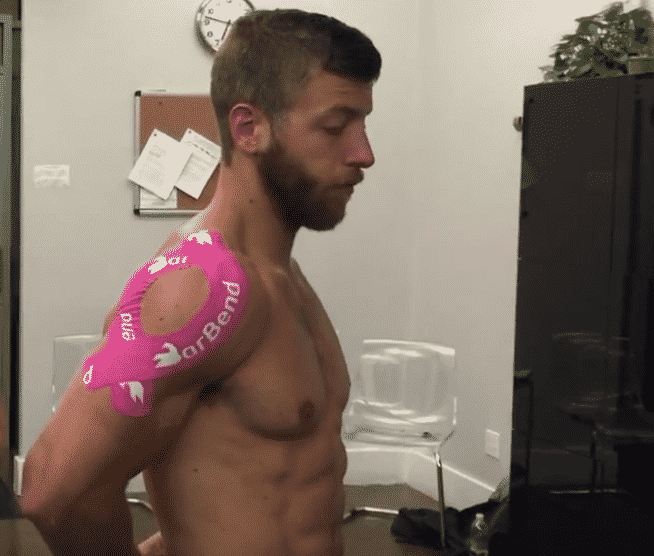
The athlete will place the second strip of tape in a similar manner to the first. An athlete will bring their arm behind them, as opposed to across their body to create tension. Once an athlete has done so, then they’ll create a two-inch and place it on the top of the front of the shoulder (reverse of the first strip).

Similar to the first strip, the athlete will then wrap the tape around the deltoid in a C-like fashion with a 20-50% stretch, and finish by placing it on the mid-tricep at a diagonal angle. After the athlete has placed the tape, then they’ll rub it in to activate the adhesive.

Tips for Kinesiology Taping the Rotator Cuff
Gambino gave use a few extra tips on top of the rotator cuff taping method. These tips are useful when applying, taking off, and understanding why you’re using kinesiology tape.
- Create Equal Tension: Each strip should have a similar level of tension, which will vary between 20-50%.
- Proprioception: Gambino stated that tape itself isn’t the cure for pain or injury, but it’s a facilitator for the body’s perception of it. The skin is very sensitive and the tape’s ability to create tension will give the brain feedback to decrease discomfort.
- Even Strips: When using two strips of tape for taping the rotator cuff, make sure to cut the two pieces in similar length to ensure an equal fit.
- Hair and Taking It Off: If you’re excessively hairy in a specific area, then you’ll pull off little pieces at a time, and use your hand to gently repeatedly chop the tape off (in a karate chopping motion). You can also pinch the skin to release some of the tapes tension, while taking it off in a partitioned manner.
- Cut the Edges: The final tip was the cut the edges of the tape, so it’s rounded. This will prevent the corners from getting caught on edges of shirts.
Final Word
The rotator cuff can be a sensitive and troublesome joint for overhead athletes. If you find yourself lacking stability and support, then tape may be able to assist with your performance. For anyone with a serious rotator cuff injury, it’s beneficial to seek our the proper medical professional for assistance.