Few exercises isolate your entire back quite like bent-over rows. You hinge forward, brace your core, and then draw your elbows to squeeze the living daylights out of your lats, rhomboids, and traps. Bent-over rows are easy to do and pretty versatile. You can row a barbell, kettlebells, dumbbells, a barbell set in a landmine attachment, and resistance bands.
No matter your weapon of choice, there’s a reason you see the bent-over row, in one form or another, in most well-made workout routines.
If you can grip it, you can row it — making the bent-over row one of the most effective and simple ways to strengthen your back. Here’s what you need to know about the movement.
How to Do the Bent Over Row
The bent-over row should be thought of as a foundational movement. Learn it, and then apply the mechanics to different variations — similar to the deadlift (and its many variations). For the sake of simplicity, the directions below will be for a barbell bent-over row, though, again, you can apply the same mechanics to any variation.
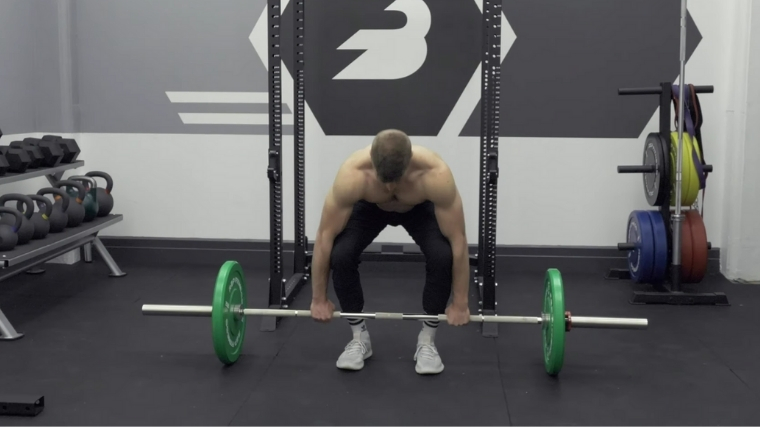
Step 1 — Set Yourself Up

Load a barbell with bumper plates on the ground and stand in front of it. Set up like you would for a deadlift, with your feet set hip-width apart, but assume a wider grip. How wide? That’s up to you, but a safe starting point is to position your thumbs on the edges of where the knurling meets the smooth steel on the barbell’s shaft.
Drop your hips down, not quite as far as you would for a deadlift, and then squeeze your shoulder blades together. Lastly, dig your feet into the ground and turn them outwards (without physically turning them outwards). You should feel your legs and glutes engage, and your entire body should feel stable.
Coach’s Tip: Find the stance that feels most comfortable and allows you to maintain a strong hip hinge and rigid back.
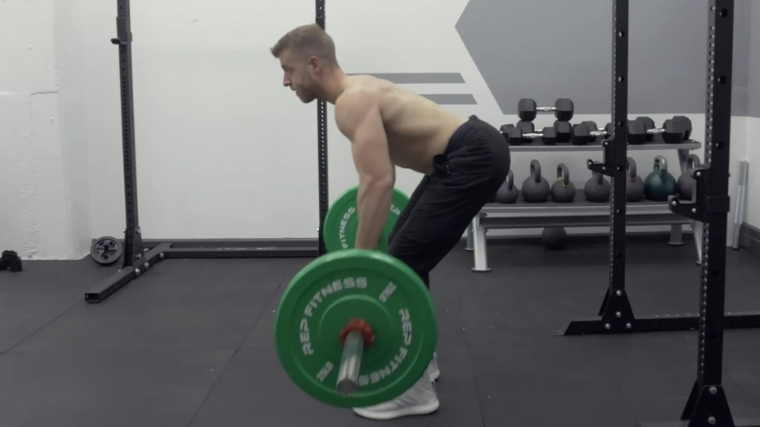
Step 2 — Initiate the Row

Lift the barbell off of the floor and let your arms extend. Keep your shoulder blades squeezed together, and then row the barbell to your stomach, leading the pull with your elbows.
Coach’s Tip: If the weight is causing you to drop your chest or the elbows are flaring, then it may be too heavy, and the weight used should be scaled back.
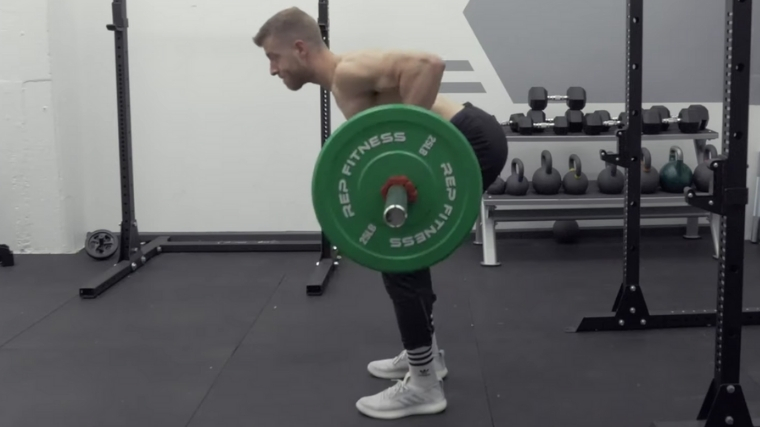
Step 3 — Squeeze and Lower

At the top of the movement, squeeze the upper back and contract the lats without breaking your hip angle and set back. Think about pulling the barbell fully to the body to ensure you’re fully contracting the upper torso’s musculature.
Coach’s Tip: Add a pause at the top of the movement to increase your time under tension, which will help you stress the muscles for more overall growth.
Bent-Over Row Sets and Reps
The barbell row is one of those movements that you can use for just about any purpose. Whether you want to put on muscle mass or train your posterior chain for powerlifting or Olympic lifting, the bent-over row is a reliable go-to. As such, how you choose to program the exercise is the main determinant of the results you’ll get out of it.
- To Build Muscle Mass: 3 or 4 sets of 6 to 9 reps, leaving only 1 to 2 reps in the tank on each set.
- For Back Strength: 5-6 sets of 4-6 reps with a heavy weight.
- As a Beginner: 3 sets of 10 reps with a light weight and a proper hip hinge.
Common Bent-Over Row Mistakes
While the exercise is relatively simple (especially compared to, say, a snatch or muscle-up), you can still make errors on the bent row that may affect your training or hinder your progress. Be on the lookout for these.
Being Too Upright
If the weight is too heavy, or you don’t know how to hinge properly, it’s easy to perform the bent-over row without being very, well, bent over. Your torso doesn’t need to be perfectly parallel with the floor, but it should be close. This allows you to effectively engage your lats to move the weight instead of relying on your biceps and shoulders.
[Read More: The Best Shoulder Exercises and Workouts for Bigger, Stronger Shoulders]
Pulling With Your Arms
The barbell row is fantastic for your back, but you have to actually use your back. Many beginner lifters will get in the habit of performing their pulling exercises entirely with their arms.
When you’re learning to row, make sure you focus hard on a good mind-muscle connection and actively pulling the weight with your lats.
Bent-Over Row Variations
There are a lot of different ways you can add flair to the bent-over row. Here are three variations worth trying.
Flexion Bent-Over Row
At the bottom of each rep, the lifter lets their upper back round (or go into flexion), which essentially extends the movement’s range of motion for more overall time under tension. Arnold Schwarzenegger would employ the same flexion technique for seated cable rows, and it seemed to work for the seven-time Mr. Olympia winner. Be sure to use light weight for this variation.
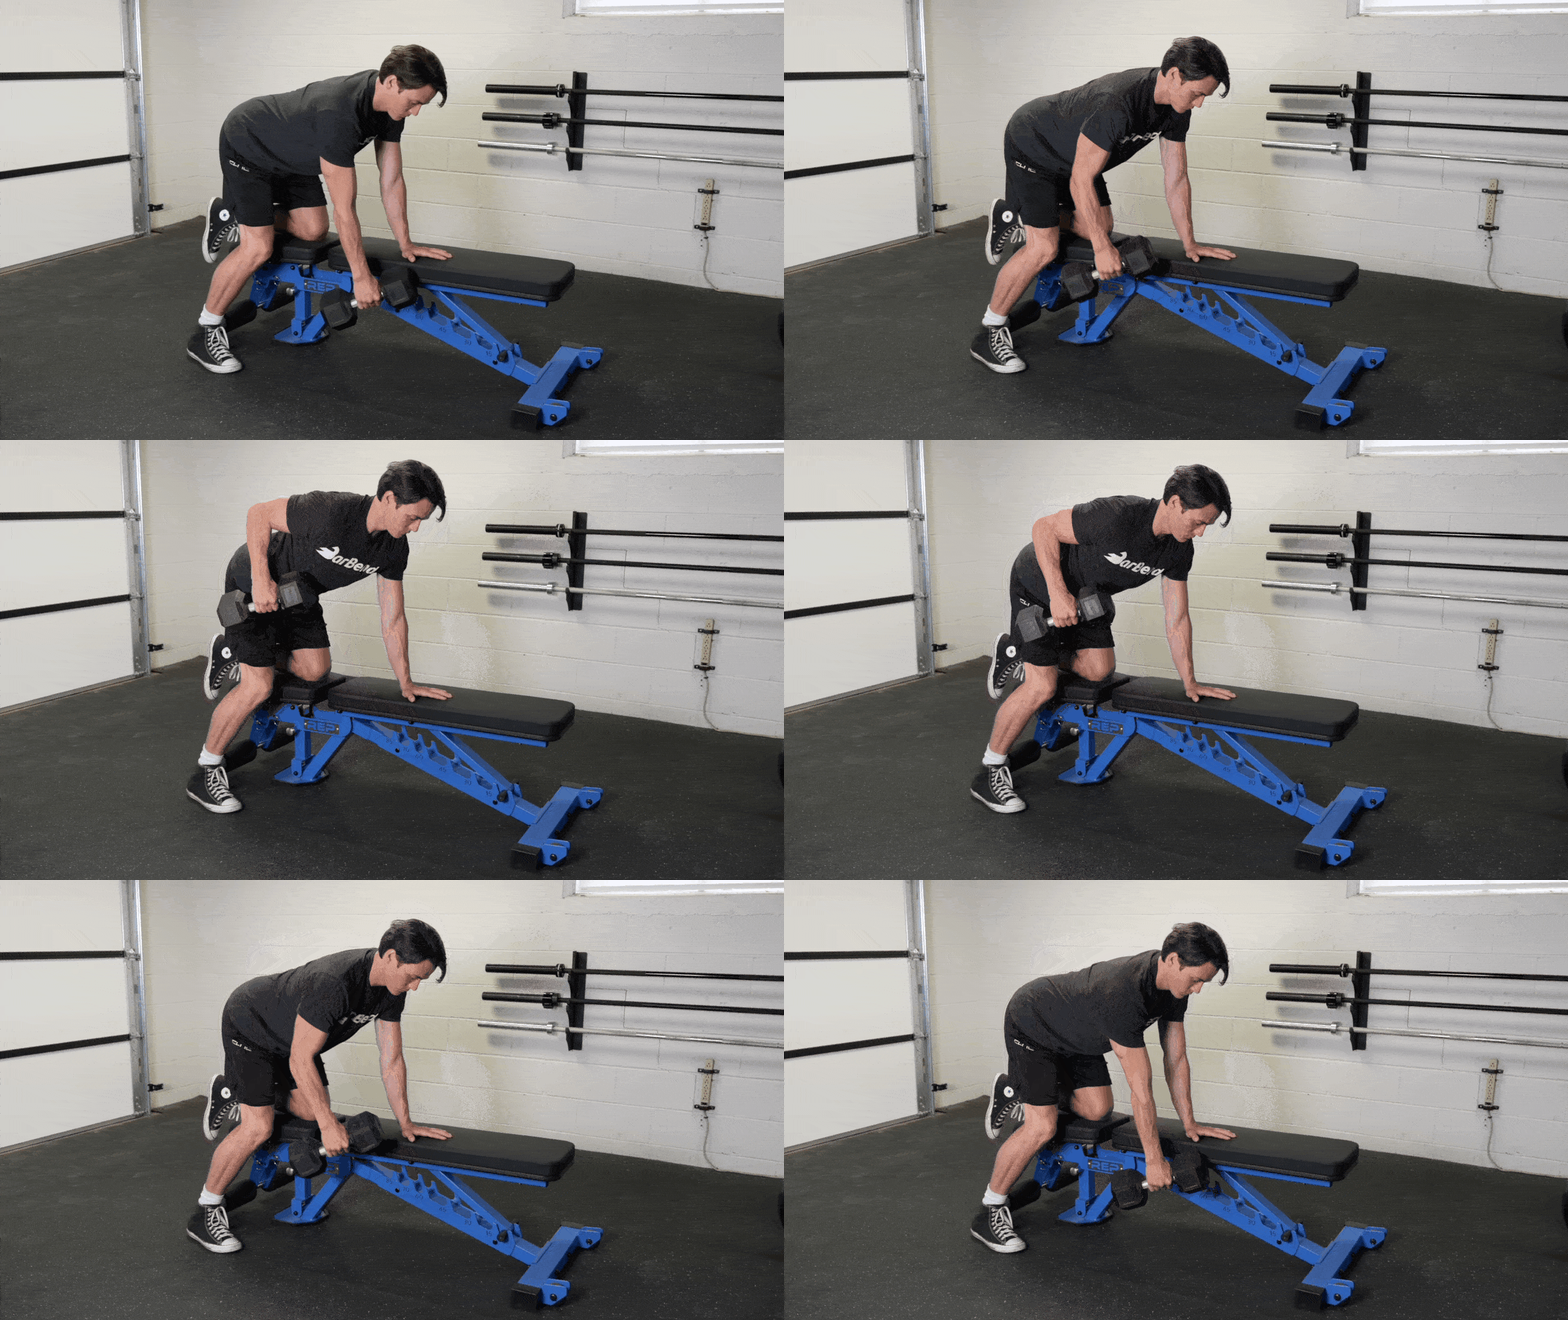
One-Arm Dumbbell Row
The one-arm dumbbell row lets lifters focus on one side of their body at a time, which helps even out muscle imbalances. Also, because you’re essentially doubling the number of reps you’re performing, you’ll burn more overall calories compared to bilateral variations.

Kettlebell Bent-Over Row
The kettlebell bent-over row is very similar to the dumbbell bent-over row. It allows a lifter to address any asymmetries in strength and muscular development. In addition, it can be used to increase the range of motion in the row to increase muscle contractions and growth.
Bent-Over Row Alternatives
Below are three bent-over row alternatives that can be done to increase strength and hypertrophy or add variety to a training program.
Inverted Row
This bodyweight rowing variation can be done using a barbell in a squat rack, TRX bands, or suspension rings. To do this, position yourself under something fixed and stable, like a barbell in a squat rack or TRX straps anchored to the wall or ceiling. You can use this as a bodyweight variation to also increase back, grip, and core strength, as well as body awareness.
Meadows Row
The Meadows row is a single-arm barbell landmine bent over row variation that allows you to increase the range of motion and hit the back from a different angle. This bent-over row alternative was named after IFBB pro bodybuilder and coach John Meadows, who made this row his go-to mass builder.
Chest-Supported Row
Laying face-down on an incline bench takes your supporting muscles (hamstrings, glutes, and lower back) out of the equation so that you can focus on contracting the target muscles. You won’t be able to lift as heavy, but you should still feel a serious burn.
Muscles Worked by the Bent-Over Row
The bent-over row is a compound, or multi-joint, movement that hits various muscles.
Latissimus Dorsi
The lats are a large triangular muscle that spans the entire length of your back. The lats are primarily responsible for retracting your shoulder blades and drawing your arms in, and so they’re the main muscle worked during bent-over rows.
Spinal Erectors
The spinal erectors are located in your lower back. Because you’re rowing weight while hinged over, this lower back exercise keep your torso stable for the entire movement. A strong lower back is necessary for nearly every lift.
Hamstrings and Glutes
The hamstrings work isometrically to support the lifter as they assume the bent-over position (similar to the erectors). When done correctly, the lifter should feel an intense stretch being placed on the hamstrings.
Scapular Stabilizers
Bent-over rows are initiated by retracting the shoulder blades. Moving the shoulder blades from a protracted to retracted position can help increase scapular stability, improve shoulder health, and increase muscle growth of the back as you are extending the range of motion.
Benefits of the Bent-Over Row
The bent-over row is simple and easy to learn, making it a great exercise for any lifter of any skill level.
Build a Bigger, Stronger Back
There are many types of rows — vertical and horizontal, and the bent-over row is the latter. By hinging over and rowing any implement, you engage the lats, upper back muscles, and traps. And because you’re hinged while rowing weight, your spinal erectors (located in your lower back) are constantly under tension. A stronger lower back pays off big time for movements like deadlifts, back squats, and planks.
[Read More: Our Favorite Forearm Workouts, + the Best Forearm Exercises]
Depending on the variation you choose, bent-over rows let you lift more weight than other back exercises, so you can directly target your muscles. You’ll also forge forearms that Popeye would pine for and an iron grip from hanging onto a weight for reps on reps on reps.
Customize Your Back Training
You can row anything — a barbell, a sandbag, a heavy rock. It does not matter. Different variations will alter your body’s position and joint angles, changing how the exercise feels. But all rows pretty much hit your back and arms, so feel free to pick a variation that feels comfortable to you and fits your training goals.
Improve Your Posture and Spinal Stability
Rows are great at increasing back strength and muscle development and reinforce proper positions and postural control. When bent over, the erectors work to keep your torso stabilized. While this may be a limiting factor for some individuals (keeping their back flat), it can help promote lower back health and stability, which can have broad application to most forms of movement in the gym and daily life.
Who Should Do the Bent Over Row?
In short, just about anyone. The bent-over row is versatile, reliable, and consistent, making it suitable for professional athletes and first-day gymgoers as well.
Strength and Power Athletes
Bent-over rows are a great movement to increase back strength and muscle growth. Movements like the deadlift, squat, bench press, carries, and overhead lifts require a strong back, making the bent-over row a great accessory exercise for powerlifters and strongmen.
[Read More: The Best Upper Body Exercises and Workouts]
A strong back is also key for movements like pulls, squats, and overhead positioning in the overhead squat and jerk. Movements like the bent-over row, Romanian deadlift, and Pendlay row are great ways to increase positional back strength necessary for Olympic lifters.
Fitness Athletes
The bent-over row is a great way to develop back strength and increase muscle growth of the lats and erectors. Ideally, lifters would include bent-over rows using various equipment (barbells, kettlebells, dumbbells) to diversify their overall training further and minimize any muscle imbalances.
General Populations
Besides the obvious benefits of increased back strength and hypertrophy, the bent-over row can be handy for any fitness level. This movement helps reinforce spinal stability while in a bent-over position. It can help increase back strength and posture, which are common issues with most general population individuals due to a sedentary lifestyle or poor posture while sitting, walking, standing, driving, etc.
Blast Your Back
Many of the greatest physiques (and strongest athletes) of all time built their success in part, at least, on foundational exercises like the barbell row. While you will need to modify, tweak, or tailor your training at some point to meet your individual needs, you should always start off with the basics.
The bent-row is a deserved staple in any workout routine. It builds your body from head to toe, and lets you load up on serious weight as well.
Frequently Asked Questions
Where on my body should I aim to row the barbell?
It depends, but, generally, aim to row the barbell to your belly button. If you’re using dumbbells or kettlebells, think about rowing the weight to your hip. Ultimately, though, row the weight to wherever elicits the strongest lat contraction.
Is it bad if my upper back rounds during the bent-over row?
Generally speaking, you want to keep the back in a neutral position or slightly extended at the top. That said, the flexion row is a great back builder and can be used with more advanced lifters who can create flexion in the upper back without sacrificing the lumbar spine (segmented spinal flexion).
Should I feel my biceps work while rowing?
Yes, but not too much. Your back muscles are the focus. If you don’t feel any back engagement, then lower the weight on the bar and concentrate on squeezing your shoulder blades together during each rep.