Foam rolling major joints like the hip can benefit an athlete’s mobility and performance in the gym. Under constant heavy loads, the hip’s fascia can become tight, which will limit proper sequencing of this joint. Factor in the amount of time we spend sitting and you’re looking at an increasingly tight, or locked up hip.
The hip is unique compared to other joints in regards to how these muscles run along side each other from similar origin points. To help us effectively roll out the hips, we reached out to Matt Moskowitz, Head of Training at Hell’s Kitchen Wellness, to learn about his go-to movements for these purposes. Check out the video below, along with more detailed movement descriptions below in the article.
Note: All motions shown are for informational purposes only. The information in this article and video is not meant to prevent or cure any disease or injury. It’s always a good idea to consult with a medical professional or trainer before attempting any new training methodology. If you experience any sharp pain while foam rolling or exercising, discontinue movements immediately.
[What, why, how, and when, answer all of your foam rolling questions with our in-depth foam rolling guide.]
Understanding the Anterior Hip
The anterior portion of the hip is made up of multiple muscles stemming from a similar origin points along the anterior iliac crest. These muscles can become tight after heavy lifts, or when sitting down all day. Below are a few of the hip and anterior leg muscles this foam rolling sequence will help target and loosen up.
- Tensor Fascia Latae
- Sartorius
- Rectus Femoris
Understanding the Posterior Hip (Glute Side)
One of the biggest misconceptions of rolling the hip is ignoring the posterior portion, or working on the glutes, too. Working to stretch and front and back of the hip will help provide this joint with an event stretch, which will support proper hip sequencing. Below are a few of posterior hip muscles that this sequence will target.
- Gluteus Maximus
- Gluteus Medius
- Gluteus Minimus
- Quadratus Lumborum
1. Self Glute Massage
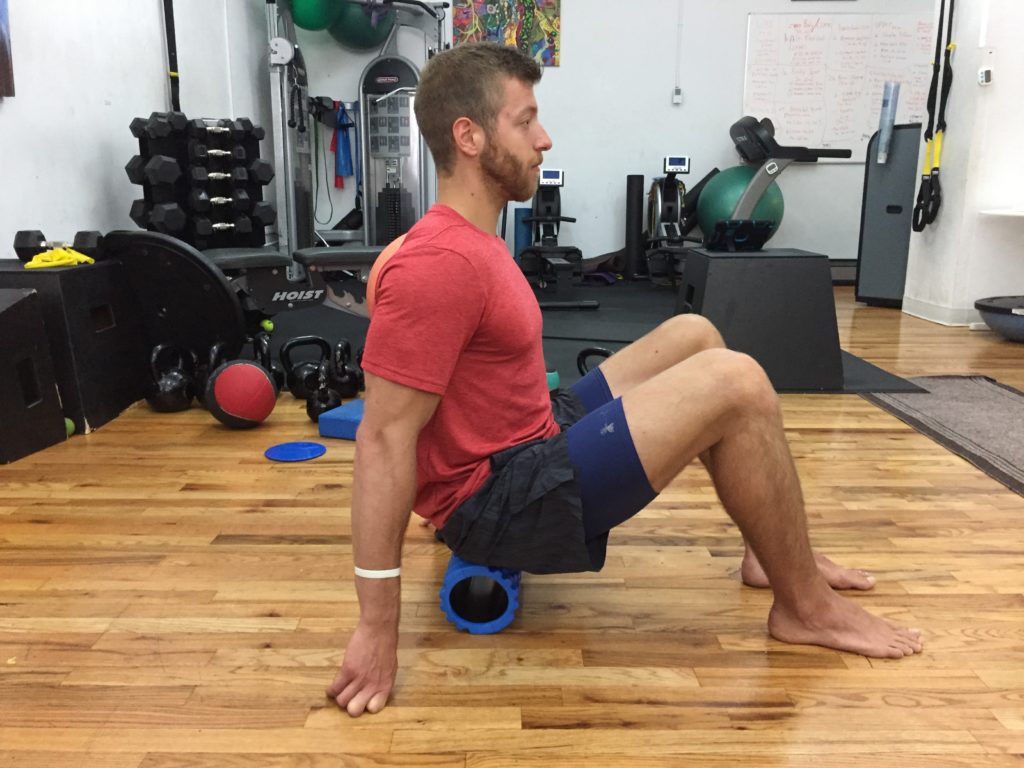
For the first movement in the sequence the athlete will sit on the foam roller right at the tailbone. Maintain a tall upright posture, then roll forward slowly to the sits bone, or the bony ridge in the mid-lower glute area. Athletes will feel a slight bump when they’ve rolled over the bony sits area. Continue to roll back and forth gently for 20-30 seconds.
[Ready to get rolling? Check out our special deal on the BarBend 2-in-1 Foam Roller today!]
2. Glute Medius Massage
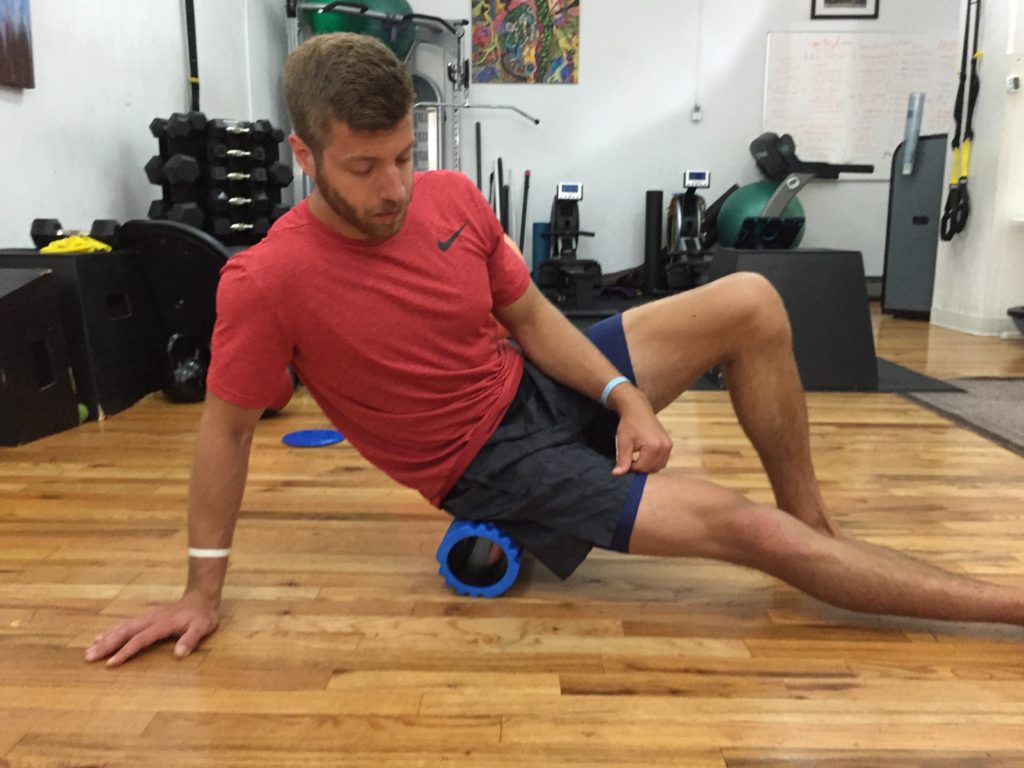
Next, the athlete will extend one leg and turn the foot outward in the direction of their extended leg. The other leg will maintain a 90 degree position, and the athlete will begin to roll gently back and forth on the diagonal side of the glute. Athletes apply pressure sparingly and breathe deeply through this movement, while rolling back and forth for 30-seconds.
3. IT Band Focus
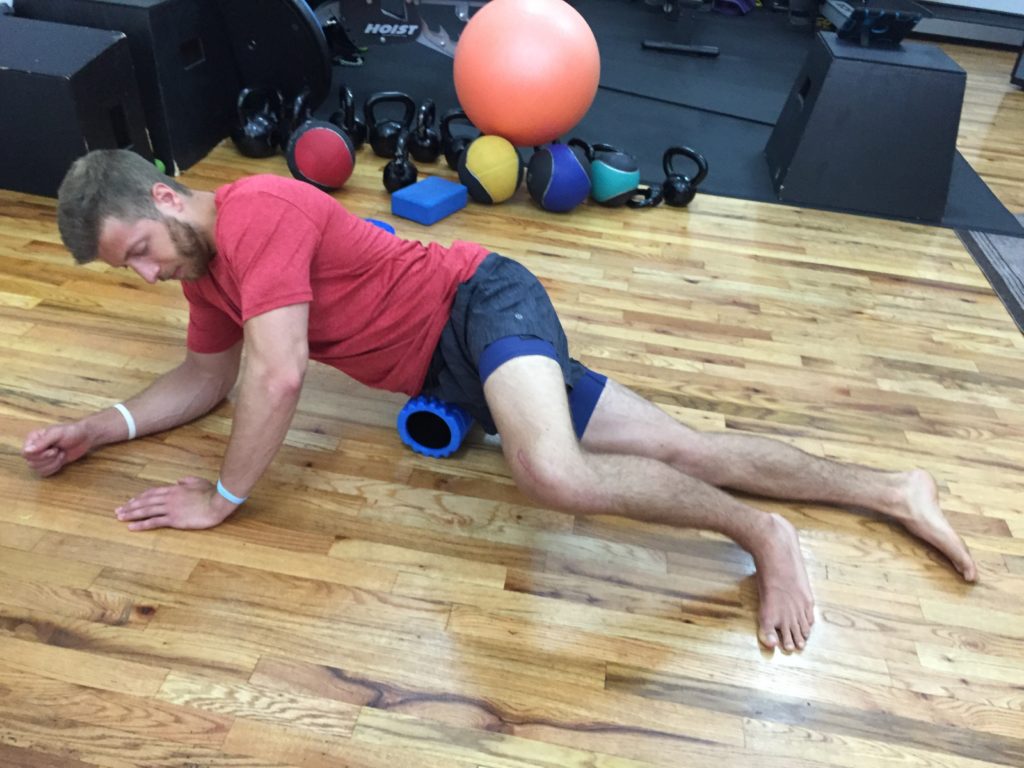
The athlete will now leave their original leg extended, and bring over the previously 90 degree bent leg. This will position the athlete with their IT band pressing into the foam roller. Often times an athlete can find their IT band by noticing the tighter area on the hip (it varies a bit from athlete to athlete). Breathing deeply applying variable pressure, the athlete will roll back and forth over the origin of the band (meaty area) for 30-seconds.
[Wanna grab a foam roller? Check out our pick for the best foam roller for the IT band.]
4. Ilium and QL Release
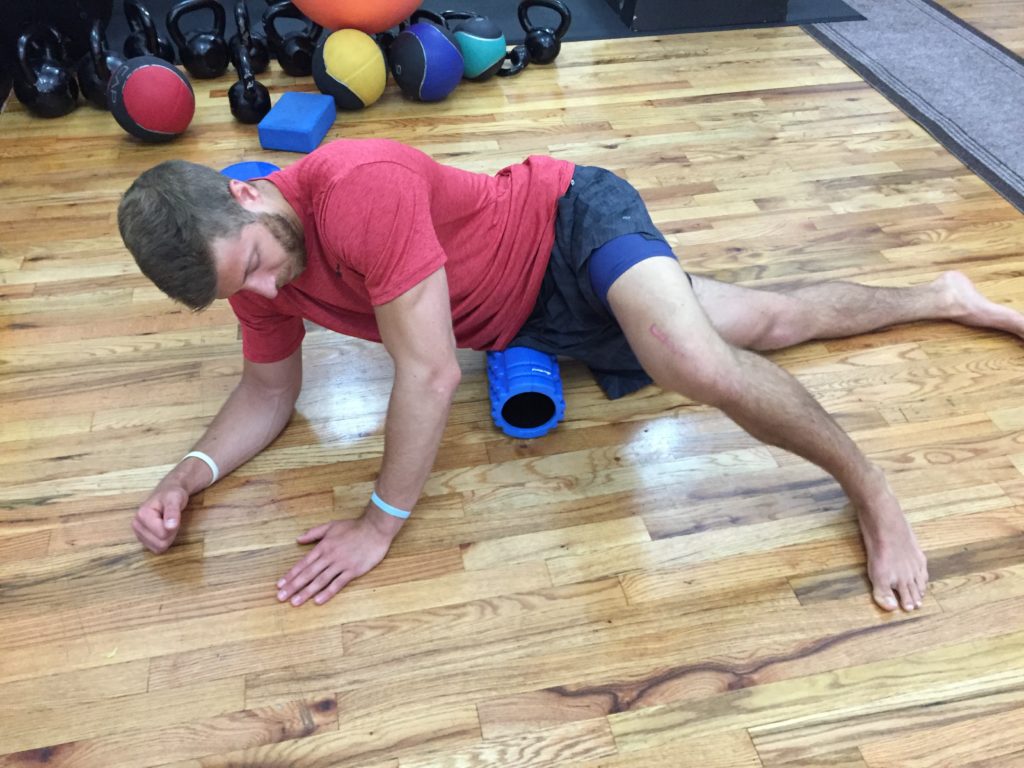
Once the athlete hits the IT band for 30-seconds, they then roll down on the roller maintaining a similar position as they did for the IT band. They stop just above the pelvis where they feel tightest, and instead of rolling up and down, they’re going to rock side to side, applying gentle rocking pressure and breathing deeply for 30-seconds.
5. Hip Flexor Stretch/Disengagement
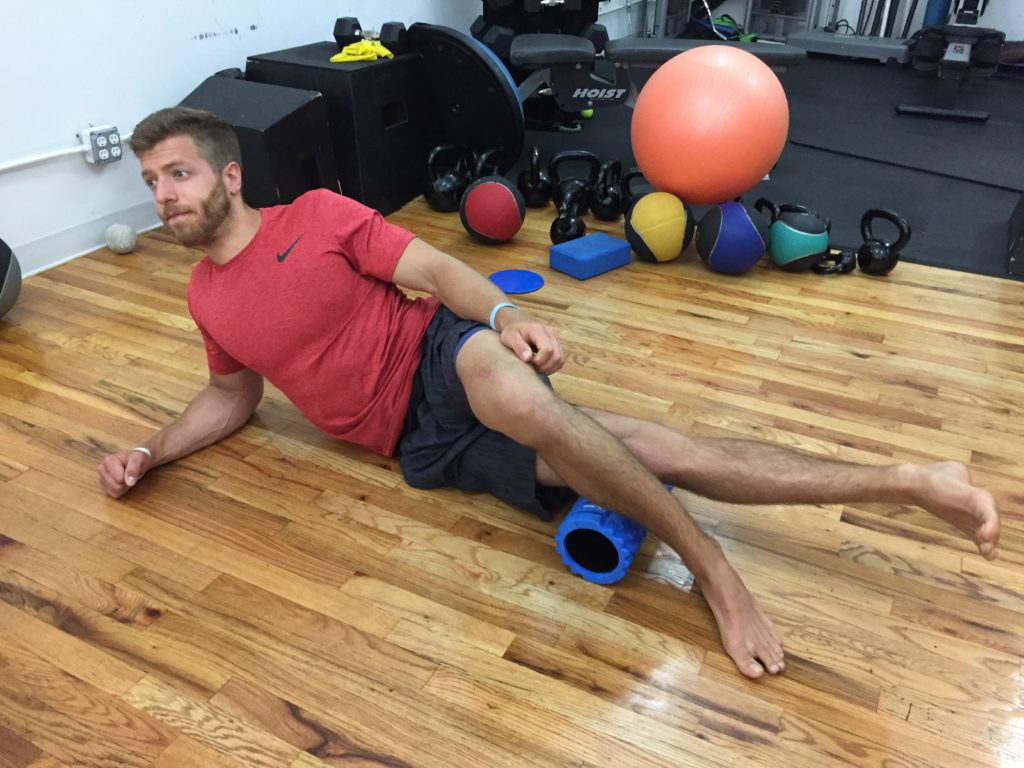
The final movement will have the athlete finish with a static hip flexor stretch. From the previous position, they roll down the roller until their hip lays flush with the floor. This will vary from athlete to athlete, and the closer the position of the roller to the knee, then the tighter the flexor tends to be. Once lying flush, they hold this stretch and breathe deeply for 30-seconds.
Foam Rolling for the Hips Considerations
The hip can be a troublesome and tight area for a lot of athletes. For this reason, it’s recommended to begin the above sequence on a softer roller and ease into a firmer roller over time. An athlete should feel a degree of pressure and stretch on the roller, but they shouldn’t feel pain, or be in a position where they’re fighting every stretch.
In Conclusion
Many athletes can benefit from stretching and working on their hip mobility. An increase in this mobility can lead to improved performance, and an all around healthier posture.