• Skip to primary navigation
  • Skip to main content
  • Skip to primary sidebar
BarBend

BarBend

The Online Home for Strength Sports

  • News
    • CrossFit
    • Strongman
    • Bodybuilding
    • Top Athletes
    • Powerlifting
    • Weightlifting
    • Competition Results
    • Latest Research
  • Reviews
    • Recovery
      • Best Cold Plunges
      • Best Saunas
      • Best Mini Massage Guns
      • Individual Recovery Reviews
    • Supplements
      • Best Protein
        • Best Whey Protein Powders
        • Best Vegan Protein Powders
        • Best Whey Isolate Protein Powders
        • Best Mass Gainers
        • Best Protein Bars
      • Best Pre-Workouts
        • Best Pre-Workouts for Women
        • Best Pre-Workouts for Men
        • Best Non-Stim Pre-Workouts
        • Strongest Pre-Workouts
      • Best Creatine
      • Best Electrolyte Supplements
      • Best Greens Powder
      • Best Meal Replacements
      • Best Nitric Oxide Supplements
      • Best Fat Burners
        • Best Fat Burners for Men
        • Best Fat Burners for Women
        • Best Non-Stim Fat Burners
      • More Supplements
        • Best Supplements for Muscle Growth
        • Best Supplements for CrossFit
        • Best Supplements for Weight Loss
        • Best Supplements for Bodybuilding
        • Best Supplements for Men
        • Best Supplement Stacks
      • Individual Supplements Reviews
    • Equipment
      • Cardio
        • Best Treadmills
        • Best Rowing Machines
        • Best Exercise Bikes
        • Best Ellipticals
        • Best Recumbent Bikes
      • Strength
        • Best Adjustable Dumbbells
        • Best Dumbbells
        • Best Kettlebells
        • Best Barbells
        • Best Squat Racks
        • Best Free Weights
        • Best Weight Benches
        • Best Resistance Bands
        • Best Slam Balls
        • Best Weighted Vests
        • Best Leg Extension Machines
        • Best Cable Machines
        • Best Power Racks
        • Best Pull Up Bars
      • Best Home Gyms
        • Best Smart Home Gyms
        • Best Gym Equipment Under $100
        • Best Home Gym Essentials
        • Best Home Gym Flooring
      • Individual Equipment Reviews
    • Fitness Accessories
      • Apparel
        • Best Weightlifting Shoes
        • Best Cross Training Shoes
        • Best Gym Bags
        • Best Gym Shorts
      • Training
        • Best Weightlifting Belts
        • Best Knee Sleeves
        • Best Lifting Straps
        • Best Grip Strengtheners
        • Best Wrist Wraps
        • Best Lifting Gloves
      • Individual Fitness Product Reviews
    • Certifications
      • Best Sports Nutrition Certifications
      • Best Personal Trainer Certifications
      • Best Nutrition Certifications
      • Individual Certifications Reviews
    • Programs
      • Best Online Workout Programs
      • Best Workout Streaming Services
      • Best Home Workout Programs
      • Individual Program Reviews
  • Nutrition
    • Diets
      • Carb Cycling
      • Vertical Diet
      • Reverse Dieting
      • Carnivore Diet
      • Ketogenic Diet
      • Intermittent Fasting
      • IIFYM Diet
    • Fat Loss
      • Macros for Fat Loss
      • Calorie Deficits
      • Natural Fat Burners
      • Cut 2 Pounds Weekly
    • Muscle Gain
      • How to Dirty Bulk
      • Go From Cutting to Bulking
      • Eat These Carbs
      • How to Eat for Muscle
    • Supplement Guides
      • Pre-Workout
      • Whey Protein
      • Mass Gainers
      • Greens Powders
      • Creatine
      • BCAAs
    • Nutrition Tips
      • Daily Protein Needs
      • Pre- and Post-Workout Nutrition
      • Foods With Creatine
      • Bulking Tips
  • Training
    • Workouts
      • Back Workouts
      • At-Home Workouts
      • Chest & Back Workouts
      • Full-Body Workout
      • HIIT Workouts
    • Exercise Guides
      • Deadlift
      • Bench Press
      • Back Squat
      • Overhead Press
      • Bent-Over Row
      • Lat Pulldown
      • Crunches
      • Farmer’s Carry
    • Best Exercises
      • Shoulder Exercises
      • Back Exercises
      • Chest Exercises
      • Glute Exercises
      • Ab Exercises
      • Hamstring Exercises
      • Quad Exercises
      • Calf Exercises
      • Biceps Exercises
      • Triceps Exercises
    • Programs
      • Push-Up Program
      • Pull-Up Program
      • German Volume Training
      • 5/3/1 Program
      • Powerbuilding Program
      • The Cube Method
      • 5×5 Program
      • Bodybuilding Programs
      • Build Your Own Program
    • Fat Loss
      • How to Burn Fat
      • Spot Fat Reduction
      • How to Train on a Cut
      • Body Conditioning
      • Workouts
        • Kettlebell Circuits
        • Dumbbell Complexes
        • Farmer’s Carry Workouts
    • Muscle Gain
      • Muscle Hypertrophy Explained
      • How to Build Muscle
      • How to Maintain Muscle
      • What Researchers Say About Muscle Gain
        • Workouts
          • 20-Minute Workouts
          • Kettlebell Circuits
          • CrossFit Workouts for Muscle
          • Bodybuilding Workouts
  • Calculators
    • Protein Intake Calculator
    • Macros Calculator
    • BMR Calculator
    • Squat Calculator
    • Calorie Calculator
Training Workouts

Kinesiology Tape for Shoulder Pain and Stability

Written by BarBend Team
Last updated on July 21st, 2023

Kinesiology tape can be a useful tool to strength athletes for multiple reasons. This article is going to dive into why an athlete would tape, or need to tape the shoulder. One of the main, and possibly biggest reasons to tape the shoulder, is for additional stability that’s created through mental proprioceptive cuing at the shoulder.

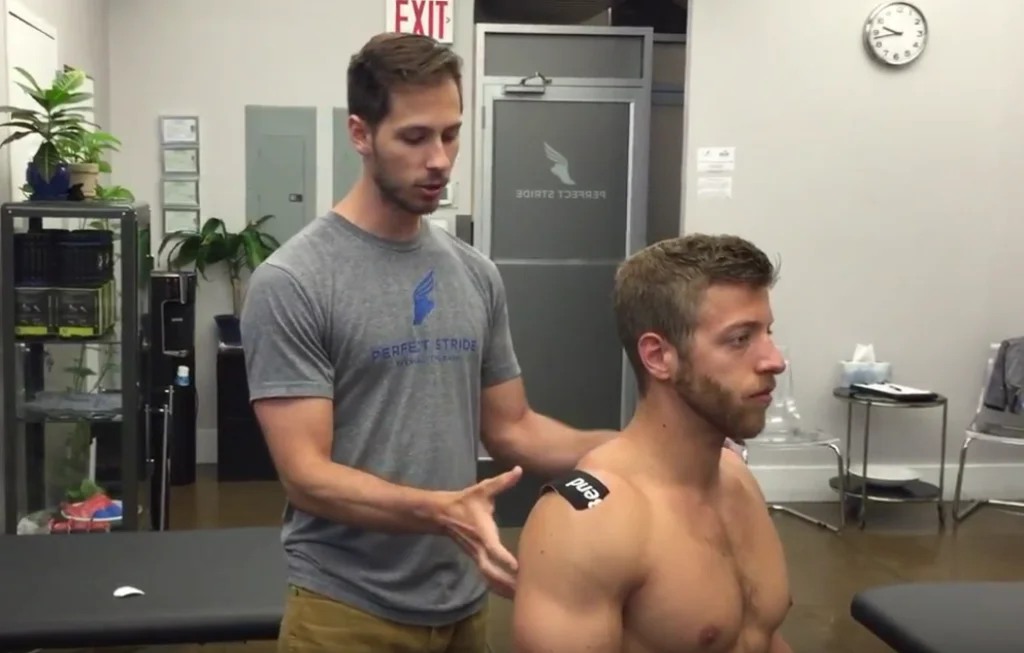
To help us learn more about this, we reached out to Joe Gambino, PT, DPT, and CSCS at Perfect Stride, New York City. Check out the video below where Gambino shows us an easy shoulder taping method, plus read on to the descriptive text that explains why taping the shoulder can be a useful tool for athletes.

Note: All motions shown are for informational purposes only. The information in this article and video is not meant to prevent or cure any disease or injury. It’s always a good idea to consult with a medical professional or trainer before attempting any new training methodology. If you experience any sharp pain while exercising, discontinue movements immediately.

[Looking for the perfect tape to fit your strength sport needs? Check out our Best Kinesiology Tapes of 2017 to find your perfect match!]

Why Tape the Shoulder?

The shoulder joint is an area on an athlete’s body that requires ample stability, but sometimes needs additional help. It’s an extremely mobile joint, so if there’s any lack of stability, then an athlete’s performance can decline. Below are a few of the body parts that make up the shoulder joint and that will be in direct contact with the tape.
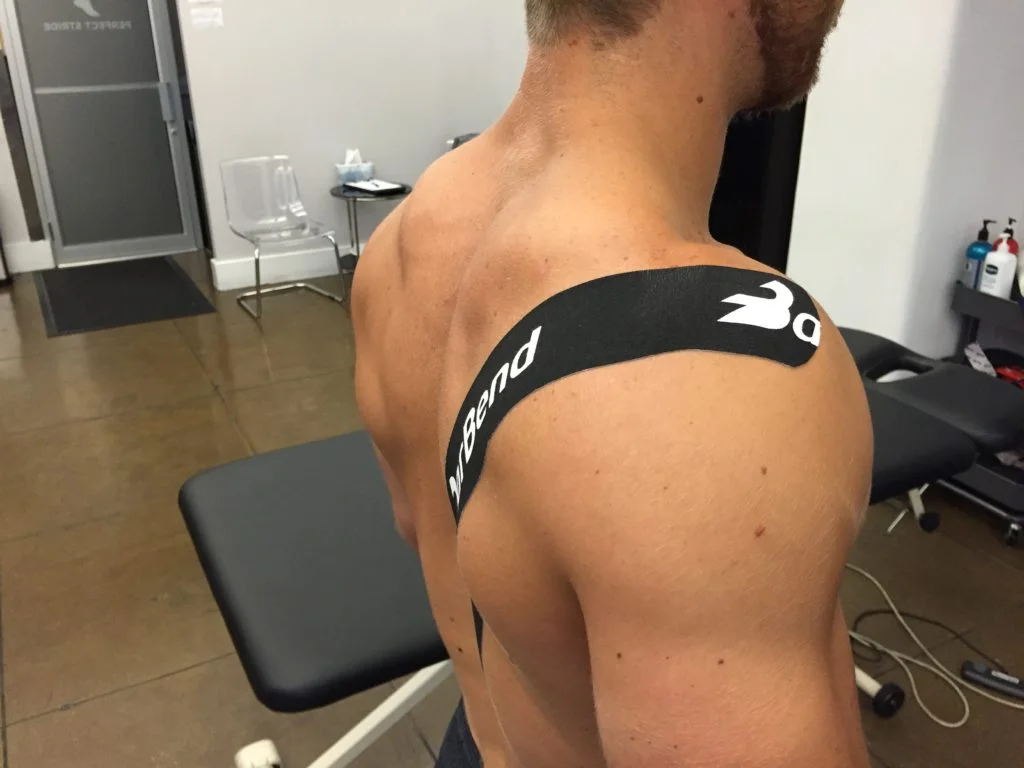
  • Acromion Process 
  • Front/Medial/Rear Deltoid
  • Infraspinatus
  • Latissimus Dorsi 
  • Rhomboid Major/Minor

Tape can help cue the body to increase stability by reacting with some of the skin’s proprioceptors. The above areas are common landmarks the tape will run over, which can help subconsciously cue the body to increase its level of stability surrounding the shoulder joint, and upper back area.

A Simple Way to Tape the Shoulder

1. First Anchor: Acromion Process

Begin by measuring out tape to span from the acromion process (bony shoulder landmark) to the mid-back/spine. Once an athlete finds the amount of tape their body requires, then they’ll cut it accordingly and round the edges, so it doesn’t get caught on clothes.

Feel around on the shoulder for the bony landmark that’s toward the front/middle of the shoulder (everyone will be slightly different). Peel off roughly two inches of the tape’s paper and place the first anchor covering the acromion process.

Shoulder Tape Acromion Process

Once the first anchor has been placed, rub it in for a few seconds to activate the heat activated adhesive. After the anchors fully placed, wrap the tape in a diagonal fashion, so it goes over the rear shoulder to the mid-back.

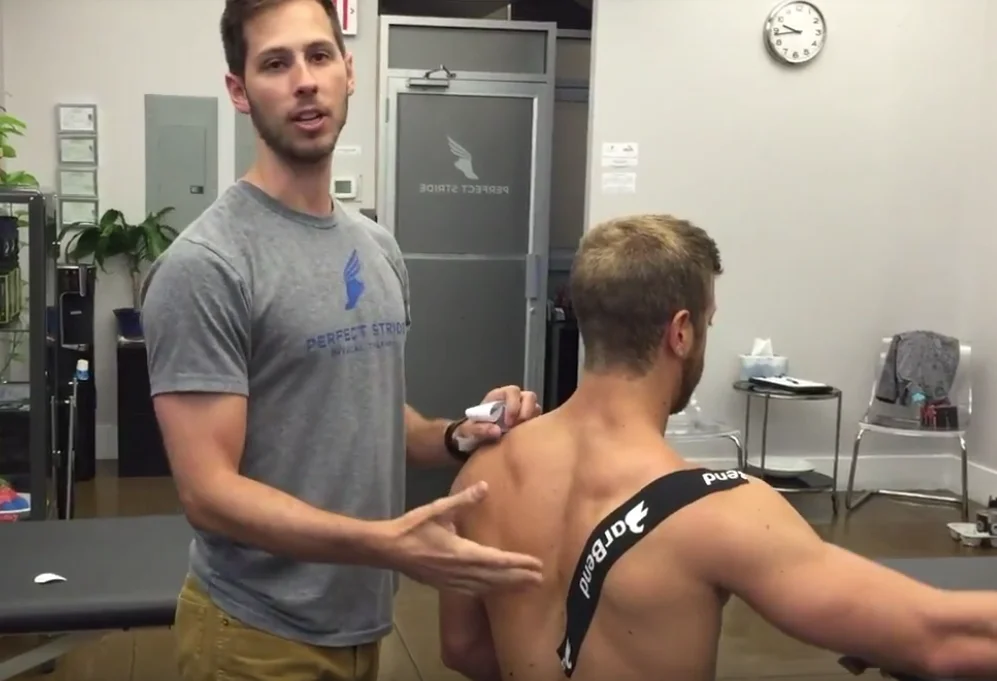
*This is a taping method that will typically require a friend, physical therapist, or coach to assist with. It can be difficult to achieve the right placement and stretch with self-application. 

2. Second Anchor: Mid-Back and Final Tape Placement

With the first anchor in place, peel the back of the tape off, leaving two inches for the second anchor, and apply a 20-50% stretch over the diagonal taping area. Gambino discusses that this percentage will be effective for most athletes, and the research is still sparse on a tape’s amount of stretch and its effectiveness.

Shoulder Taping Second Anchor

Once the tape is in its final placement over the shoulder and down the back, rub it in similarly to the first anchor. As the tape becomes flush with the skin as you rub it in, peel off the final two inches of the tape for the last mid-back/spinal anchor.

Rub on the final anchor, and progressively work your way up the tape rubbing the whole strip to ensure there are no areas that will get caught on clothes.

Shoulder Taping Final

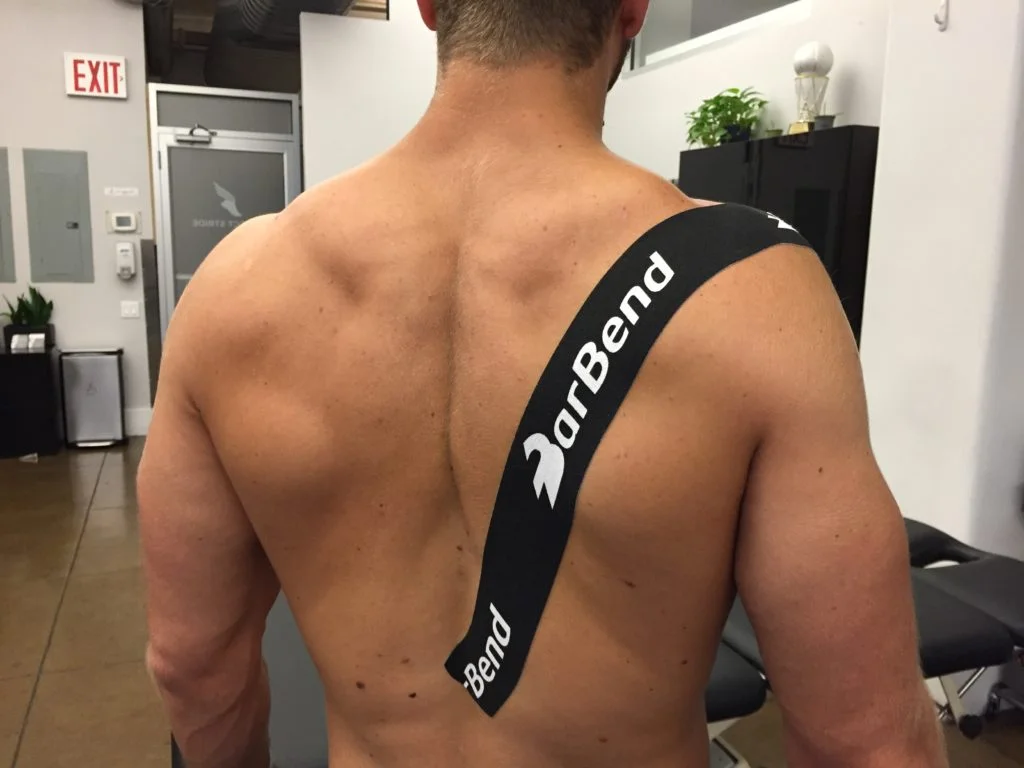
The final tape job will look similar to what’s shared above. Everyone’s body and tape placement will be slightly different due to anthropometrics differences. This is why it’s important to establish your anchor points before applying the tape.

Tips for Shoulder Taping with Kinesiology Tape

  1. Create Tension: Pay attention to how the joint moves and create tension with the tape by slightly retracting the scapula and sitting upright.
  2. Proprioception: Gambino stated that tape itself isn’t the cure for joint instability, but it’s a facilitator for the body’s perception of it. The skin is very sensitive and the tape’s ability to create tension will give the brain feedback to increase stability in the joint being taped.
  3. Stretch: Another aspect Gambino talked about was the amount of stretch for stability. He said that research is conflicted on how much stretch you need, and he usually does 20-50% stretch to enhance the additional proprioceptive feedback.
  4. Hair and Taking It Off: If you’re excessively hairy in a specific area, then you’ll pull off little pieces at a time, and use your hand to gently repeatedly chop the tape off (in a karate chopping motion). You can also pinch the skin to release some of the tapes tension, while taking it off in a partitioned manner.
  5. Cut the Edges: The final tip was the cut the edges of the tape, so it’s rounded. This will prevent the corners from getting caught on edges of clothes and shoes.
Another view of a shoulder with kinesiology tape applied.

Final Taping Considerations

Tape isn’t an end all be all when it comes to providing the shoulder with stability, but if used properly, it can enhance an athlete’s performance. The goal of the shoulder tape is to give the body subconscious cues to enhance natural joint stability. When applied correctly, tape can be an asset for every strength athlete.

About BarBend Team

The BarBend Team is made up of writers and editors with combined decades of experiencing covering the world of strength and strength sports. We're passionate about bringing the best from the world's of weightlifting, CrossFit, powerlifting, strongman, bodybuilding, and more. In addition to coverage of the latest in these and other strength-based sports, our team produces a variety of training, nutrition, and fitness content relevant to all levels and abilities. Interested in getting in touch for a pitch, story idea, or comment? Email us at info [at] barbend.com.

View All Articles

Primary Sidebar

Latest News

Best Cyber Monday Weight Bench Deals (2023)

International Association of Trans Bodybuilders & Powerlifters 2023 Full Results

Do All High-Carb Diets Lead to Weight Gain?

Dana Linn Bailey’s 4 Meal Prep Tips for Beginners

Enahoro Asein (83KG) Decimates IPF Raw World Deadlift Record With 380 Kilograms

Latest Reviews

Redwood Thermowood Panorama Sauna Review

Redwood Outdoors Yukon Cold Plunge Tub Review

Redwood Outdoor Thermowood Garden Sauna Review

Future App Review

Bells of Steel Hydra Rack Review

BarBend

BarBend is an independent website. The views expressed on this site may come from individual contributors and do not necessarily reflect the view of BarBend or any other organization. BarBend is the Official Media Partner of USA Weightlifting.

  • About Us
  • Advertise With Us
  • Contact Us
  • Facebook
  • Instagram
  • Twitter
  • YouTube
  • Pinterest

Sections

  • CrossFit
  • Strongman
  • Bodybuilding
  • Powerlifting
  • Weightlifting
  • Reviews
  • Nutrition
  • Training

More

  • BarBend Newsletter
  • BarBend Podcast
  • The Ripped Report
  • 1RM Calculator
  • BMR Calculator
  • Macros Calculator
  • Protein Calculator
  • Squat Calculator

Policies

  • Accessibility
  • Advice Disclaimer
  • Cookies Policy
  • Disclaimers
  • Disclosures
  • Editorial Policy
  • Privacy Policy
  • Terms of Use

Copyright © 2023 · BarBend Inc · Sitemap