So the barbell is feeling heavier on your back than it normally does. Or maybe you’re benching and benching and benching (because your chest can handle more volume), but your PR isn’t budging.
If you’re putting in the hours but your numbers aren’t moving, you’re probably experiencing one of a dedicated lifter’s worst nightmares: the fear that this is it. You’ve hit your best, and you’ll never get any better.
But before you despair, let’s think through some issues.

Figure Out What Your Plateau Is From And What Weaknesses You Need To Target
Try to notice where your form breaks down, where your lift stalls.
Maybe your triceps need work if you’re having trouble locking out your bench. Could be that you’re just not putting in the accessory work you need to prevent your knees from caving under your squat. Maybe you’re trying to yank your deadlift with your back (I’m having sympathy pains just thinking about it) instead of using your lower body and glutes, to push away from the ground. Maybe you’re just not getting enough sleep, or not fueling your body the way it needs to be fueled.
Sometimes, though, your form and accessory work are all locked in. You’re sleeping and you’re eating and you’re just… stalled.
Lifting is a grind, and if you’re reading this, it’s super likely that you love that grind. But grinding is stressful, and sometimes busting through a plateau is about breaking up that grind, challenging yourself in a new way so that your mind is engaged differently, so you can target different weaknesses in your lifting patterns. And — maybe this is the most important bit — so you can toss a little creativity and fun into your training routine.
Enter… kettlebells.

Why Kettlebells?
These oddly-shaped puppies can definitely help get you out of trouble you’ve been having with moving the bar. Why?
You physically move differently with a kettlebell. Let’s face it — they’re weird little guys, and they require different grips, different angles, and different ways to manipulate them through space. Your stabilizers will work differently because the bells are by nature so imbalanced, and since a lot of kettlebell moves are momentum-based, you’ll be breaking out of the rut of slowly, meticulously grinding out heavy reps.
But also… kettlebells are just fun. And plateauing is the opposite of fun. It’s frustrating, it’s when you start to beat yourself up, and it’s when you let your ego take over — you’ll often put more weight on the bar to try to prove something to yourself instead of stripping the weight, along with your ego, to reset yourself. (Be honest: you know you’ve done it.)
To melt away some of that frustration, a week with kettlebells can be heaven-sent:
- you won’t be lowering the weight on your barbell (though you should always be programming deload weeks anyway), so you won’t feel quite so demoralized, and
- your body will be challenged in a different way than normal, so trust me: you’ll feel the grind that you go to the gym to chase.
It’ll just be a different type of grind, and oftentimes, different is what your mind and body need when your numbers have gone static.
[See our picks for the best kettlebells on the market!]

The Workouts
Two common issues lifters come across — especially when you emphasize all barbell, all the time — are muscular imbalances and, even though we never want to hear it, poor conditioning. You might be finding that your plateau is from strength imbalances, or you might find that you’re just straight-up running out of gas too early in your sets.
The following two programming options for your kettlebell week won’t tax your nervous system like heavy lifting will: and you won’t be going super heavy here. That’s not the point. Think of it these weeks as both deload and a recharge. You’ll give your central nervous system a break (which is often a culprit with plateaus) and you’ll be targeting your weak spots all at the same time.
You can take either of the below programs and mix-and-match according to your training goals, preferences, adventurousness, and time requirements.
Pick your kettle-poison as needed. Always accommodate for your injuries and make sure your form is locked in. And — really can’t emphasize this enough — have fun.

Imbalances Program: A Unilateral Week
If you suspect your plateau is from strength imbalances, this is the kettlebell week for you. Maybe you notice your squat is shifting from side-to-side, emphasizing one leg over the other. Or that your bench wants to lockout with one arm while your other is wanting to crap out on you. If those sound familiar, have at this.
Day One: Lower Body Push
1A: Unilateral Front Rack Squat — 3×8
Make sure your wrist is neutral as the bell rests comfortably on your forearm. Keep your chest tall and, if it helps you, your empty hand behind your back or out in front of you. Make sure to avoid knee cave (toss a band around your thighs if you need extra help with that).
1B: Unilateral Front Rack Lunges — 3×6 (per leg), 90-second rest
You’re going to rack the bell the same way as you do for the move above, and you’re going to lunge with the same cues: chest tall, your empty hand doing what it needs to support you balance-wise (but know that most of the support should be coming from your core). Make sure not to cheap out on these — lead with your weaker leg so you can make sure you’re really giving it everything you’ve got to smooth out those imbalances.
2A: Double Rack Lunges — 3×4 (per leg)
Ah, more lunges. Except double-racked this time, meaning two kettlebells in front rack position. Keep your wrists neutral and your chest tall. Breathe, and remember that four reps (per leg) will not, no matter how much it feels like it, last forever.
2B: Double-Racked Front Squat — 3×6, 90-second rest
Pretty straightforward here: a kettlebell in each hand, front racked, into a squat. You’re keeping the reps low here because by this point, you will hate everything. Especially if you choose to tackle an added challenge: don’t take the bells out of rack position in between moves. Just flow A right into B. Pain (it shouldn’t be sharp or anything, just… that burn) will be there for sure, but it’ll give your core and forearms an extra shot of training for sure.

Day Two: Upper Body Pull
1A: Kettlebell Deadlift — 3×8
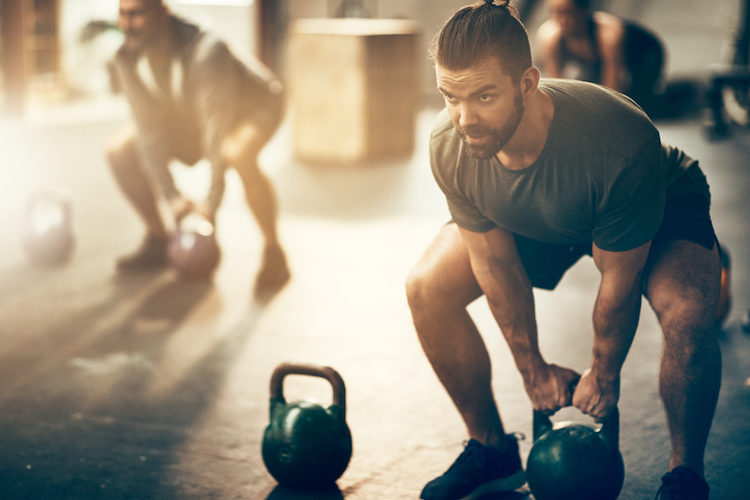
You’re going to set up like you would for a barbell lift, except your stance will be narrower (because the center of gravity and mass is more contained in the kettlebell, instead of spread out over six feet like with a barbell). And, to keep the bell over your laces (like you should be doing with barbell deads), you’re going to start the lift with the bell between your legs, the handle lined up with your laces. Remember it’s a hip-hinge, not a squat, and have at it.
1B: Kettlebell Upright Rows (Unilateral) — 3×10 (per side), 75-second rest
Unilateral upright rows with kettlebells are an exercise (pun intended) in control: you need to not yank the weight and you need to keep your torso centered. Your shoulders and core should not look like any weight is shifting: the only indication should be the pulling back of your elbow and the bell itself tracing its way up your body. It might be tempting to hike your shoulder to “help” the motion, but don’t do the thing. Keep it disciplined, and lower the weight if you need to. It’s a form lift, not an ego lift. Remember that, and remember not to yank the bell higher with your wrists at the top of the lift, and you’ll be good to go.
2A: Unsupported Kettlebell Rows — 3×8
Settle into a solid hip hinge, like you’re going to do a barbell row. Except you’ll have a kettlebell in each hand, and those puppies are what you’ll be rowing. You’ll have more range of motion than you would with a barbell, and you should take advantage of it, pinching your shoulder blades together at the top of the lift: but never, of course, yank with your back to get extra movement.
2B: Kettlebell Upright Rows (Bilateral) — 3×6 (per side), 75-second rest
You’re going to go back (see what I did there?) to upright rows, but with a bell in each hand this time. You’ll still be correcting imbalances because both arms are doing independent pulling. And again, if you want an extra challenge, keep the bells in your hands between A and B. A little extra attention to your grip strength never hurt anybody (except your forearms, but what doesn’t kill them will make your lifting better).

Day Three: Core
1A: Alternating Kettlebell Swing — 3 x 45 seconds
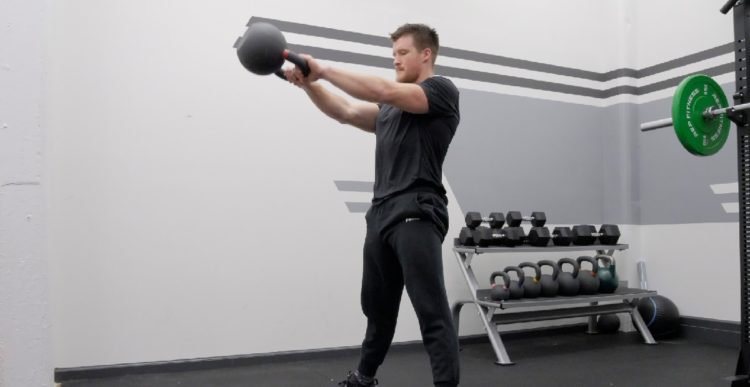
Make sure you’re confident enough with regular swings to accomplish the badass-looking feat of switching the bell between your hands mid-air (at the top of your swing, about chest-height). Set a timer, keep your form locked in, and see how many quality reps you can get in. Each go-round of the circuit, try to beat the number before without compromising your form.
1B: Suitcase Carry — 3 x 30 seconds (per side, one right after the other), 90-second rest
Especially following swings, this is going to challenge your grip and core. A lot. But try to get the full minute in — 30 seconds in one hand, switch hands, then immediately go into the next 30 seconds. It’ll make it much harder, and therefore more… fun. Because we know you’re in this for the grind anyway.
2A: One-Handed Swing (Unilateral) — 3 x 30 seconds (per side, one right after the other)
This will look the same as the alternating swing, except you’ll keep the bell in one hand the entire time (no switch at the top of the swing). It’ll fire up your core in all the best (and worst) ways, and your grip strength will come out stronger, too.
2B: Double-Offset Farmer’s Walk — 3 x 30 seconds (per side, one right after the other), 90-second rest
So for this one, you’re going to hold one kettlebell, all regular and easy, in your right hand. In your left hand, you’re going to have a kettlebell of the same weight in front rack position. And then you’re going to farmer’s walk, slow and controlled. When thirty seconds are up, you’re going to switch — right hand in front rack position, left hand with the bell by your side — and have fun for another thirty seconds.

Day Four: Conditioning
1A: Double Kettlebell Swings — 10 reps, EMOM (every minute on the minute, alternating minutes with exercise B)
Ten reps might not seem like a lot, but when you’re double swinging… it is. With a bell in each hand, keep your palms facing each other, your stance a bit wider than you would do for a single-bell swing. It’s okay if the bells clink a little bit, but as you get used to the movement, you should get more efficient and they should clink less.
1B: EMOM Kettlebell Pushups — reps to failure, EMOM, alternating minutes with exercise A, 16 minutes total
Sixteen minutes total might not seem like a long workout, but today is the day to go hard. And you’ll feel just how hard you’re going throughout because the clock will be relentless. But keep your wrists neutral, drop to your knees if you need to in order to keep your form locked in, and do pushups with those bells as braces. It’ll hurt, but so good.
Swinging Program: Conditioning Week
If you find that you’ve got nothing in your tank by rep four or five, you probably need to both give your central nervous system a break and improve your cardiovascular conditioning. To give your body a bit of both, kettlebells are a great option. They’re low-no impact, won’t tax your CNS like heavy grinds do, and they’ll give your heart a reason to pump a little harder for a little longer (ultimately training your body to work more efficiently when you’re under the bar).
Day One: Swing, Swing, Swing
These are pretty much all what they say on the tin: you’ll be swinging a lot, for nearly two minutes at a time. It’ll be brutal, but your conditioning will whip itself into shape pretty quickly. Always remember, though, that you can make adjustments to the length of sets, the rest times, whatever you need. It’s your workout, and it should fit your body.
1A: Alternating Swing — 30 seconds.
1B: Two-Handed Swing — 30 seconds.
1C: One-Handed Swing (Unilateral) — 15 seconds (per hand, one right after the other).
1D: Double-Kettlebell Swing — 15 seconds, 90-second rest, repeat circuit 4 times.
[Related: 5 kettlebell circuits to improve your endurance]
https://www.instagram.com/p/BsyNcK8hmLS/
Day Two: Core Conditioning
1A: Double-Racked Front Squats — 3×10, speed reps.
Go a little lighter than you normally would here, because you’re going to be going full range of motion (no half squats in this house, unless you’re training that move specifically or have specific body needs) but you’re also going to be going for speed. Blast into and out of each rep, and ten reps will feel like a lot, even without too much weight.
1B: Two-Handed Swing — 3×15, rest 90 seconds.
After pre-exhausting your core with the front squats, these will feel like a challenge — just make sure your form stays locked in the entire time.
2A: Kettlebell Cleans — 3×8 (per hand, one right after the other).
Make sure you’re setting this one up properly: your grip off to one side (the web connecting your thumb and index finger flush with the curve of the handle), and when the bell is on the ground (pre-lift) it should be positioned with your thumb facing behind you. That way, you’ll be setting yourself up for an easy process of threading your wrist through and under the bell when you bring it into rack position, without thwacking your forearm (no one wants that).
2B: Kettlebell Planks — 3 x 45 seconds.
Simple. Get into pushup position, but instead of holding a full plank with your hands on the ground, you’re going to be grasping the kettlebell handles to hold yourself up. It will be a very long 45 seconds, and there’s no shame in resting before that. Choose heavy bells for a broader base of support. It’ll still fire up your core, but your forearms will shake a lot less.
2C: Double Kettlebell Swing — 3×10, rest 90 seconds.
Simple — ten reps. Except they won’t feel simple at the end of this circuit. Just keep good form, and know that 90 seconds of rest is approaching.
Day Three: Grip Work
These moves are all pretty straightforward, but remember that everything here is based on time, not number of reps. So your forearms will be displeased with you. But once they start powering even stronger lifts when you get back to the barbell, they’ll forgive you.
1A: Suitcase Carry — 30 seconds per side (one side right after the other).
1B: One-Handed Swing — 15 seconds per hand (one hand right after the other), 45-seconds rest.
2A: Kettlebell Upright Rows (two hands) — 30 seconds.
2B: Double-Racked Front Squats — 30 seconds.
2C: Farmer’s Walk — 30 seconds, 90 seconds rest.

Day Four: Power Moves
No supersets for today: just straight-up lifts. You’ll notice that the rep count is lower, because you’re working for power here. Leave it all on the proverbial floor, and have a good time.
Kettlebell Snatches — 4×4, per side, 75-second rest.
Watch out for the infamous forearm slap at the top of the lift, which should end with your arm and bell above your head, your shoulder nice and packed instead of wobbly. Use the same offset grip you use for kettlebell cleans, and make sure you initiate the pull from your hips, following through with momentum rather than trying to turn it into a shoulder press. Pull the bell back to you, bringing it down to shoulder height and then dropping back to start position from there — don’t just let it swing down. Your shoulders will hate you, and no one needs that.
Kettlebell Cleans — 4×4, per side, 75-second rest.
Have at it, but use a higher weight than you might otherwise, because the reps are low and we’re building power here.
Kettlebell Thrusters (Unilateral) — 4×6, per side, 75-second rest.
With one bell in front rack position, drop into a solid squat. Use the momentum from your hips lifting to thrust the bell over your head, steady and solid. Like with a snatch, bring the bell back down to shoulder height and rack position with steady control, as opposed to the momentum that goes into the first part of the lift.
Kettlebell Thrusters (Bilateral) — 4×7, 75-second rest.
This is going to look the same as the unilateral thrusters, except… there will be two! One in each hand, both popping up (use momentum from your squat) and coming back to rack position (use the control, Luke) simultaneously. If one arm is struggling more than the other, switch both arms to a lower weight.
Switch It Up
Now you’re ready to destroy your plateau. With kettlebells. Because kettlebells both destroy and cure everything.
Remember that you can mix and match components of these programs to best suit your needs, and make any modifications your body needs along the way. These workouts are for you, so you don’t have to follow them like they’re written in stone. Have fun, and breathe through it every time. You’ve got this, but your plateau doesn’t stand a chance.
Featured image via mrbigphoto/Shutterstock
