It’s likely you’re training the big 3 (squat, deadlift and press) because this is the meat and potatoes of all good training programs. And are good, correct?
But to keep improving, you must look to include accessory lifts into your routine that strengthen weak points and keeps you off the disabled list. Because when you’re focused on getting stronger, these exercises (sometimes) get pushed to the wayside.
Here’s a few exercises brought to you by some of the brightest and creative minds in the fitness industry that will work on strengthening the muscles and movements that play a big role in the big 3.
Now you have no excuse but to add some spice to your meat and potatoes.

1. Adductor Exercises
Kellie Davis, Strength Coach and author
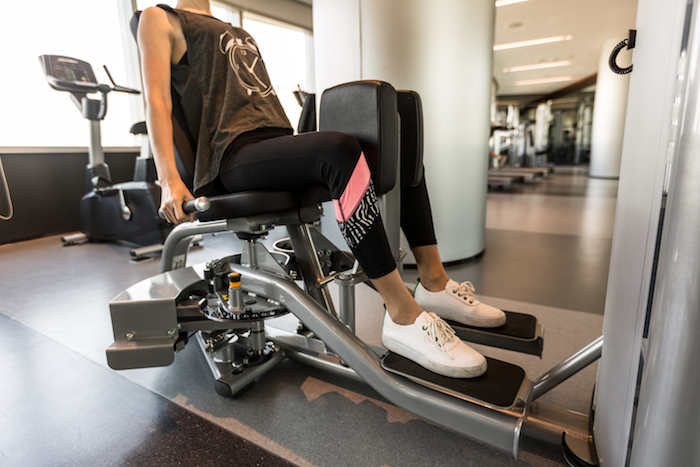
Most lower body exercises that are commonly programmed do not target the adductors, or they allow for compensatory patterns that make up for adductor weakness. It’s far sexier to build a bigger squat than it is to squeeze a ball between your knees or hammer away at machine adductions. But weak adductors are commonly seen in athletes and laypersons alike.
The adductors play a crucial role in your overall hip, knee, and back health. This muscle group brings the hips and pelvis toward a neutral, and work to constantly keep the trunk stabilized.
They work to help the hips flex and extend, and, to a slighter degree, rotate. In addition, strong adductors help to stabilize the medial knee as they directly attach to the medial patellofemoral ligament.
One of my favorite ways to strengthen the adductors is Copenhagen Planks. The great thing about this plank variation is you can regress and progress it to suit various strength levels.
Here are 3 levels of Copenhagen planks with different variations.
Beginner
Bent knee Copenhagen Plank
Bent knee isohold Copenhagen Plank
Bent knee active Copenhagen Plank
Intermediate
Short lever Copenhagen plank
Short lever iso hold Copenhagen plank
Short lever active Copenhagen plank
Advanced
Copenhagen plank
Active Copenhagen plank
Active knee drive Copenhagen plank

2. Hyperextensions
JC Deen, Fitness and Nutrition Coach
I think it’s neglected for a few reasons:
- It’s an uninviting piece of equipment. It’s rarely shiny or displayed prominently in a gym.
- The average gym goer doesn’t know how to use it effectively to target their glutes or hamstrings.
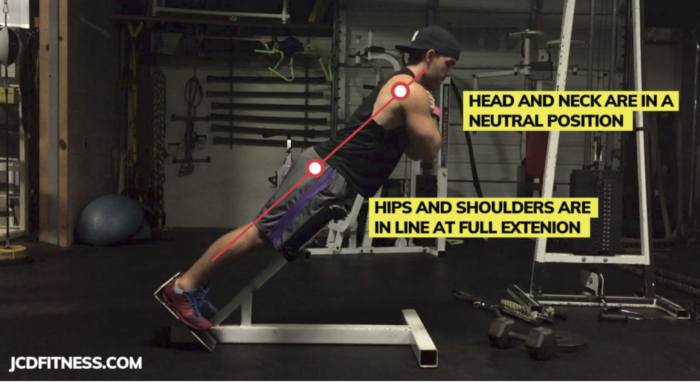
- Most people haven’t been taught how to do the movement properly, so when they try it on their own, it turns into a lower back flexion/extension instead of a hip extension.
Here are some benefits:
- When done properly, it is a major player in developing strength and muscle mass that carries over to the squat and deadlift.
- It’s a good movement to teach people how to activate their glutes and hamstrings for hip hinging movements.
If done the right way, you’ll learn how to properly use the glutes and hamstrings while cutting out the over-activation of the lower back.
And this translates very well to the deadlift because one can do the deadlift using mostly their hips, or mostly their lower back. It’s really all about the positioning, form, and of course, the person’s anatomy.
[Read JC Deen’s full article on the right way to do hyperextensions here.]
3. Box Squats
Dr. John Rusin, Owner, John Rusin Fitness Systems
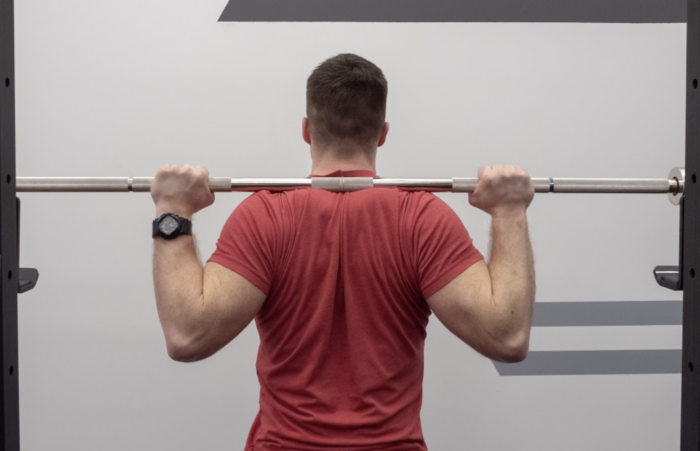
The box squat has gained the notorious reputation for being an inherently dangerous squat variation that only powerlifters do and that causes many other lifters and athletes to shy away from this staple squat variation.
This makes the box squat one of the most underutilized movements in the gym. Doing it can rebuild your squat pattern from the ground up while adding a safe spark to your explosive strength and power work.
Here’s my guide to doing it correctly.
When properly programmed and pristinely executed, the box squat transcends populations and is one of the safest and most effective ways to load the squat pattern.
4. Psoas Marches
Meghan Callaway, Strength Coach and Writer
While countless people spend a lot of time stretching their psoas muscles, they devote very little time to strengthening them. Here is a unique, and more advanced psoas march variation that will strengthen this neglected muscle.
This exercise strengthens the psoas muscles, develops lumbo-pelvic stability, grip strength, and shoulder and scapular stability (as both remain in a fixed position for the duration of the movement).
Key Coaching Points:
- Position each kettlebell so the horn is resting on your forefoot and dorsiflex your feet.
- Set your body so it’s in a slight hollow body position. Your head, torso and hips are in a stacked position (I love to use a canister analogy), and your knees are straight.
- Set your grip so your palms are facing away from you (pronated) and adopt your preferred hand width.
- Without bending your elbows or initiating the movement with your arms, use the muscles in your mid and upper back and draw your shoulder blades together and down and lift your body a few inches. Do this for the entire time.
- Before you go, take a deep breath in (360 degrees of air around your spine), brace your core, and tuck your ribs towards your hips (close the space in your midsection). This will help prevent you from swinging.
- While keeping your entire body in a fixed position (aside from the moving leg), slowly bring your knee up so your thigh is at least parallel to the ground and lower your leg back to the starting position with complete control.
- Repeat using the opposite leg.
- As for the non-working leg, keep your knee straight.
- For the duration of the exercise, keep your core muscles braced (360-degree brace), and ribs tucked towards your hips.
- Do not allow your lower back to hyperextend (or round), ribcage to flare, torso, spine, or hips to rotate, as this defeats the purpose of the exercise. Do not lose the “canister” position.
Do not use any momentum or allow your body to swing. Aside from your one leg, your body should remain close to still.
[Learn more with these 3 exercises for a stronger psoas.]
5. Lateral Lunges
Travis Pollen, Personal Trainer and PhD Candidate in Rehabilitation Sciences
All lunge variations are all beneficial. Incorporating a mix of them into your training will build big strong legs. But in terms of the muscles they train, they’re more similar than they are different.
Enter the lateral lunge – one of the most neglected exercises. The lateral lunge is a close cousin of the forward lunge. The only difference is that instead of stepping forward, you step to the side.
In addition to hitting the quadriceps, the lateral lunge has the added benefit of training the hip adductors and abductors (the oft-neglected muscles of the inner and outer hip/thigh). Having strong hips in all directions can protect against injury and improve performance in activities that require side-to-side movement.
The lateral lunge can be performed in several ways, from assisted (with a suspension trainer) to bodyweight to added external load.
- The assisted version is a good choice for beginners and people who struggle with balance. It also provides a nice adductor stretch on the straight leg.
- The bodyweight version is great for warm-up prior to heavy lifting and sport. Reach the arms forward as a counterbalance or hold a light plate.
- The loaded versions are go-to exercises for building muscle. A variety of implements can be used (e.g. dumbbell, kettlebell, barbell), based on personal preference.
Lateral lunges can be performed in the same direction repeatedly for the desired number of reps before switching sides or in an alternating fashion, switching lunge directions each rep.
Experiment to find the step distance, depth, and torso angle that’s right for you. The step should be wide enough that you feel a stretch in the inner thigh of the straight leg.
The depth should only be as low as you can comfortably control. There’s no need to plop down, ass to grass. The torso angle doesn’t have to be totally vertical. A little forward lean is okay as long as your back isn’t rounding excessively.
[Learn more: What’s the difference between a lateral lunge and a Cossack squat?]
Finishing Up
By training neglected muscles and movements, not only are you strengthening your weaknesses but you’re also strengthening your strengths when it comes to the big 3. And by doing so, you’re protecting against injury and you’ll build a better performing (and looking) body.
A win-win in anyone’s book.
Featured image via Meesiri/Shutterstock
