If you’re having nightly dreams about deadlifting while you’re missing your barbells, it’s easy to get demoralized. When all you have is a single kettlebell — and even a heavy one doesn’t hold a candle to your warm-up barbell deadlift weight — panic mode may well be imminent. And it’s okay to be upset about missing your favorite lift and the feel of a platform under your feet.
But that sadness doesn’t have to mean you don’t work in your deadlift pattern at all. You can still work to improve your deadlift with a single kettlebell, and rest assured that your most beloved move will be right there waiting for you to come back to your gym.
Related: Single Kettlebell Workouts for When Resources Are Limited!

The Exercises
For each of these single kettlebell lifts, you’ll want to mentally prep yourself. It’s easier to get discouraged and in your own head about not having access to barbells if you’re cruising through “light” motions thoughtlessly and without intention. Even if your kettlebell is relatively light, make sure you are setting each lift up like you’re about to lift a heavy barbell. Breathe and brace properly, and pretend you’re on a lifting platform. Easier said than done, sure, but getting into that mental space will help keep your head in the game and get the most out of your single kettlebell deadlift moves.
For each lift, try for 3-4 sets — but your rep scheme will depend on the weight of your kettlebell. If you’ve got a super light bell, feel free to train in the 15-25 rep range (yes, you can push for a bit of endurance). If you’ve got a heavy bell, train more cautiously, especially if you’re not used to doing unilateral moves with hamstring emphasis (like the single-leg RDL) — stick to a lower 8-12 rep range, and always listen to your body if it’s telling you something doesn’t feel right.
Conversely, listen to your body when it tells you it can do more, because with such little weight available, pushing into endurance rep ranges can be a good choice for building a lot of muscular stamina (which, yes, you’ll need when you reunite with your barbell).
Suitcase Deadlift
You’re going to perform a deadlift with the same form as you would always have, so set up the same way. (Though if you tend to lift sumo, get into a conventional stance for this one.) Place your kettlebell on the outside of your left foot (so next to your left pinky toe, with the bell aligned with your mid-foot just like a bar would be). Hinge down as you would with a deadlift, pick up the bell with your left hand, and come back to standing with the same form as you would while performing a regular lift (make sure not to hyperextend your back).
Of course, your center of gravity is going to be off-center because you’re unilaterally loaded (and the bell is outside your foot and next to your body, rather than in front of it). The trick here is to brace your core and focus on your form heavily enough that you don’t look like you’re unilaterally loaded. AKA, don’t slant over toward the bell. Just perform your lift as usual, and your stabilizer muscles — and your deadlift — will thank you.
- Full Guide: Suitcase Deadlift
Single-Leg RDLs
They might seem like a glorified balance exercise, but don’t let your powerlifter’s hatred of all things balance deter you — single-leg RDLs are excellent ways to get deep into your hamstring strength. (And yes, you do need excellent stability to perform a deadlift properly — how else are you going to be balanced enough to drag a heavy bar directly up your shins?)
Set up with the bell in your left hand and your feet in your conventional deadlift stance. Keeping your hips square, brace your core and send either your left or right leg back behind you (which leg you send will depend on your own sense of balance and comfort level, so experiment with what your body wants and needs).
Try to keep your back leg relatively straight as you counterbalance the movement by hinging forward at the hips. Keep the bell as close to your body as possible, stopping the movement when the bell is at about shin height and/or when you start to feel a stretch in the hamstring of your standing leg (whichever comes first). Switch sides and do it all again.
- Full Guide: Single-Leg RDL
Sumo Deadlift
Because you’re not actually working with a barbell, you might need to adjust your sumo stance to bring your feet a bit closer together than normal. But either way, set up in a sumo stance with the bell aligned with your midfoot, square in front of your hips.
Hinge down (with as much or as little a knee bend as you tend to use in your sumo squat) to take the handle in both hands, brace, and snap back up to upright. You might be using just a kettlebell (and it might be fairly light), but you still want to keep your body as tight as you can throughout the lift.
- Full Guide: Sumo Deadlift
Bent-Over Row (Explosive)
With your kettlebell handle in one hand, hinge at the hips until your back is as parallel to the floor as you can make it without straining your hamstrings. Once you’re set up for a row, use your lats to squeeze the kettlebell up to your rib cage, as opposed to yanking it up with your biceps. Your biceps will work after a while, sure, but you want to emphasize the work of your back here, so think of your arms as levers to the bell rather than the primary pullers.
Once the kettlebell reaches about your rib cage, switch it between your hands — just like you would in an alternating kettlebell swing, but under your body instead of out in front of it — and repeat the row with your opposite hand. Make sure your back is remaining neutral and your hips are staying square the whole time (AKA, don’t tilt or lean to one side or the other during the rows or during the explosive transition.
- Full Guide: Bent Over Row
Unilateral Upright Row
Set up with your feet squarely under your hips and keep your knees soft. Holding the bell in your left hand, brae your core as you drag it vertically up to about chin level. Use your upper traps and rear delts to drive the movement rather than yanking it haphazardly. Your elbow should travel up and slightly behind you to give extra emphasis to your posterior chain.
When you’re nearing the end of your range of motion, don’t give into the temptation to bend your wrist to get the weight slightly higher — it won’t help the muscles you’re actually targeting, and it’ll mess up your wrist long-term. Stop where your body naturally stops, and repeat. If you trust yourself and want to add an explosive element, switch hands at the top of the lift — just make sure you have the shoulder mobility you need to get your elbows that far back and secure.
- Full Guide: Upright Row
Alternating Swings
For more explosive ways to develop your posterior chain and boost your deadlift without a barbell, you’ll want to try some swings. Especially if you’ve only got a lighter kettlebell, alternating swings are going to help fire up your glutes and hamstrings while keeping your back nice and neutral (just like it should be during your deadlift). You’ll grease the groove of your hip hinge, too, and that’s always good for a solid deadlift.
Set up with your feet hip width apart (or slightly wider, depending on the size of your bell and your comfort level with swings). Place the bell a foot or two in front of you, so that you have to hinge forward to grab it (think hiking a football). Keeping your spine neutral, use one hand to drag the bell back toward your body (you can use your free hand to counterbalance or follow the movement).
Hike the kettlebell back behind you, keeping the body of the bell above your knees and letting your forearm graze your inner thigh to avoid any painful complications like the bell accidentally hitting you where you really don’t want it to. Snap your hips up to bring the bell out in front of you, swinging to about chest height. All the bell’s movement should come from the hips, not your arms. At the top of the swing, switch hands and repeat.
- Full Guide: Kettlebell Swings
Dead Stop Swings
You’ll set up the same way this time, but use two hands to start your swing. Complete a single swing as normal, but don’t flow from one swing into another — instead, swing back (to start your momentum from your hip hinge), up (until the bell reaches chest height), back down (behind you, but start to slow the bell down), and then just don’t swing it up again. Let the bell come back to the floor in front of you instead, into a dead stop.
This way, you’ll have to set the swing up again completely — since you’ve killed the momentum, your body will need to retighten to initiate the swing again. Think about the difference between using a “bounce” between reps in a deadlift set versus letting the bar come to a full halt on the ground between each rep. The second one is a lot harder (and a lot better for developing strength).
Clean and Press
Set up with the kettlebell between your hip-width-apart feet, aligned with your midfoot. The handle should be long-ways, so that when you grip it, you need to rotate your hand with your thumb pointing back behind your body. Offset your grip so that the pad between your thumb and index finger are snug against the curve of the bell (again, with your thumb pointed back behind your body. Explode up with a slight knee bend and solid hip hinge, using your posterior chain (rather than your arms) as the driving force of the movement.
Keep the bell tucked as close to your body as you can (your elbow dragging along your rib cage) as you approach rack position. Loop your hand under the bell so that you catch it in rack position, careful not to yank the bell and therefore flopping it painfully on your wrist and forearm. Once you reach rack position, set your core by squeezing your glutes and quads, then press the bell overhead. Come back down to rack position with slow control, then repeat.
- Full Guide: Kettlebell Clean and Press
Snatch

Make sure you have excellent shoulder mobility and a very strong, crisp kettlebell clean down before you even attempt this one. To perform a kettlebell snatch, you’ll start just like you start an alternating kettlebell swing — with the bell out in front of you, one hand grip, and swing it behind you to build momentum from your hip hinge. This time, though, make sure your grip is off-center, with the web between your thumb and index finger hugging the curve of the handle. And instead of bringing the bell out into a full swing, ease it into a partial swing and transition into a high pull.
Do this by activating your upper traps and rear delts to bring your elbow back behind you (like you’re elbowing someone in the face). Once the bell gets close to your body, thread your hand under the bell (this will be made a lot easier by your off-center grip) and let momentum peel the bell up overhead. Come to full lockout above your head and feel free to hover there for a moment, with the bell resting on the back of your forearm to reset your mind and your form. Flip the bell over your hand and swing it back down. You can either use the momentum of the swing to go right into another snatch, or bring it to a dead stop to reset the move.
- Full Guide: Kettlebell Snatch
Weighted (Single-Leg) Glute Bridge

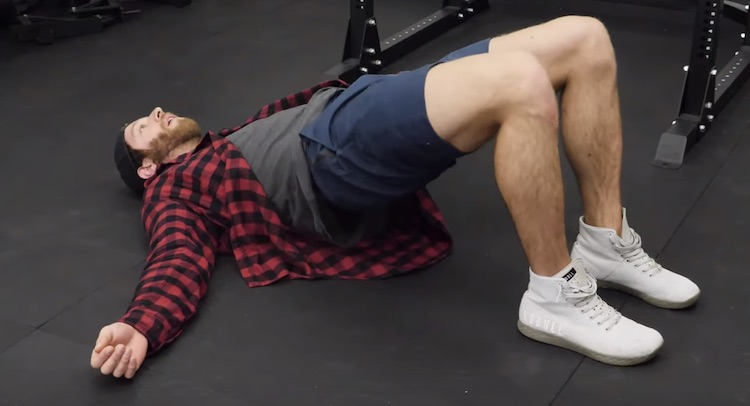
Set up for a single-leg glute bridge, laying on your back with both knees bent and your feet planted on the floor. Hug your kettlebell up to rest in your hands just below your navel, as close to the center of your hips as the bell and your comfort level allows. With intention, straighten one leg until your thighs are parallel, and press the floor away with your planted foot.
Keeping your hips square, raise them as high as you can toward the ceiling. With slow control, come back down to the ground… and repeat. Switch legs when your reps are done, and make sure to keep your form impeccable the entire time.
- Full Guide: Glute Bridge
Deficit Deadlift
Got an old college textbook that you’ve always wanted to burn, but will settle for stepping on instead? Hop onto that (or something similar and stable) and set up for a regular old kettlebell deadlift. But because you’re standing on your old calculus text, you’ve given yourself at least a couple inches of deficit. This will help you develop a much more solid range of motion coming off the ground.
Even though you’re moving with a kettlebell that is likely a lot lighter than what your barbell lift would be, brace your core and move as though the weight were heavier — this will help your body transition back to the barbell effectively when the time comes.
- Full Guide: Deficit Deadlift
Bottoms-Up Suitcase Carry
If you’ve only got a super heavy kettlebell, it’s definitely alright to perform these carries in rack position or just holding an overhead press. But if your bell is light enough (and your grip is solid enough), press the kettlebell up in bottoms-up position, AKA with the bottom of the bell facing the ceiling. Once you’ve stabilized the bell with your elbow locked out (it’s okay if this takes a few moments), engage your entire core and start walking slowly and with intention. Lead with your hips and keep your traps engaged.
Resist the temptation to counterbalance the offset weight by leaning to one side. Keep your body upright, as though you were sharing weight evenly between your hands (or better yet, like you’re not carrying any weight at all). Walk as long as you can with solid form and then switch hands.
- Bottoms-Up Suitcase CarryFull Guide:
Half Turkish Get-Ups
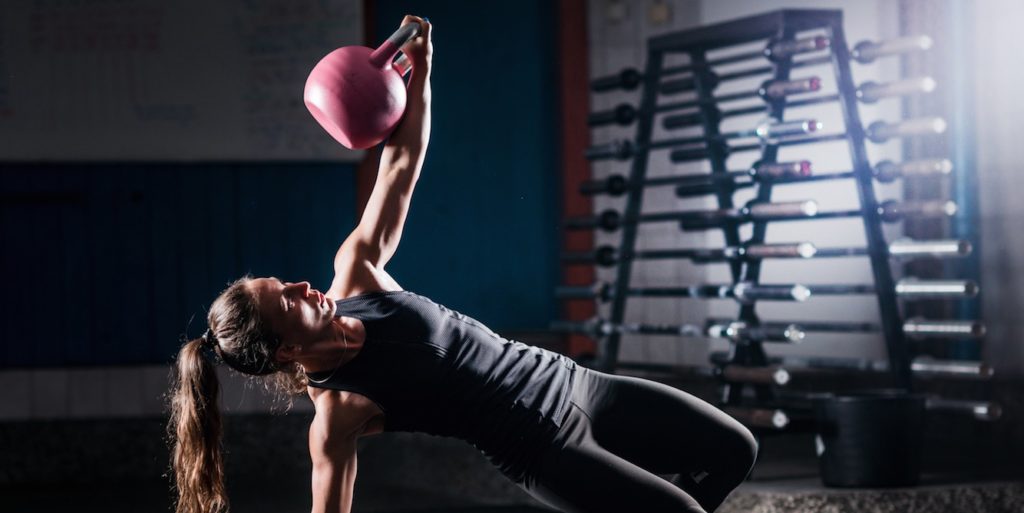
You really want to be emphasizing the hip-raising bit of the Turkish get-up here; hence why you’re only doing a half get-up. Set up by laying on your right side, hugging your kettlebell by the handle in your right hand. Roll over onto your back, bringing your bell with you. Splay your left leg out on the ground at about a 45 degree angle, with your right knee bent and your right foot planted firmly on the ground. Your left arm, also lay out at about a 45 degree angle. Keeping your hips square, press the bell up with your right hand just like you would with a floor press, except turn your palm so it’s facing your left side. Pack your shoulder by pushing your shoulder blade back into the ground until your arm feels super stable.

Keeping eye contact with the bell, press your left heel and your entire right foot into the ground to set your body. Pay special attention to forcing your left foot into the ground, engaging your core to prevent it from popping up. Peel your right shoulder off of the floor (keeping your elbow locked out and your shoulder packed). As you’re doing so, press your left elbow down into the floor so that your upper arm peels away from the ground, too.
You’ll be leaning up on your forearm. Adjust as needed so you can comfortably press up off your forearm onto your left hand. As you’re doing this, you’ll push the floor away with both feet, bringing your hips as high as you can toward the ceiling. Hover here for a moment, maintaining eye contact with the bell. Then slowly lower back, segment by segment, into starting position. Bring your hips down, come back down from your hand to your forearm, then let your right shoulder and left arm peel back to the floor gently. Repeat and switch sides when your reps are done.
Full Guide: Half Turkish Get-Up
Single Kettlebells For The Win
You might only have one kettlebell, but that shouldn’t stop you from greasing the groove of your favorite hip hinge pattern. Keep your technique locked in and it’ll be much easier to work back up to heavy deadlifts when your gym opens again.