
Trap bars might not be competition lifts but if you’re not competing, why should you care? The trap bar, also called a hex bar, can be a great option if you suffer from low back discomfort or if you don’t have the required shoulder or hip mobility to do barbell squats or deadlifts.
And even if you’ve got a pristine low back and deadlift mobility out the wazoo, if you’re an athlete interested in getting stronger and improving performance then working in some trap bar exercises is ideal.
Here are some things to consider when it comes to trap bar squats.
Barbell Vs Trap Bar Squats
The biggest difference between barbell and trap bar squats, obviously, is that the weight is in your hands and not on your back. The hexagonal design of the trap bar allows you to step inside the bar, which aligns the weight with your center of gravity, and this leads to a more upright torso position.
So trap bars reduce compressive force on the spine, plus with the neutral grip, it’s a great option if haven’t got the required shoulder mobility for a back or front squat.
Although both train similar muscles (quads, glutes, hamstring, and calves), trap bar squats are more useful for grip training and relies heavily on glute and middle/upper back strength, while the quads and low back will be hit harder in the back squat. The shorter range of motion with trap bar squats also leads to limited knee and hip flexion in comparison to the back squat.
This limits your ability to train the quadriceps and hamstrings throughout the full range of motion — but this problem is solved by elevating your feet.
Trap bar squats are awesome. Here are three trap bar squat exercises to perform when the barbell is not an option.
[Read more in our breakdown of trap bar vs barbell squats]
1. Elevated Squats
A problem people voice with trap bar squats is the limited range of motion, even though a limited ROM allows you to lift more weight. (So maybe it’s better for your ego, but I digress.) This can be overcome by standing on a platform or weight plates and using the low bar handles. This increases your ROM and puts more emphasis on your quads like a squat.
Form and Programming Suggestions
Squat down to the lower handles keeping your chest up and squeeze your armpits together. Doing so will ensure a neutral spine throughout the entire range of motion.
This variation is slightly easier and safer than a barbell squat, thus it can be more easily performed for higher reps to increase hypertrophy and grip strength. Pairing this with an exercise that doesn’t demand a lot of grip strength works well. For example,
1A. Trap Bar Elevated Squat, 8-12 reps
1B. Dumbbell Floor Press, 8-12 reps on both sides
[Related: 4 trap bar exercises that aren’t deadlifts]
2. Band Resisted Squats
The accommodating resistance of the bands — meaning the exercise is harder as the bands get stretched — mimics the difficulty of getting ‘out of the hole’ and locking out of a barbell squat. Although you don’t get the same ROM as elevated squats, the entire ROM is more difficult.
Form and Programming Suggestions
There are two ways to set this up:
1. Wrap a band around both ends of the trap bar (before you add plates) and stand in the middle with the band under your mid foot.
2. Use a band anchored on each side of the trap bar, either hooked to a power rack or heavy dumbbells.
Consider adding less weight as the initial pull from the floor is easier but the whole movement winds up more difficult. This exercise can be used for power (as demonstrated in the video) or for hypertrophy. For example,
1. Trap Bar Speed Squats, 3 reps (and rest 1-2 minutes between sets)
Or,
1A. Band Resisted Trap Bar Squat, 8-12 reps
1B. Half Kneeling Pallof Press, 10 reps on both sides
[Related: 17 ways to bust through a squat plateau]
3. Elevated Split Squats
You load this exercise similarly to dumbbells, but with the trap bar you have unlimited loading potential. Many believe the only way to get substantial load with this movement is with a barbell but a trap bar can be a terrific alternative. Besides the load, there are two more advantages to trap bar elevated split squats over dumbbells.
1. It reinforces good technique. A lot of lifters keep an upright torso which makes the split squat difficult. However, if you don’t lean forward, your back thigh will butt into the trap bar way too early.
2. The trap bar forces you to maintain constant tension because you’ll probably find you cannot lockout the movement, as the back thigh runs into the trap bar even with forward lean and good technique. (You may see it as a disadvantage when you walk funny the next day.)
Form and Programming Suggestions
Using good squat mechanics with a forward lean will help you get the best out of this exercise. Make sure to lock in your upper back to keep a neutral spine. Due to the brutal nature of this exercise, pairing this with a mobility exercise for recovery purposes works well. For example,
1A. Elevated Trap Bar Split Squats, 5-8 reps per leg
1B. Bench Hip Flexor Stretch, 30-60 seconds per leg
Wrapping Up
Barbells and dumbbells are not the only way to load a heavy squat. A trap bar makes a great alternative if a barbell is out of the question or you lack access to heavy dumbbells.
Plus, your legs will feel just as wobbly the next day.
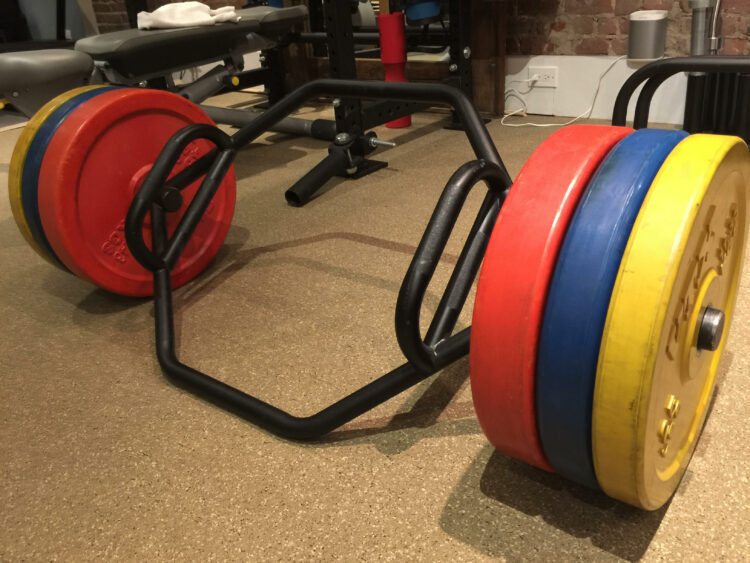
Featured image via Arturs Mikelsons/Shutterstock