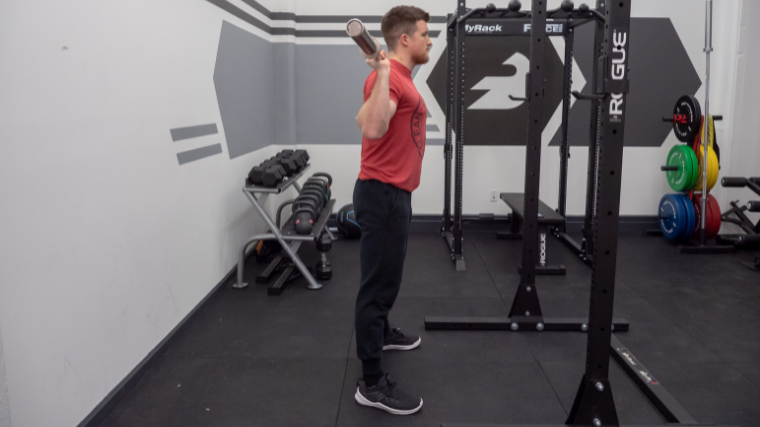
A successful squat starts when you unrack the bar. Sure, executing perfect reps is important for making gains, but you can’t overlook the importance of the setup and how it impacts your performance.
It may not be glaringly apparent, but your squat walk out can make or break the lift. Mastery of the walk out comes with several surprising benefits including improving your consistency, better mental confidence, minimizing energy leaks, and priming yourself for full-body tension.
There’s really no perfect one-size-fits-all squat walk out, but there are a string of cues that can put you in a position to succeed. Here are the five crucial steps you need to nail down during your walk out.
5 Steps to the Squat Walk Out
Note that there are several different styles of squatting. If you use a low bar posture, for instance, these cues may not perfectly translate, but should still serve as decent guidelines.
Step 1 — Secure Your Grip
Finding a grip width that allows you to pack your lats and maintain a strong, stable upper back posture without elbow flare or extreme discomfort is the first step to a good walk out.
How to Do It
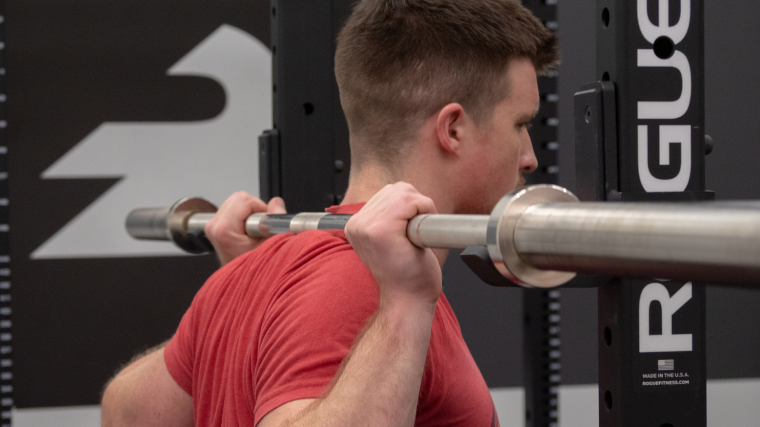
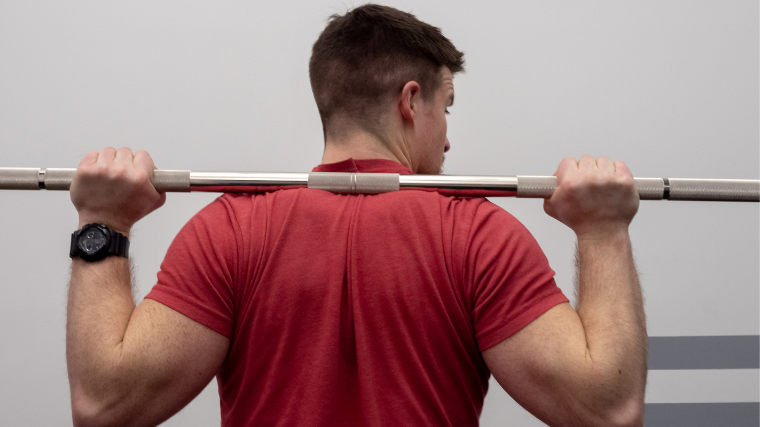
Contract your lats, traps, and upper back, and then grip the bar at a narrow (but comfortable) width. Don’t force a grip width that causes shoulder, elbow, or wrist irritation. Your grip should be tight and allow you to pull your elbows downward once the bar is on your back.
Once you’ve placed your hands where you want them, make a mental note to replicate it every time you address the barbell in the future.
Coach’s Tip: It’s always a good idea to use similar bars every time you have a squat workout, as the knurling rings will serve as a handy reference point for where you should place your hands while you set up.
Step 2 — Wedge the Bar
Your goal here is to wedge the barbell into a position on your back that is both comfortable and serves the style of squat you’re about to perform (think high bar vs. low bar).
How to Do It
High bar squats will usually have the barbell lay atop the meat of your upper traps, while low bar squats wedge the barbell across your upper back and rear deltoids. Your exact bar position will differ slightly based on personal preference, squat style, and mobility. Regardless, you want to pull your shoulder blades together to create a stable shelf for the bar to rest on.
Whether you set your bar high, low, or in-between, make sure that your posture allows you to maintain a braced torso throughout your set. Awkward bar placement may cause your trunk to collapse or otherwise impede your bracing. Get tight and stay tight the whole way.
Coach’s Tip: The high bar position generally requires less shoulder mobility than its low bar counterpart. If you squat low bar (whether because you’re a powerlifter or just out of preference), you may want to consider using a wider grip on the barbell.
Step 3 — Establish Your Stance
Once your hands are on the bar and the bar is secured on your back, your next task is to get your feet in the right place to safely remove the barbell from its fixture in the squat rack.
How to Do It
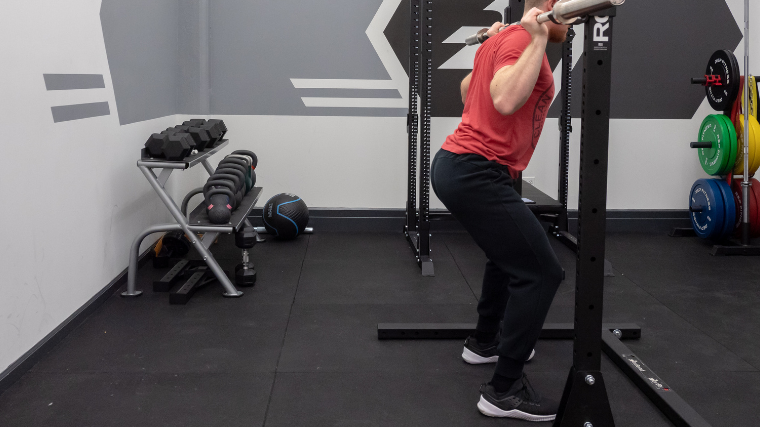
Set your feet in line with one another directly underneath the barbell. You can ensure you’ve got your stance lined up correctly by gazing down from over the bar to see where you are. Consider taking a slightly narrower foot placement than you actually want to squat with, as this makes you “taller” and will give you more clearance when removing the barbell from the hooks.
Coach’s Tip: Play around with different foot positions during your warm-ups and integrate prospective new set-up methods on lighter days. Finding the right foot placement for you will take some trial and error.
Step 4 — Set Your Brace
Once your barbell is glued to your back and your feet are fixed where they’re supposed to be, the next step is all about tension. You want to create a harmonious unracking motion that primes you for success and boosts your confidence.
How to Do It
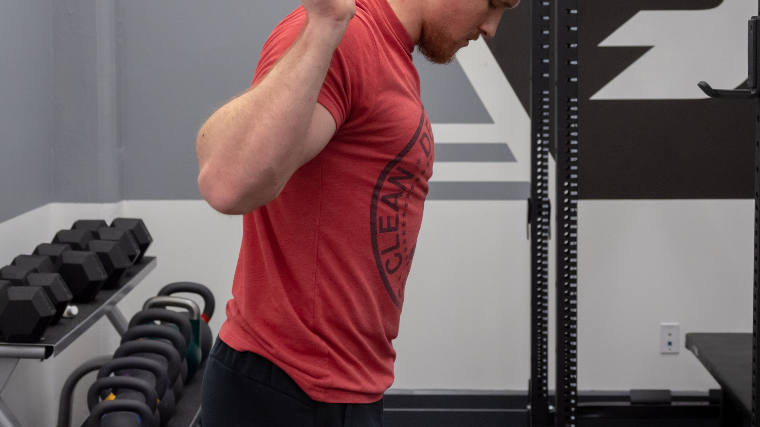
Once you’re locked in under your barbell, brace your trunk by filling your belly with air. If you’re wearing a lifting belt, think about expanding your stomach against it. As you brace, lock your elbows down at a 45-degree angle and gently put pressure up against the barbell to engage your upper back. Your spine should be flat and rigid, and your pelvis slightly tucked.
Your feet are your point of contact and the source of your power. Anchor them down such that you’re both pushing into the floor and against the bar simultaneously.
Coach’s Tip: When you’re bracing yourself to unrack the barbell, avoid “breathing into your chest” as this can affect your bar placement. Breath low into your belly, creating as much intra-abdominal pressure as you can.
Step 5 — Take Two (or Three) Steps
Once you remove the barbell from the rack, your set has begun. The steps you take are just as important as the squat itself.
How to Do It
Maintain your brace while you unrack the bar. Take one step backward and slightly out to a wider stance. Then, step back with the other foot, placing your feet back in alignment where you’ll actually be squatting. You should only need two steps in theory, but some athletes opt to take two steps with their second leg. You may also need to dump your air and reset your brace once you’re out of the rack.
Coach’s Tip: Be conservative with the length of your stride. Stepping backward too far may put you into an unbalanced position, or affect the placement of the barbell on your back if it were to begin rotating.
Benefits of the Squat Walk Out
If you’ve ever watched world-class squatters sit down with unbelievably heavy weights, you’ll understand that professional strength athletes take their walk out just as seriously as the lift itself.
In fact, you can often tell whether a powerlifter will be able to properly squat or not based on how confident they look during their walk out. That’s how important it is to get it right from the jump.
Improved Consistency
You can think of the squat walk out as akin to your pre-bench set-up ritual. Getting the pre-lift sequence right every single time can improve your odds of success both with a bar in your hands or on your back. By giving the squat walk out the respect it deserves, you’ll eventually build subconscious motor patterns that guarantee your technique and let you focus on what you’re actually there to do — lift.
Better Mental Confidence
Have you ever unracked your barbell to squat and noticed too late that your feet were out of line? A small misstep can ruin the entire set and throw you off your mental game. Once you’ve developed a consistent and automatic routine, though, you can attack each and every set with more confidence and vigor.
Minimizing Energy Leaks
The walk out is a part of your very first rep. If you approach it haphazardly or allow the weight to (figuratively) push you around, you’ll struggle to retain enough tightness before you ever begin sitting down. The more energy you expend trying to get into position or align your stance, the less you’ll have for actually squatting.
An efficient and economical walk out will ensure that you have as much power as possible. Keep your upper back tight, abs braced, and root your feet into the floor.
Primes You For Tension
The barbell back squat is an incredible tool for developing strength and power, but you need to earn your proverbial stripes with the technique. If you want to squat heavy, you must respect the setup that goes into working with a heavy, loaded object. The squat may be a leg exercise, but it necessitates a great deal of upper body tension, since that’s where the weight itself is resting.
A sloppy or inconsistent walk out will waste energy and throw you off balance, but a tight and secure walk out teaches you how to be tense and immovable from head to toe. Getting the bar into place shouldn’t be the deciding factor during your next personal record attempt.
Squat Walk Out Tips
Practice makes permanent. To improve any skill, you need tons of repetition under your belt. There’s a technique to everything you do in the gym (even things as innocuous as spotting your gym partner). If you’re still feeling shaky about your walk out, give these tips a try.
Practice With the Empty Bar
You shouldn’t go into the gym and load up three plates on each side of a barbell to begin your leg day. Most squatters start with the empty bar, and that can give you an opportunity to get more walk out practice in. It may have taken you some time to tinker with the exact sequence of your walk, but once you have it, practice it from the very first time you touch the bar.
Try Overloading
Some strength athletes intentionally overload themselves to develop more isometric tension as well as good walk out habits. You can make the squat walkout its own exercise and use it as an accessory on your leg days.
Try loading up as much as 110% of your one-rep max and only do the walk out portion. You can obviously hold a heavier barbell than you can squat with, and an overloaded walk out is a great way to potentiate your nervous system and even make subsequent squat sets feel a bit lighter by comparison.
Do Some Bracing Drills
If your early squat sets feel shaky or uneven, you can supplement your walk outs with some bracing drills. Any low-intensity exercise that engages your trunk or upper back will do. Try banging out a quick set of resistance band crunches or good mornings between your squats if the walk out feels unstable.
How to Squat
The many different squat variations you’ll commonly encounter in the gym all have their own unique cues. That said, there are a few overarching elements that define a good squat no matter where or how you’re holding the barbell.
Step 1 — Balance and Brace
This should be easy pickings if you’ve nailed your walk out. Regardless of how you’re squatting, make sure that your stance is balanced and you don’t have too much of your weight in your toes or heels.
You should feel active and tense through your midsection and not as though you’re about to collapse under the weight.
Step 2 — Sit Down, Slowly
All squats should be lowered with a controlled and calculated descent. If you drop too quickly, you’re at risk of losing your brace or wasting energy recovering your posture. Conversely, exaggerating your eccentric can also sap you of energy and rob you of your muscles stretch-shortening cycle.
You shouldn’t be free-falling, but don’t take a week to descend, either, unless you’re intentionally doing tempo work.
Step 3 — Reverse the Descent
A good squat looks the exact same on the way up as it did going down, only backward. It’s all too easy (if you’ve got a bad brace or a muscular imbalance) to keel over as you come out of the hole, or to drift too far to the front or back.
Your hips and knees should stay in the same place as you rise out of the bottom. This guarantees that you’re making the most of both your quads and glutes to power the weight up.
Walk Your Way Out
If you want to work with the heaviest weights, you need to approach your squat walk out with the same intensity and intent as the squat itself. Think of the walk out as your runway. It paves the way for you to use the power of your legs and guarantees a safe departure.
If you treat it with the respect it deserves, you might just be surprised at how much more controlled and confident you feel with the bar on your back (or across your chest, or in the nooks of your elbows, or…). Address the barbell with purpose, stay super tight, and attack the weight.
You know the steps, now go break some personal records.
Featured Image: sportpoint / Shutterstock
