
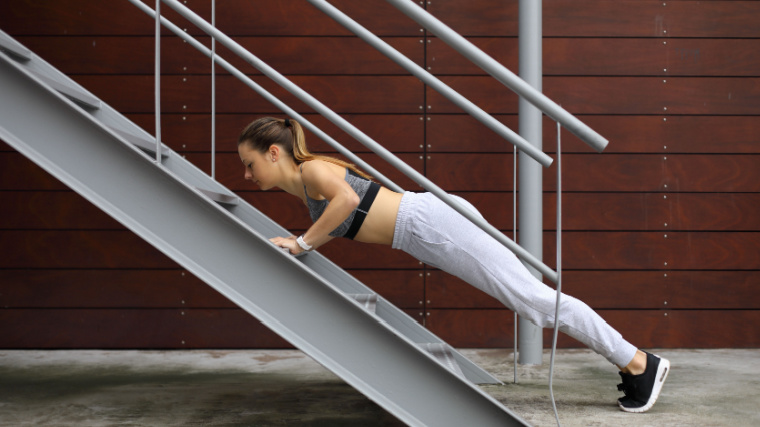
Your gym buddy might be able to bang out endless sets of push-ups, but you may still be struggling to achieve your first full rep. Or you’re a more experienced athlete aiming to add more chest exercises to your repertoire. Regardless of your fitness level, the incline push-up is the perfect entry to building upper body strength and core stability.
If you’re an experienced strength athlete, don’t click away because you think incline push-ups are “just for beginners.” They’re not. You can cleverly deploy incline push-ups as a warm-up exercise, a move to superset between bench press sessions, or a workout finisher to get the ultimate chest pump.

For the average gymgoer, learning how to do the incline push-up — and effectively integrate it into your workout program — can be a rite of passage. Once you master this technique, you’ll be off to the races of chest gains. Here’s everything you need to know about this do-it-anywhere move.
Editor’s Note: The content on BarBend is meant to be informative in nature, but it should not be taken as medical advice. When starting a new training regimen and/or diet, it is always a good idea to consult with a trusted medical professional. We are not a medical resource. The opinions and articles on this site are not intended for use as diagnosis, prevention, and/or treatment of health problems. They are not substitutes for consulting a qualified medical professional.
- How to Do the Incline Push-Up
- Incline Push-Up Variations
- Incline Push-Up Alternatives
- Incline Push-Up Sets and Reps
- Common Incline Push-Up Mistakes
- Muscles Worked by the Incline Push-Up
- Benefits of the Incline Push-Up
- Who Should Do the Incline Push-Up
- Frequently Asked Questions
How to Do the Incline Push-Up
The set up for this exercise is simple. All you need is a wall, weight bench, plyo box, step-up platform, or even a stable couch or chair. No need to break out your yoga mat.
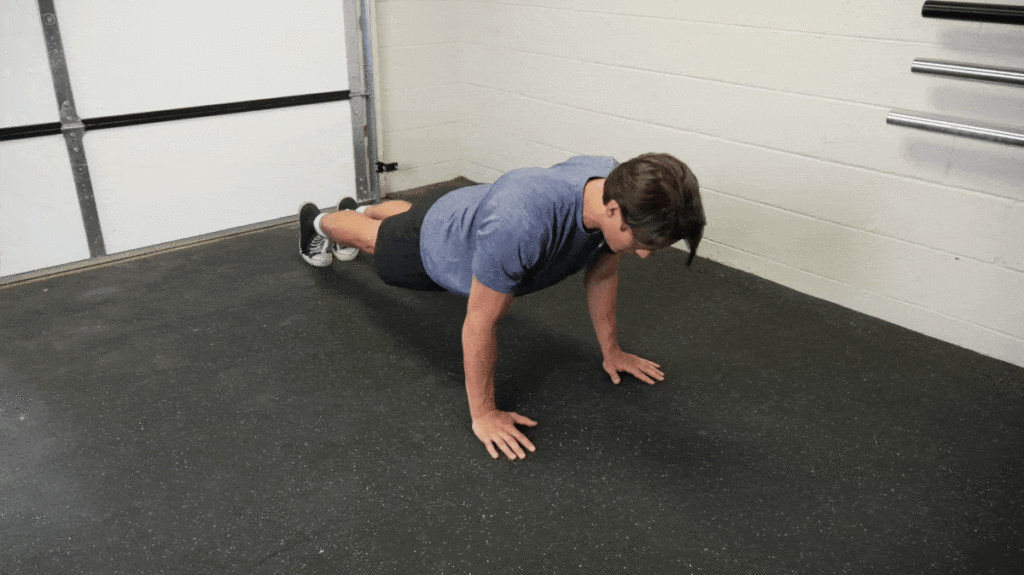
Step 1 — The Set Up
Find a sturdy platform, bench, or box at your desired incline. Place both hands on top of the incline shoulder-width apart and walk your feet back until your body is at a 45-degree angle with the floor. This is the starting position.
Coach’s Tip: The higher the box or platform, the less of your body weight you’ll be pressing. The lower the incline (the more horizontal your body is), the more challenging this move will be.
Step 2 — The Descent

Keeping your back straight — your shoulders in line with your hips — slowly lower your body towards the box until your chest is an inch away from the box. Aim to keep your elbows in line with your shoulders, although it’s okay for them to flare out slightly. Keep your gaze straight ahead, as looking up may strain your neck.
Coach’s Tip: Using a wider grip will activate your pectoralis major more while using a narrower grip will activate your triceps more. Neither is better or worse. It simply depends on what you’re looking to gain from the exercise.
Step 3 — The Push

Exhale as you straighten your arms, pushing your body back up towards the starting position. Don’t alter your foot or hand placement or round your back towards or away from the floor. Keep your hips and shoulders in alignment as much as possible. To help with this, keep your core engaged while squeezing your glutes and quads.
Coach’s Tip: Incline push-ups are best done slowly. Take at least three seconds to lower and three seconds to raise yourself. If you’re looking for an exercise to do faster, try bench dips.
Incline Push-Up Variations
One of the best features of the push-up is its versatility. While there are nearly endless push-up variations to choose from, here are some of the most common you’ll come across.
Standard Push-Up
[Read More: Bodybuilding Chest & Back Workouts]
- Get into a high plank position by placing your hands on the floor shoulder-width apart, toes pointed into the floor with your feet next to each other, and back flat.
- Brace your core, squeeze your shoulder blades together, and lower your entire body until your chest is about an inch above the floor.
- Push through the floor to straighten your arms and return to the starting position. Keep your back flat throughout the motion.
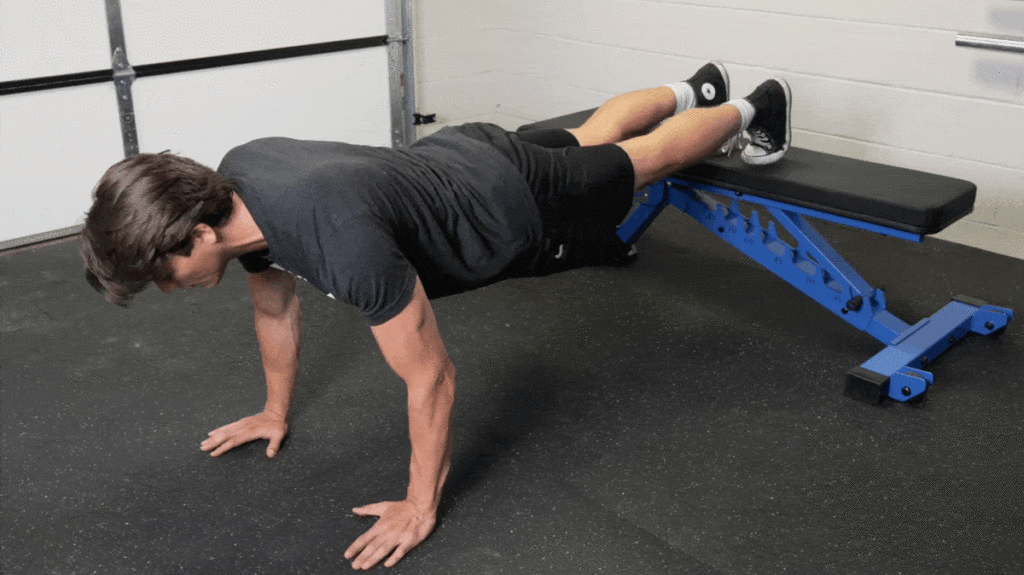
Decline Push-Up
[Read More: The Best Back Exercises]
- Place your feet on a bench or box with your hands on the floor underneath your shoulders. Make sure your back is in a straight line. Start with your arms and legs extended.
- Slowly lower yourself towards the floor until your chest is one to two inches off the floor. Push yourself back up to the starting position.
- Since the angle between your body and the floor is decreased, there is an increase in muscle activation in the pectoralis major, triceps, and anterior deltoid. You can make this more challenging by adding chains, a weight plate, or a weight vest on your back.
Decline Suspension Trainer Push-Up
[Read More: The Best Shoulder Exercises for Building Muscle]
- Set up the same way as a decline push-up, facing away from a stable suspension trainer. Loop your feet into the handles securely so that you’re in a push-up position, but with your feet suspended above the ground.
- Brace your core and stabilize your starting position. Then slowly lower yourself into a push-up.
- Keep your core, glutes, and quads engaged to ensure that your lower back doesn’t sag as you push yourself back up.
Incline Push-Up Alternatives
If you’re early in your fitness or calisthenics journey, or you’re managing injury risk, here are some related upper-body exercises that may be even more accessible than incline push-ups.
Wall Push-Up
[Read More: One-Month Push-Up Workout Plan for More Push-Ups]
- Stand facing a wall, straighten your arms, and place your hands on the wall directly in line with your shoulders. Then, slightly lower and widen your hand placement.
- Lower yourself toward the wall, keeping your elbows tucked in.
- Exhale as you push away from the wall. That’s one rep.
Kneeling Push-Up
[Read More: The Best Knee Sleeves]
- Get into a quadruped position (all fours) with your back straight. Place your hands about shoulder-width apart.
- Lower your torso toward the floor until you feel a slight stretch in your chest muscles or until your chest is one to two inches from the floor.
- Exhale as you push yourself back up to the starting position. Keep your shoulders and hips in line throughout the movement.
Shoulder Taps
[Read More: What Are Workout Splits and Which Is the Best One?]
- Get into the same position starting position as the push-up.
- Remove your left hand from the ground slowly and tap your right shoulder.
- Slowly lower your left hand back to the ground.
- Then, remove your right hand from the ground and tap your left shoulder. This is one rep. Keep your abdominals engaged the whole time and try not to sway your hips during.
Incline Push-Up Sets and Reps
Depending on your fitness goals, you’ll integrate the incline push-up into your program in different ways. Here are some prime examples.
- For Strength: A strength athlete such as a strongman athlete or powerlifter can use incline push-ups as part of their dynamic warm-up. Try three sets of 10 to 15 reps as part of your warm-up.
- For Hypertrophy: If done as part of a superset, tri-set (three exercises), or circuit, do four sets of 10 to 12 reps.
- For Endurance: Like strength, endurance is relative to what you’re able to do. If you can currently do three incline push-ups without getting tired, an endurance set might involve pushing it to five reps per set. If you can do 10 reps easily, increase to 12 or 15 reps. Perform three to four sets to two reps short of failure.
Common Incline Push-Up Mistakes
Sometimes, it’s easiest to make mistakes during the simplest movements simply because you’re breezing through reps without thinking about it. Don’t be afraid to admit that you make mistakes — it happens to the best of lifters. Here are some red flags to be on the lookout for.
Lack of a Warm-Up
Just because the incline push-up is simpler compared to the regular push-up doesn’t mean that all athletes can leap into them completely cold. Opt to include some mobility exercises and activation drills such as cat-cows, band pull-aparts, and thoracic rotations to get your body ready for action. Otherwise, you might be setting your shoulders up for failure.
Excessive Lumbar Extension
This error occurs with regular push-ups, too. If your lower back starts to drop toward the floor while your chest is still up (think: cobra pose), you’ve done more than enough reps.

Just because your arms can still push you up and down, doesn’t mean you should continue. Excessive hyperextension in the lumbar spine (lower back) isn’t something you want to court during your push-ups. To avoid this, keep your core tight and focus on keeping your hips in line with your shoulders.
Feet Too Close to Platform
If your feet are too close to the box, then you’re going to be doing the incline push-ups while the scapula is elevated, which might expose you to a greater risk of shoulder impingement. You want the scapula depressed so the upper traps are not contracted prior to starting the descent.
Moving your feet away so the shoulder blades are down will prevent you from doing the push-ups while in a shrugging position. Another cue you can use is keeping your shoulders down and away from your ears, even in the top position of the push-up.
Muscles Worked by the Incline Push-Up
The incline push-up may activate your muscles less intensely than other push-up variations. (1) But that doesn’t mean it isn’t working your upper body at all. To the contrary — you’ll be working quite a few key players in upper body pushing exercises, namely:
- Pectoralis Major
- Triceps Brachii
- Deltoids
- Serratus Anterior
Benefits of the Incline Push-Up
Don’t scoff at the incline push-up. It may look less intense than its push-up cousins, but it packs a punch when it comes to versatility.
Warm-Up, Superset, and Finisher
When you’re getting ready for an intense chest workout, a less-intense variation to help you ease into things can help. Adding the incline push-up to your bench press warm-up routine is sure to help activate your chest, shoulders, and triceps and prime them for action.
You can also use the incline push-up to help reach a sick pump during bodybuilding chest workouts. For example, let’s say you begin a chest workout with four sets of eight to 12 reps of the dumbbell bench press. The next thing you do can be a superset of dumbbell flyes and incline push-ups. Not only does this force more blood to the pectoralis major — it saves time.

[Read More: The Best Online Workout Programs]
Alternatively (or in addition), use the incline push-up as a true workout finisher. Let’s say you usually like to finish your strength or bodybuilding workout with a superset of barbell curls and triceps extensions. Add incline push-ups — pushed to failure — after the extensions to ensure you’ve reached muscular fatigue with minimal injury risk from loading.
Training Through an Injury
When you’re training through injury or recovering from one, the first stop on your continued fitness journey should be a doctor or physical therapist. But once you have the go-ahead to perform push-ups, the incline variation is a solid place to start.
Begin with a high incline — a stable countertop, for example — to minimize the amount of weight you’re actually pressing in the beginning. As you gain more strength (and have corresponding clearance from a medical professional), continue using the incline push-up to get lower and lower to the ground. You’ll build your strength and stability back up gradually.
Convenience
The incline push-up can be done essentially anywhere. You don’t need any proper equipment — not even a yoga mat — and you can adapt almost anything in your environment to help you out.
Couches, sturdy work desks, aerobics step platforms, park benches, and anything that can support your weight is fair game. So whether you’re in the office, at home, or warming up for a 5k in the park, you don’t need to get on the ground to activate your chest muscles.
Who Should Do the Incline Push-Up?
The incline push-up is often associated with beginners — and with good reason. But those aren’t the only athletes who can make good use of this exercise.
Beginners
The incline push-up is most useful for beginners to increase strength and size in your chest, triceps, shoulders, and serratus anterior. The incline push-up offers people a tangible starting rather than just throwing up their hands and giving up before they get started with a full push-up.
Strength Athletes
Powerlifters, Olympic weightlifters, and strongman athletes alike can benefit from the relatively low barrier of entry to the incline push-up. Using exercises like this to warm up the rhomboids and middle trapezius prior to bench pressing and overhead pressing is key.
To ensure continued activation during rest periods — without majorly increasing fatigue — athletes can also use this move to superset between bigger barbell exercises.
Endurance Athletes
Some endurance athletes are all about lower body exercises. Runners and cyclists, for example, need a powerful set of legs to get them through their respective races. Still, they also need a solid amount of upper body endurance to keep them balanced and strong across the board. The incline push-up can help do just that, without requiring a new skill set acquisition.
[Read More: Train to Do 100 Push-Ups a Day]

Other endurance athletes, like swimmers and rowers, are more accustomed to upper body exercises because they use their upper bodies a lot in their sport. The incline push-up is a solid choice for an upper-body session meant to increase muscular endurance while not adding too much fatigue and mechanical strain to the body.
Put Your Training on an Incline
Beginners and advanced athletes alike can agree — the incline push-up is an incredibly useful variation on a classic. By placing your hands on a raised surface, you’re allowing yourself to perform push-ups without as much strain, effort, or skill as the full version.
This can come in handy whether you’re coming back from injury, are building up an initial reservoir of strength, or are searching for a heavy-duty, low-impact chest pump. What are you waiting for? Grab your incline and push.
FAQs
If you’ve still got questions about this versatile exercise, you’ve come to the right place. We’ve got answers.
The incline push-up is when your hands are raised on a platform with feet on the floor. The decline push-up is when your feet are raised on a platform and your hands are on the floor. When your feet are on an incline (a decline push-up), you’ll be responsible for pushing more of your body weight than you are with an incline push-up (with your hands on a platform).
The primary movers during the incline push-up are the pectoralis major, triceps brachii, deltoids, and serratus anterior.
Whenever possible, always discuss your injuries and any movement limitations with a doctor, physical therapist, or other qualified medical professional. That said, if you’re cleared to perform push-ups, you might opt to start with an incline push-up since it involves pushing less weight around than the full push-up.
With a doctor’s go-ahead, you might choose to gradually lower the height of your incline over a series of weeks until your body becomes more horizontal (closer to a “real” push-up).
References
- Kowalski KL, Connelly DM, Jakobi JM, Sadi J. Shoulder electromyography activity during push-up variations: a scoping review. Shoulder Elbow. 2022 Jun;14(3):326-340.
Featured Image: PeopleImages.com – Yuri A / Shutterstock