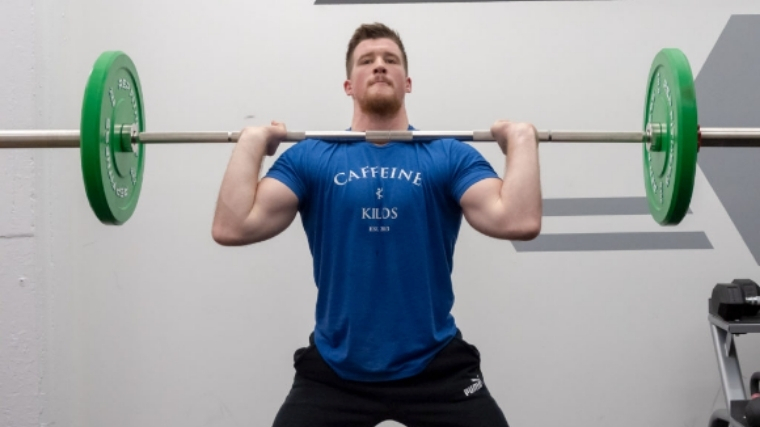
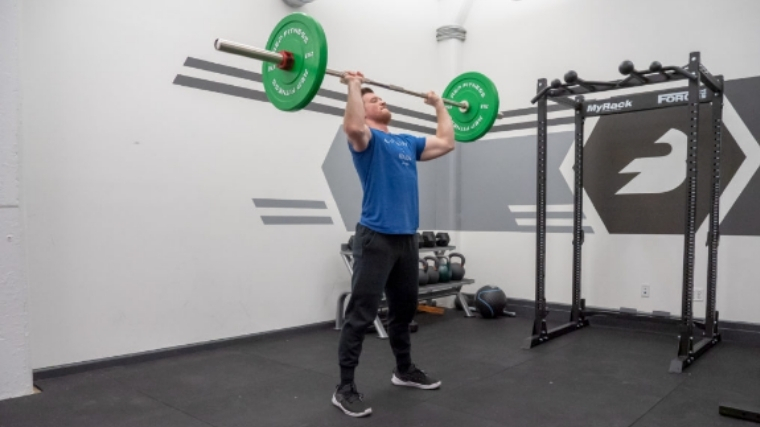
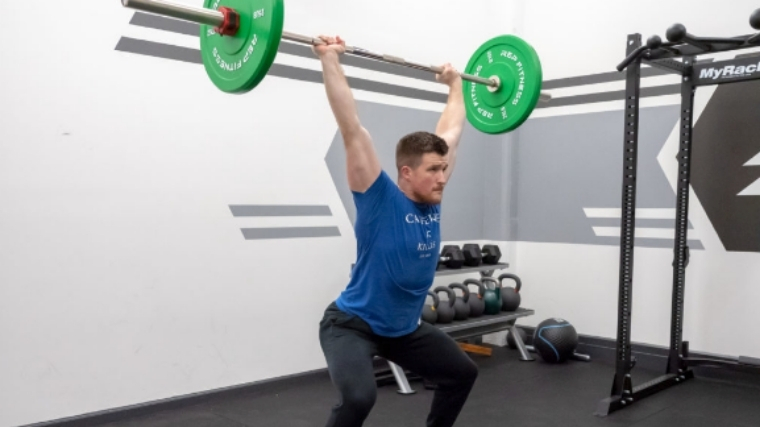
Few moves are as dynamic and recruit as many muscles — namely, the quads, back shoulders, glutes, and core — as the clean & jerk. It’s one of the two competition lifts in the sport of weightlifting, but it’s a pretty useful addition to your workout program. That said, the clean & jerk isn’t easy to do. It’s essentially three moves in one — a deadlift, a clean, and an overhead press — and learning it takes time, skill, and patience. However, you’ll be rewarded with more full-body strength, coordination, and power — which is probably why you’re reading this article.
In this guide, we’ll go over all of the steps needed to perform a proper clean & jerk, as well as the move’s benefits, variations, and alternatives.
- How to Do the Clean & Jerk
- Benefits of the Clean & Jerk
- Muscles Worked by the Clean & Jerk
- Who Should Do the Clean & Jerk
- Clean & Jerk Sets, Reps, and Weight Recommendations
- Clean & Jerk Variations
- Clean & Jerk Alternatives
- FAQs
Editor’s note: The content on BarBend is meant to be informative in nature, but it shouldn’t take the place of advice and/or supervision from a medical professional. The opinions and articles on this site are not intended for use as diagnosis, prevention, and/or treatment of health problems. Speak with your physician if you have any concerns.
How to Do the Clean & Jerk
Below is a step-by-step guide on how to perform the clean & jerk with a barbell. (Note: You can most certainly do a clean & jerk with a set of dumbells or a pair of kettlebells. It’s traditionally done with a barbell, so that’s the variation we’re outlining below.)
Step 1 — Get Set
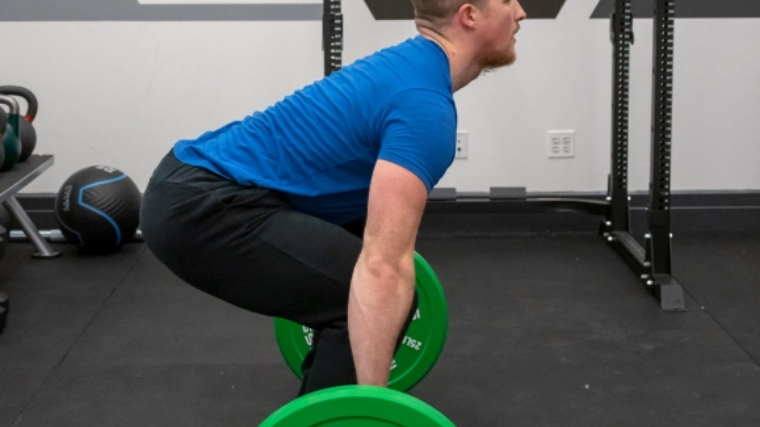
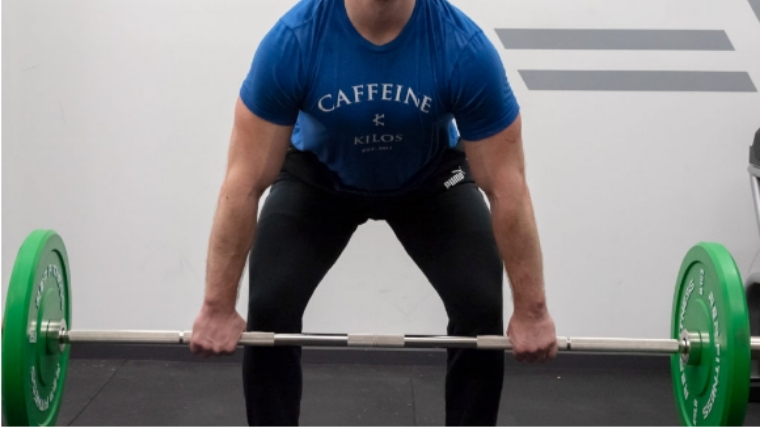
Stand in front of a loaded barbell with the feet set hip-width and turned slightly out (as this will allow the lifter to keep the knees/thighs out on the setup). The shoulders should cover the barbell, with the hips lower than shoulder-level yet higher than the knees. Note: these are general setup concepts, and specific setups may vary based on coach/athlete preferences.
Form Tip: The barbell should be in contact with the shins at the setup. This will ensure the barbell starts close to the body in the pull, which ensures a smooth bar path.
Step 2 — Initiate the First Pull
The first pull of the clean occurs when the barbell initially breaks from the floor. The first pull ends when the barbell passes the knee, which is the start of the second pull. The initial pull is essentially a deadlift. Be sure to maintain a neutral spine and to keep your core braced.
Form Tip: The goal of this first pull is to gain the momentum necessary for an explosive second pull.
Step 3 — Initiate Second Pull and Turn the Bar Over
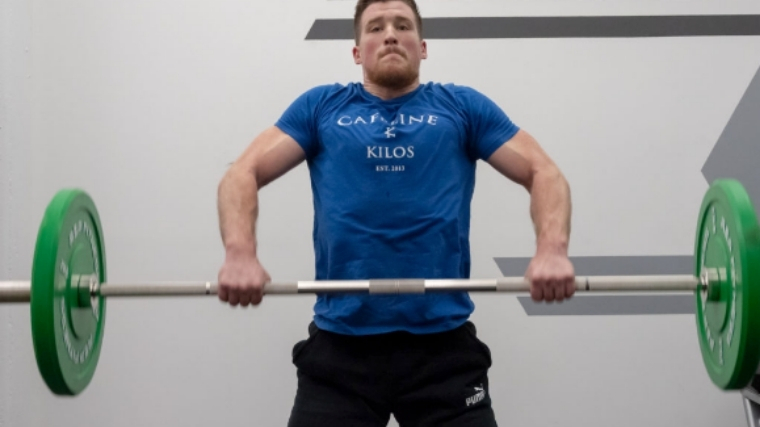
This next step could be broken down into two parts, but it happens so quickly that it’s basically one cohesive step. For this pull, the barbell passes the knee and ends up right at hip level. The lifter then drives their hips and pulls the barbell up the body, making sure to stay balanced in the full foot with the shoulders above the bar. Then, the lifter acts upon the barbell to forcefully rotate their elbows underneath and into the front rack position. As you finish the second pull, stay active on the barbell after the second pull using the traps to elevate the bar higher and pull oneself under the bar.
Form Tip: Try to simultaneously move the feet and reset them firmly under your hips so that you’re in a strong front rack position.
Step 4 — Catch the Barbell
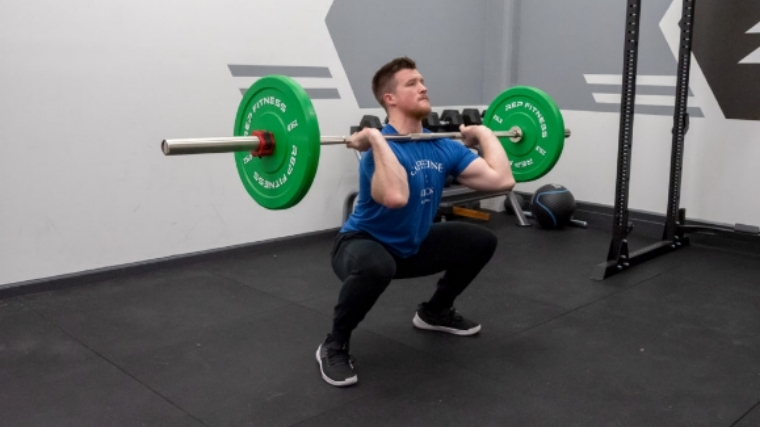
As the bar is exploding upward from the hip drive, the lifter will quickly squat down and catch the barbell across their shoulders in a front rack position. The elbows should be pointing forward.
Form Tip: Be aware of your knees. A lot is going on during a clean & jerk, so be sure to keep your knees actively pressed out for an efficient squat.
Step 5 — Dip Down
From the front rack position, the lifter is going to dip their knees down a few inches. This creates a spring-like effect to help drive the weight overhead for the jerk phase of the lift. This phase of the lift is essentially a push press.
Form Tip: The dip speed should be smooth and allow for a stretch reflex to take place. Be sure to dip down in a straight line, not letting the torso sway back or come forward.
Step 6 — Jerk the Bar Overhead
There are two types of jerk — a split jerk and a squat jerk. For now, we’ll stick with the squat jerk. Don’t think of the jerk as just an overhead press. Really, it’s a push press that your drop under to reduce the distance it has to travel overhead. So, you’re going to a) dip down, b) drive the bar over your head, and c) drop into a half squat position as the bar ascends.
Form Tip: Initiate the drive with the legs, and think about pushing everything you can through the bar.
Step 7 — Receive and Recover the Jerk Overhead
Lock your arms out and pause in the bottom of the jerk to stabilize the weight. Hold this position while you get set. Do not stand up until the weight feels balanced. Once you’re stabilized, stand up.
Form Tip: If you feel as though you’re going to drop the weight, keep your arms locked out and let them fall forward so that the bar crashes to the floor. Don’t lean forward, as the bar may bounce back and hit your head.
Benefits of the Clean & Jerk
There are many benefits of the clean & jerk. Here are three main ones that make the clean & jerk a worthwhile addition to your workout split.
Total Body Strength and Power
You have to be strong and explosive at every phase of the lift — from the pull off the ground to the hip drive to the jerk. Each muscle will be taxed and activated during the clean & jerk, which is why it’s considered one of the best full-body moves you can do for more strength and power. Just as focusing on the deadlift, push press, and clean will carry over to a stronger all-around clean & jerk, doing clean and jerks will strengthen those individual moves.
Improved Athletic Performance
There’s a reason why athletes teams outside of weightlifting perform the clean & jerk (and its many variations). The strength that it develops in the glutes and legs results in the ability to sprint faster and jump higher. One meta-analysis in the British Journal of Sports Medicine concluded that Olympic weightlifting movements result in an improved vertical jump. (1)
Better Motor Skill Development
The clean & jerk is a technically complicated move that requires the lifter to focus on many aspects at once. To make this exercise — or any exercise — happen, the central nervous system sends signals to the muscles to direct them. This connection between your brain and your muscles is also called “motor skill.” Like a muscle, the CNS can be trained to be more efficient and responsive. The more you practice the movement, the more proficient you’ll be at it.
Muscles Worked by the Clean & Jerk
The clean & jerk is a total body movement that stresses nearly every muscle in the body. Below are the major muscle groups that are worked when performing the clean & jerk exercise.
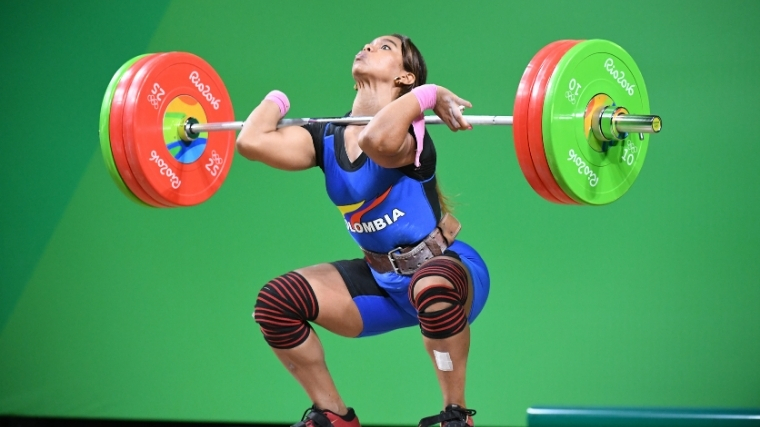
Hamstrings
The hamstrings are really only involved in the hip-drive, or second pull, phase of the clean & jerk. They’re contracted explosively and for a short time, and so the clean & jerk isn’t the best exercise to grow your hammies. You’ll want to also add the Romanian deadlift and good morning to your routine for optimal hamstring development.
Quadriceps
The quadriceps are used in the squatting aspect of the clean and the dip and drive phase of the jerk. Strong quads help increase one’s ability to get out of the clean.
Back and Traps
The back (lats) and traps are all used during the pulling, squatting, and jerk phase of the lift. A strong back and traps are needed to maintain an upright position in the front squat and offer stability in the jerk.
Shoulders
The shoulders, along with some of the supporting muscles of the arms (triceps and biceps), are most active during the jerk. Though the jerk motion comes mainly from leg drive, the shoulders are working isometrically to stabilize the weight overhead. So, you’ll still want to add different shoulder exercises into your routine to develop them fully.
Who Should Do the Clean & Jerk?
Below we will discuss what types of athletes can benefit from the clean & jerk and why.
Strength and Power Athletes
Strength and power athletes use the bench press to increase overall strength, add quality muscle mass to the chest and triceps, and improve sport-specific performance.
- Powerlifters and Strongmen/Strongwomen: Pure strength athletes can integrate the clean & jerk into their training to improve power output and overall athleticism.
- Weightlifters: The clean & jerk is a necessary exercise for all Olympic weightlifters to train as it is one of the two movements performed in a competition. Practicing this movement and its various positional drills can increase technique and overall performance in competition.
Functional Fitness Athletes
The clean & jerk is a movement that is often found in CrossFit programs, competitions, and workouts (in some form). CrossFit and fitness athletes should use the clean & jerk to improve overall strength, power and train it to use in competition.
General Population
Everyday gym-goers can reap the same benefits mentioned above by using the clean & jerk That said, it’s a technical move that, if not done properly, can lead to potential injury risk. So, be sure to consult a trainer for guidance and always use a lighter weight than you think you can handle.
Clean & Jerk Squat Sets, Reps, and Weight Recommendations
Below are three sets, reps, and weight (intensity) recommendations for coaches and athletes to properly program the clean & jerk based on training goal. Note that the below guidelines are here to offer coaches and athletes loose recommendations for programming. While the clean & jerk can help spark muscle growth, it’s not a move you should program for hypertrophy purposes.
To Improve Technique
The clean & jerk should be trained with light to moderate loads to develop proper positional awareness, timing, and foundational movement patterning necessary for more advanced training progressions. Start by performing three to five sets of three to five repetitions with light to moderate loads or 50-65% of your one-rep max. The key here is movement quality, timing, and precision.
To Increase Power Output
This phase is often used for athletes (non-Olympic weightlifter, see next section) looking to integrate the clean & jerk to improve athletic power outputs. Stick with three to five sets of two to five reps using 60-80% of your 1RM.
To Improve Olympic Weightlifting Performance (Non-Peaking)
This is the training range that most Olympic weightlifters will spend most of their training career in, as it can be manipulated to increase volume, add intensity, and address maximal power output. Generally speaking, most Olympic weightlifter will perform three to 10 sets of one to three reps with around 70-75% of their 1RM.
Clean & Jerk Variations
Below are three common clean & jerkvariations to build strength, address technique issues, and improve Olympic weightlifting performance.
Block Clean
The block clean can be done to increase the rate of force production in the clean or address technical breakdowns in the pull. The block clean is done from blocks, set at varying heights to help improve positional strength. These are also great additions to use before a block clean, such as in a complex (see below).
Clean + Jerk Complex
Weightlifting complexes are a combination of different phases of an Olympic lift strung together. This flow of movements increases training volume, adds variety to training, and reinforces proper technique and positional strength. For example, in the video below, the lifter performs a clean, then a front squat, and then two jerk variations. He still did a full clean & jerk but broken down into separate lifts. You can try that complex below or start with something more simple. Even a full clean with an additional front squat is an added challenge.
View this post on Instagram
Hang Clean
The hang clean is similar to the block clean in that it increases force production in the clean. This is also a good variation to incorporate with lifters who have issues transitioning under the bar. You can perform these from varying hang heights, such as below the knee (low hang) above the knee.
Clean & Jerk Alternatives
Below are three clean & jerk alternatives that can be used to improve power outputs with an easier learning curve.
Clean/Snatch High Pull
The clean/snatch high pull may decrease injury risks of the wrists or minimize the technical coaching needed to help lifters. This can help non-weightlifting athletes looking to get the benefits of power training without running risks of injury due to lack of proper readiness.
Clean & Press
The clean & press is similar to the clean & jerk. However, the athlete can perform a strict pres to get the weight overhead. This is a good option for lifters who lack proper jerk timing and technique. This is also good for adding overhead strength, as the jerk requires less concentric strength as strict pressing or push pressing loads overhead.
Ball Clean
The ball clean has the lifter perform the movement with a medicine ball. It’s a great way to teach the exercise and for younger or older lifters who may lack the skills for the barbell version.
FAQs
How should I learn the clean and jerk?
Ideally, you’ll find a local qualified coach (USA Weightlifting Accredited) in you area to get some initial coaching from. If you cannot do this, opt to look for a good coach online who will break down the lift and have you begin with the basics like movements.
I'm weak out of the hole of my front squat, how can I fix this?
Increasing leg strength for the clean and jerk is not as simple as doing more cleans. In addition to increasing the volume of front squats you do, be sure to treat the front squat portion of the clean as a separate lift. This means take a second to get set, lower yourself slowly, and drive up with good form. Don’t rush through the movement like it’s simply a step in the clean and jerk. It is, but one that should be handled with care.
How often should I do the clean and jerk?
Most lifters looking to improve weightlifting performance and technique should aim for at least three training sessions per week that include the clean and jerk or variations. The more frequently you train it, you need to make sure you are also monitoring recovery, training intensity, and performance over time to find what works best for you.
References
Featured image: A.RICARDO/Shutterstock
