
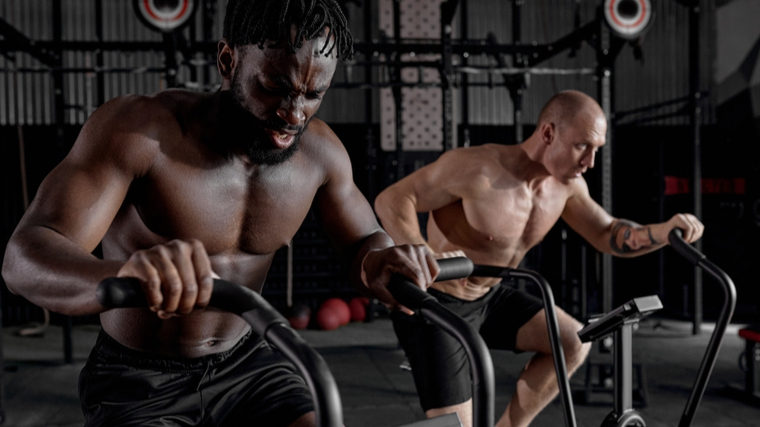
What’s your favorite form of cardio? Running is all well and good, and there’s a lot of fun to be had with a good barbell complex — but these are far from your only options in the gym.
The air bike will teach you how to breathe efficiently, improve your aerobic capacity and recovery, and help you push past mental and physical barriers that may be holding back your training. But you likely can’t just hop on an air bike and go all-out right away.

Today, we’ll review an air bike progression that will take you through nine workouts. This progression is broken down into three beginner, three intermediate, and three advanced workouts. Each category builds on the previous set of workouts so you can bike forward from any level.
Best Air Bike Workouts
- Pacing Baseline
- Aerobic 101
- Power 101
- Aerobic 102
- Power 102
- Pacing Pyramid
- One-Minute Max Calories (or Meters)
- Death Race
- Dirty DT
Note: These workouts are organized by mounting difficulty. The first three are scaled for beginners, the second trio are designed for intermediate athletes, and the final triplet are great if you’re an experienced athlete or truly want to test your limits.
Beginner Workouts
You’ll notice that all of the beginner workouts are time-based intervals. This is to allow you to learn what paces you can hold for different time domains. Over time, you will be able to see a prescribed workout and know the time range it typically takes you to complete it. This skill is invaluable to attack workouts correctly and have a plan to increase your capacity progressively over time.
Pacing Baseline
This workout is meant to teach you the different paces you’re able to hold based on the assigned RPE. Each interval is two and half minutes, gradually increasing intensity until the final fifteen seconds, where you’ll peak for a short burst before the rest.
The first ninety seconds should feel like an easy warm-up or recovery, followed by forty five seconds at a working pace, while still leaving some in the tank. The final fifteen seconds shouldn’t be a true max effort, but rather a short sprint to see how high you can rev up the RPMs or watts.
The Workout
4 Rounds:
- 1:30 Bike (3-4 RPE)
- 0:45 Bike (6-7 RPE)
- 0:15 Bike (8-9 RPE)
- 2:30 Rest
If you attack this correctly, the first sixty to ninety seconds of rest should be needed, with the final minute getting you back to feeling fresh for the next interval.
Aerobic 101
After performing your pacing baseline, you’ll have a rough idea of what your six to eight RPE range feels like. This workout repeats 30 seconds of work, followed by 30 seconds of rest. These short intervals will allow you to sustain your pace without accumulating too much muscle fatigue that the paces become unsustainable.
The Workout
10 Rounds:
- 0:30 Bike (7-8 RPE)
- 0:30 Rest
Use the first few rounds to gauge what a hard, sustainable pace is for you. The final rounds should be consistently held at this pace, hitting the same number of calories for each interval. The number of calories tracked are used to determine your effort in this context.
Note: Many athletes may not want to or be able to use calories to track their effort. If that’s not something you’re able to do, work to keep your meter count consistent instead of calories.
Power 101
We’re going to work the opposite side of the spectrum with this workout, testing your power baseline on the bike. These intervals will have you in a one to three work-to-rest ratio, allowing you to push extremely hard while still recovering.
The Workout
10 Rounds:
- 0:15 Bike (9-10 RPE)
- 0:45 Bike (3-4 RPE)
The goal here is to see how high the ceiling is for your power. You should be able to get at least 10 RPMs higher than you were holding in the previous workout. If you’re unable to do this, you will definitely want to spend time doing more anaerobic intervals to help balance the development of your energy systems.
Intermediate Workouts
The intermediate workouts act as a bridge between the beginner and advanced categories. This is where you’ll be challenged to perform longer intervals while sustaining similar paces to the previous set of workouts.
Aerobic 102
This takes the aerobic intervals from the beginner category and increases the stamina demand. The duration of each effort will be doubling each interval, testing your ability to maintain your paces through muscle fatigue.
The Workout
10 Rounds:
- 1:00 Bike (7-8 RPE)
- 1:00 Rest
The goal would be to try and hold the same pace you held for Aerobic 101, attempting to hit roughly the same number of calories or meters each interval.
Power 102
This workout kicks things up a notch. You’ll double the duration of work for each interval while decreasing the rest down to a one to two work-to-rest ratio.
The Workout
10 Rounds:
- 0:30 Bike (9-10 RPE)
- 1:00 Rest
Attack this workout a little differently than Power 101. Now that you know your top-end pace, start slightly below that and aim to increase the pace each round, with your tenth interval being a max effort sprint.
Pacing Pyramid
This workout is meant to test how well you know your different paces. It’s also the first time you’ll be performing a workout for a prescribed number of calories — or meters, if needed — as opposed to a timed interval workout.
You’ll perform the prescribed calories or seconds and then rest equally as long as it took you to complete that interval. The descending format of this workout means you should be increasing your pace every round on the bike.
The Workout
For Time:
-
- 50 Calories/50 seconds (6-7 RPE)
- Rest 1:1
- 40 Calories/40 seconds (7-8 RPE)
- Rest 1:1
- 30 Calories/30 seconds (8 RPE)
- Rest 1:1
- 20 Calories/20 seconds (9 RPE)
- Rest 1:1
- 10 Calories/10 seconds (10 RPE)
Focus on holding a consistent RPM or wattage for the duration of each interval. Your final ten calories or seconds will be an all-out sprint. Your score for this workout is the total time to complete the prescribed work (including the rest).
Advanced Workouts
As you move from the intermediate to advanced category, the workouts will now combine the air bike with other movements. This will introduce a powerful new stimulus to challenge paces you think you’re capable of holding. You’ll need to shift to a more intuitive approach and adjust paces accordingly to get the most out of each workout.
One-Minute Max Calories (or Meters)
It may not sound like much, but sometimes the simplest workouts are the most painful. This test is not appropriate for someone just starting out on the air bike, as it will likely result in an experience that ruins your desire to ever touch the bike again. Now that you’ve built up a strong base at varied time domains and intensities, it’s time to see what you’ve got.
The Workout
For Calories or Meters:
- 60-Seconds
This is a short, fun, and miserable test to throw in every once in a while to see where things are at. If you do this test and you’re walking around and talking within a minute of rest, you did it wrong.
Death Race
This workout is a popular air bike test in the CrossFit world, combining two simple movements that elicit a painful and effective workout. You’ll notice that men have a prescribed fifteen calories, while women have ten calories each round. (CrossFit allows trans athletes to compete with other athletes of their gender. However, it does not have a non-gendered division or workout prescriptions at this time.)
The Workout
5 Rounds for Time:
- 15/10 Calories or 45/40 Seconds at 6-7 RPE
- 10 Burpees
By now, you may have enough experience to know roughly how long a given amount of calories will take you. Alternatively, perform a particular number of seconds instead. Don’t make the mistake of attempting to hold a pace from a workout that had built in rest.
You’ll need to account for the fact that these are five rounds with no rest, with fifty burpees sprinkled in. A good strategy is to start conservatively (a six to seven RPE) and attempt to hold that pace or build across the five rounds by feel.
Dirty DT
This workout puts a spicy interval twist on the CrossFit Hero workout DT. Mixing the air bike with moderately heavy weights is a potent combination. As a result, you may need to figure out pacing within this workout due to the unfamiliar fatigue introduced by the barbell.
The Workout
5 Rounds (2:00 work / 2:00 rest):
- 1 Round of DT
- Max calorie or meter air bike in the remaining time
1 Round of DT is:
- 12 Deadlifts
- 9 Hang Power Cleans
- 6 Push Jerks
The prescribed weight is a 105-pound barbell for women and 155 pounds for men. Regardless of your gender, you’ll want to choose a weight that allows you to complete the full round of DT in about a minute. This will leave about a minute to work on the bike each round.
A good way to break up this barbell complex is to do 11 deadlifts and then drop the bar. Then, deadlift your 12th rep and go directly into eight hang power cleans, dropping the barbell after eight reps.
Finish the round by deadlifting the bar and completing your ninth hang power clean, followed by six unbroken push jerks.
How to Program Air Bike Workouts
As with barbell work, you don’t want to dive into air bike training full force as a beginner. Instead, you’ll want to gradually progress your training to improve over time. To do this, you’ll want to keep an eye on stats you may be unfamiliar with.
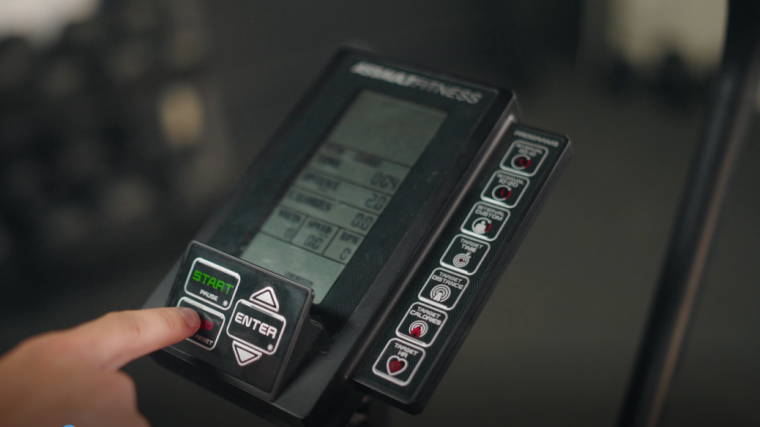
It’s important to learn different paces on the bike, which can be established by watching RPMs or Watts on the air bike screen. RPM stands for “revolutions per minute.” This refers to the cycle rate of the bike pedals each minute.
Wattage refers to the power you’re producing on the bike at that moment. Pacing will be highly specific to your individual fitness level, so it’s important to have a system to learn what’s appropriate for you.
How to Use the RPE Scale
Utilizing the RPE scale is a helpful tool when learning different paces on the bike, relative to your individual capacity. RPE stands for “rating of perceived exertion,” where a scale of one to 10 is used to measure the desired effort for a given workout, interval, or movement.
Here’s a simple breakdown to help you understand the scale:
RPE Scale
- 1: Lying on the couch.
- 2-3: Going for a walk.
- 4-5: Warm-up or recovery pace that can be sustained for an extended period.
- 6-7: Moderate pace that feels like work, but there’s still more in the tank.
- 8-9: Threshold pace that’s extremely challenging and uncomfortable to hold.
- 10: Max effort pace.
Using the RPE scale and learning to associate how things feel with the numbers on the bike screen will teach you the different paces that are right for you. Make sure you’re intentional with each workout, paying attention to either the RPM or Watts you’re able to sustain for different time periods.
Focus on being consistent. Try not to allow your pace to fluctuate during sets. Over time, this focus will allow you to achieve paces by feel, rather than needing to monitor the screen for the full duration of the interval or workout.
How to Air Bike Properly
Working on the air bike might be easier to learn than more technically advanced barbell lifts, but that doesn’t mean you don’t have to do it right. Here’s how to make sure you’re using your air bike properly.
Seat Height
Set your seat height so your knees have a slight bend in them when your foot is in the very bottom position of the pedal revolution. You can also set the seat at hip height when standing next to the bike seat.
Correctly setting your seat height will prevent you from overextending your knees (with the seat too high). This allows you to get the most out of your leg strength.
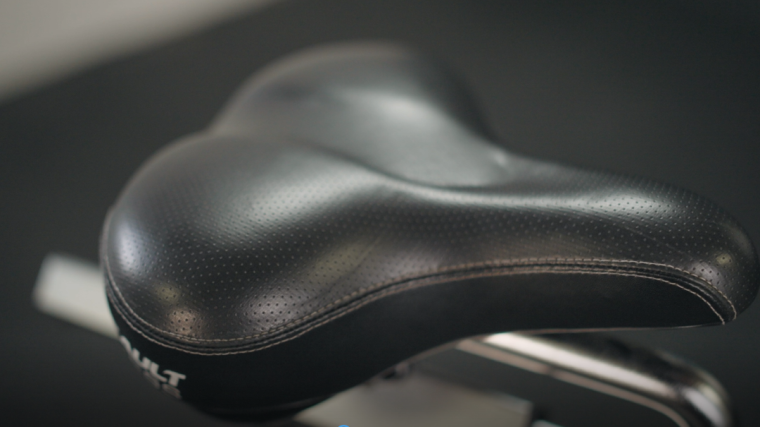
Seat Position
Bring the handles evenly next to the bike monitor (in a neutral position). While sitting in an upright position, your elbows should have a very slight bend in them. Adjust the seat forward and back as needed to accomplish this.
By setting your seat position properly, you’ll keep unwanted pressure off your knees (if the seat is too far forward). The seat position will also prevent you from excessively leaning forward (if the seat is too far back).
Foot Position
Keep the balls of your feet on the pedals when using the air bike. This will allow you to get the most power out of your legs, simulating the mechanics used with proper running form.
Arms and Legs
When biking, be sure to push and pull the handles with your arms to get the most out of every revolution. Using your shoulders, chest, and back muscles distributes the workload across your upper body, making it more efficient and sustainable.
[Read More: The Best Upper Body Exercises and Workouts]
The same concept applies to your legs, where you should push down with your quads and then actively pull the foot up with your hamstrings. Think of the push as the work and the lift as the active recovery.
[RELATED: Best Leg Exercises]
Breathing
Find a breathing cadence that works for you on the bike. There’s no cookie-cutter method, but the most important thing is that you are consciously aware of your breathing. Establishing a consistent breathing pattern can help your body relax and bring your heart rate down.
To start, try inhaling for four to five seconds and then exhaling by feel. Synching this breathing pattern with the cadence of the bike handles helps to focus on breathing and take your mind off the pain of the bike.
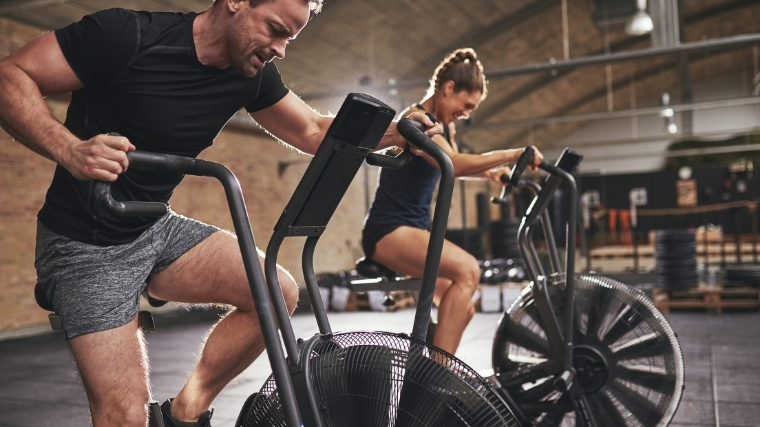
Benefits of Air Biking
It’s easy to get intimidated by a piece of equipment that puts the world’s top competitors through their paces at the CrossFit Games. But there are plenty of reasons to get after a workout on the air bike.
Beginner Friendly
The air bike allows new athletes to safely train at high intensities, without needing to think or worry about technique too much. Beginners need time to safely learn the complex barbell and gymnastics movements in CrossFit, but can still get a really hard workout by incorporating the bike during this developmental period.
High Intensity, Low Impact
The bike mimics the same coordination of running (arms and legs both moving), without the same impact on the joints. Whether you’re starting your journey, getting back into exercise, or rehabbing an injury, the bike is a great way to build your cardio and leg stamina without all the wear-and-tear. You can build an incredible engine on the air bike without ever going for a run.
Aerobic Base and Active Recovery
The bike helps you perform low heart rate aerobic sessions, also known as zone two workouts. These sessions balance nicely with high intensity training because having a strong aerobic base can help with recovery and overall metabolic health.
This low intensity, steady state training should be performed around your maximum aerobic heart rate. To figure out your estimated max aerobic heart rate, calculate 180 minus your age. This number represents the highest your heart rate should be during a zone two session.
Staying within 10 beats per minute (BPM) of your aerobic max is the most optimal way to target zone two training. For example, a 30-year-old may have a max aerobic heart rate of about 150 BPM. In that case, it would be optimal for their zone two session to be between 140 and 150 BPM for the entire workout.
If this estimate doesn’t match your needs, simply follow the RPE scale and perform a 30 to 45 minute session at an RPE between three and five. Go at an intensity where you can comfortably hold a conversation during the entire duration of your workout.
Get to Work
Regardless of your experience level, the air bike is a low-impact machine that can help you build incredible cardio and stamina. Focus on being consistent and learning what paces are appropriate for your current fitness level.
This nine workout progression adds extra cardio training into your routine and can be repeated as you improve over time. Have fun and set a goal for yourself with each workout to give it purpose and meaning.
Featured Image: Arsenii Palivoda / Shutterstock