Anyone who gets into the gym and picks up weights is typically concerned with two things: Lifting heavier weights for more reps.
Progressive overload — doing more than you did last time, session to session — is the method you’ll employ to get stronger and bigger. To see results, you’ll need to be consistent in the gym, follow a thoughtful workout plan, and develop muscular endurance — the ability to ward off fatigue during sets and recover more quickly between workouts. Here’s what you need to know.
What Is Muscular Endurance?
Muscular endurance refers to how long you can do a set of an exercise before you hit failure from fatigue.
Many people measure this by the number of reps they can get to. Another way to measure muscle endurance is by tracking the time you can hold a position, like a plank.
Muscular endurance training typically uses shorter rest times to challenge your muscle fibers differently than heavier resistance training and longer rest periods.
Types of Muscular Endurance
There are three main forms of resistance training involving some kind of muscular endurance. Isometric, isotonic, and isokinetic forms of physical activity all offer unique challenges to add to your muscle endurance routine. Isometric and isotonic moves pop up the most in workout programs.
- Isometric: Isometric exercises and contractions have you produce force without a change in the length of your targeted muscle. For example, a plank produces force at the abdominals to prevent your back from arching, but you stay locked in one position.
- Isotonic: Isotonic exercise refers to the mass majority of resistance training performed in the gym. It is where repetitions are performed with consistent resistance, like during a bodyweight squat.
- Isokinetic: Isokinetic exercise is a slightly rarer type of training and may require special equipment. Isokinetic exercise is when you maintain a specific pace and resistance of each repetition, regardless of the position, through the range of motion, such as an isokinetic leg extension.
Why Is Muscular Endurance Important?
Even if your primary goal is to gain muscle size and strength, improving your muscular endurance will help. It’ll give you a baseline of strength, is a fantastic tool for training your stabilizers, and improves technique.
Establish a Strong Training Foundation
Beginners are in for quite a treat in the gains department when starting in the gym. The first several months (and even years) contain rapid gains. That said, you’ve still got to spend time learning the fundamentals and building up a base of strength.
Using a muscular endurance-style program is a great way to start building your form and strength levels from the ground up. From fueling hypertrophy to getting stronger at key movement patterns and strengthening individual muscle groups, higher repetition sets that use full-body exercises and calisthenics are some of the best ways to set yourself up for long-term success.
You’ll Become More Stable
Large muscle groups are responsible for producing lots of force during exercise. The back squat, for example, demands massive effort from your glutes, quads, and hamstrings to get you back up to standing position. However, your stabilizers (like your transverse abdominis and erector spinae) support these larger muscles, providing a secure base from which to produce their force.
The health benefits of this increased stability are big across your entire body. Muscular endurance is a key component of joint stability, helping your joints handle the movement patterns associated with big strength efforts. In this way, high-rep bodyweight exercises can help you stave off potential plateaus or injuries.
Improve Your Lifting Technique
The more repetitions you perform with proper form, the more ingrained the technique becomes. From managing injury risk to practicing tough movement patterns, there’s a lot to gain from being as technically sound as possible.
Muscle endurance facilitates what’s called greasing the groove (a powerlifting saying that refers to practicing a specific lift over and over) because you’ll perform a lot of reps with (relatively) light weights. Think: around 60 percent of your one-rep max, for upwards of 15 reps (depending on your experience level and the exercise — more on that below). You’ll experience the feeling of fatigue under a specific movement pattern. The end result: you’ll better understand the warning signs of technique breakdown in the future.
Yes, even if you want to get big and strong, building up your muscular endurance will help. It’ll give you a baseline of strength to start with, is a fantastic tool for training your stabilizers, and improves technique to boot.
Best Muscular Endurance Exercises
- Push-Up
- Bodyweight Squat
- Pull-Up
- Dead Hang
- Sit-Up
- Overhead Carry
- Plank
- Step-Up
- Walking Lunge
- Kettlebell Swing
1. Push-Up
[Read More: Push-Up Workout Plan for Beginners]
| Equipment Needed | Body weight |
| Muscles Worked | Chest, triceps, anterior deltoids, and core |
| Sets & Reps | 3-5 sets of 10-20+ repetitions |
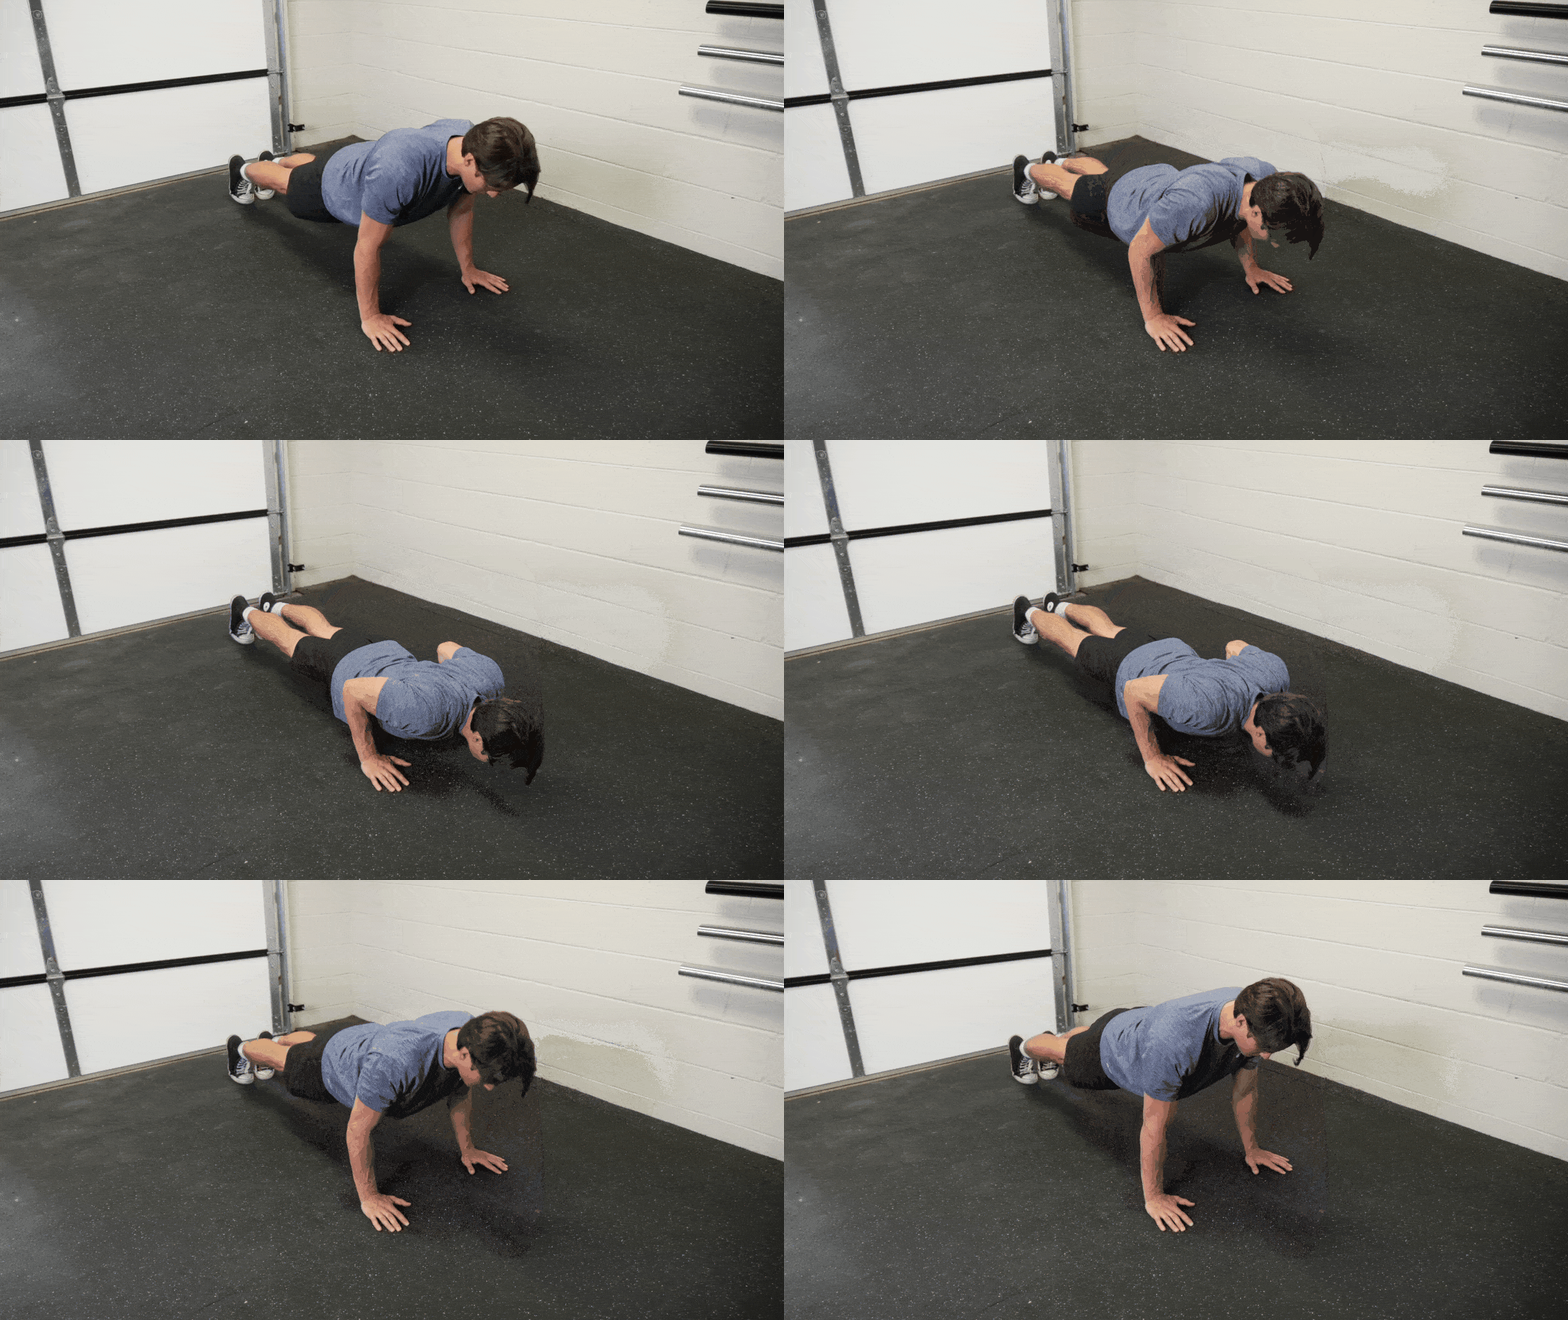
The push-up is a quintessential upper-body exercise. It combines the major pushing muscles (shoulders, chest, and triceps) and your core into a highly effective movement. While it usually starts as a strength or skill exercise, as you gain strength, it can become an effective endurance-builder for your torso muscles.
How to Do It:
- Reach your arms straight ahead of your body while in the standing position. Pin your shoulders back and down — this is your grip width.
- Get on your knees and place your hands on the floor in the grip positioning you just established.
- Brace your core and pop up onto the balls of your feet with straight, locked out legs. Have your feet shoulder-width apart or close together for a bigger challenge.
- Stabilize your whole body and bend your elbows under control. Once you reach approximately 90 degrees of elbow flexion, push back up to the starting position.
- Repeat for repetitions.
[Check out our push-up guide for everything you need to know.]
Modifications
- Make it Easier: Perform them from the knees instead of the balls of your feet. Alternatively, do them on an incline using a bench, or slowly scale the height of your incline using a Smith machine. Another option is to set up a band on the squat rack safety arms and use the band to reduce resistance as you lower yourself into each repetition.
- Make it Harder: Extend the range of motion or adding resistance. Place your hands on a slightly elevated surface (bumper plates work well here) to create a deficit push-up. Likewise, have someone place a light plate on your back to add resistance.
2. Bodyweight Squat
[Read More: The Best Glute Workout Exercises, With Tips From Our Experts]
| Equipment Needed | Body weight |
| Muscles Worked | Quads, glutes, and core |
| Sets & Reps | 3-5 sets of 10-20+ repetitions |
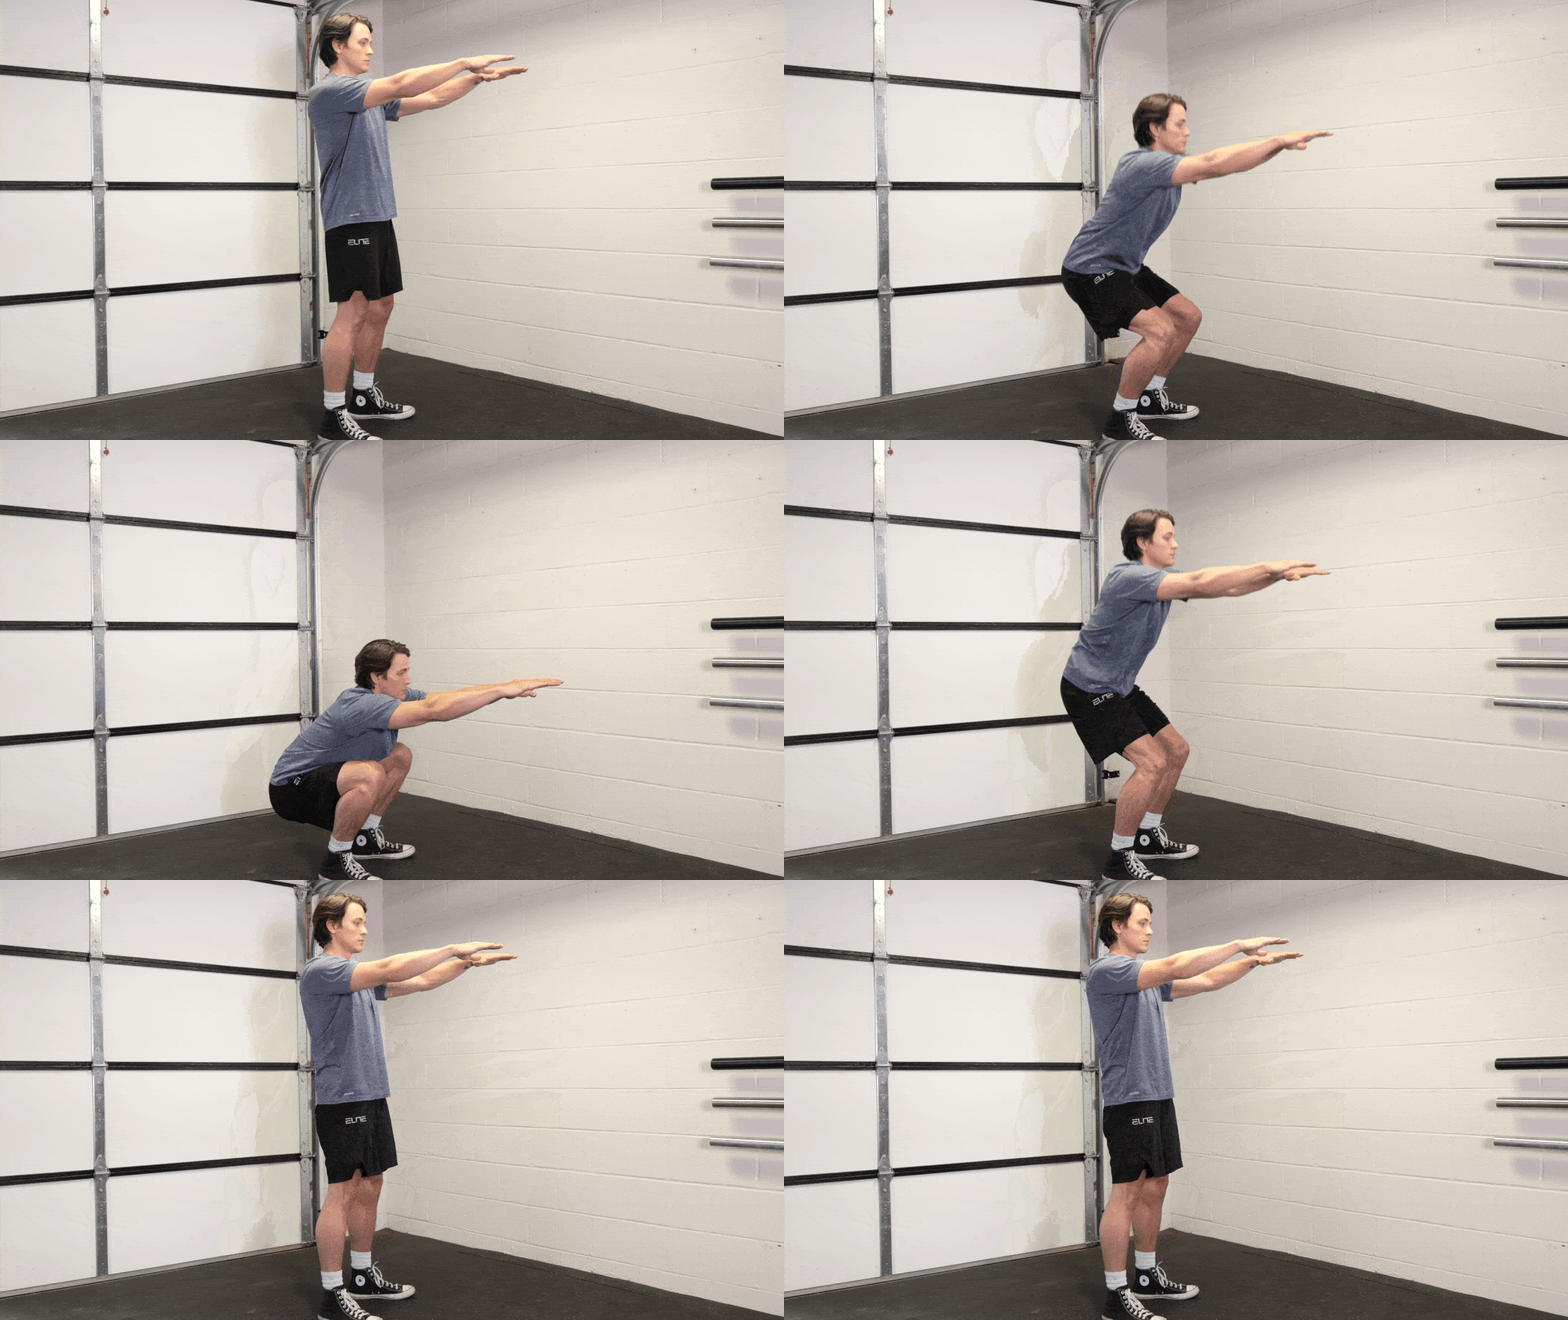
You likely do it every day in one way or another, even if it’s just to settle in for a Netflix marathon on the couch. The squat is one of the most beneficial and popular exercises out there. It recruits an absolute ton of muscle mass and requires a solid amount of coordination. While you build the muscular endurance of your lower body, bodyweight squats serve as a foundation for endless squat variations in your future.
How to Do It:
- Set your stance by placing your feet hip-to-shoulder width apart with your toes straight ahead or slightly turned out to comfort.
- Place your hands in a cross-arm position, with your left arm on your right shoulder and vice versa.
- Brace your core, tighten your legs, and lower yourself into the bottom position.
- Once your hips break parallel with the floor, push back up to the starting position. Repeat for repetitions.
Modifications
- Make it Easier: Make the bodyweight squat easier by using a plyo box as a target for your depth. Alternatively, reduce the difficulty by grabbing a set of TRX straps to help stabilize you throughout the range of motion as you build your endurance.
- Make it Harder: Up the ante by adding resistance. The natural progression of your bodyweight squat is the goblet squat — simply grab a dumbbell.
3. Pull-Up
[Read More: The Best Shoulder Exercises, + 4 Workouts From a CPT]
| Equipment Needed | Body weight, pull-up bar |
| Muscles Worked | Traps, lats, arms, forearms, and core |
| Sets & Reps | 3-5 sets of 1-15+ repetitions |
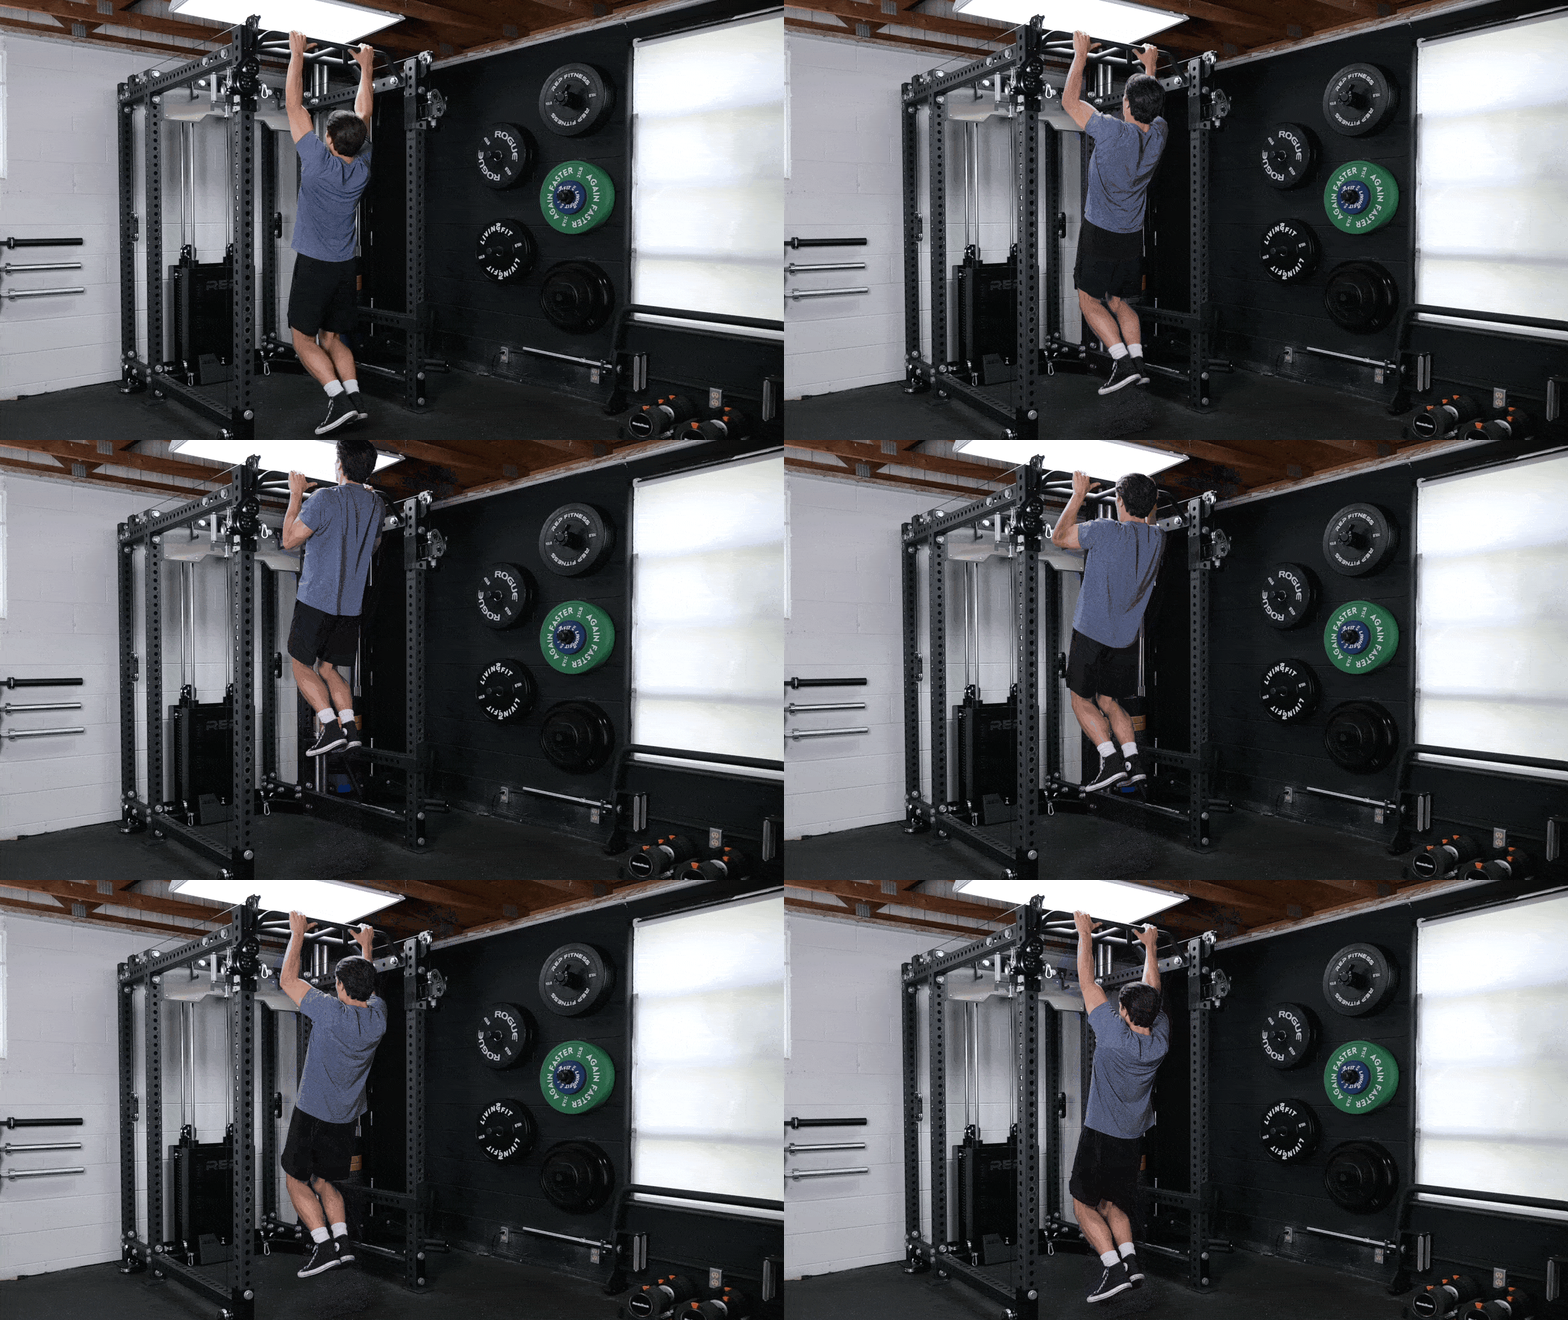
Pull-ups might be intimidating, but they’re well worth the effort. From inspirational movie montages to gains with minimalist equipment, the pull-up offers a ton of upper-body muscle mass and strength building. They won’t come easy, but cranking them out will bring you unprecedented back strength (and bragging rights).
How to Do It:
- Grab a pull-up bar using an overhand grip just outside of shoulder width.
- Perform a dead hang and stabilize against any unnecessary body sway. This is your starting position.
- Set your shoulder blades back and down to stabilize your shoulder joints.
- Brace your core and pull with your arms, lats, and traps.
- Raise yourself to the bar and lower yourself back to the starting position under control.
[Check out our pull-up guide for everything you need to know.]
Modifications
- Make it Easier: A change of grip placement makes a huge difference in your stability and muscle emphasis. Try an underhand grip or neutral grip to help build towards overhand pull-ups. You may also use assistance from a resistance band.
- Make it Harder: One of the easiest ways to make your pull-ups harder is by adding resistance. Attach a plate or two to a dip belt to hang from your waist and test out weighted pull-ups.
4. Dead Hang
| Equipment Needed | Body weight |
| Muscles Worked | Forearms |
| Sets & Reps | 1-3 sets of maximum time |
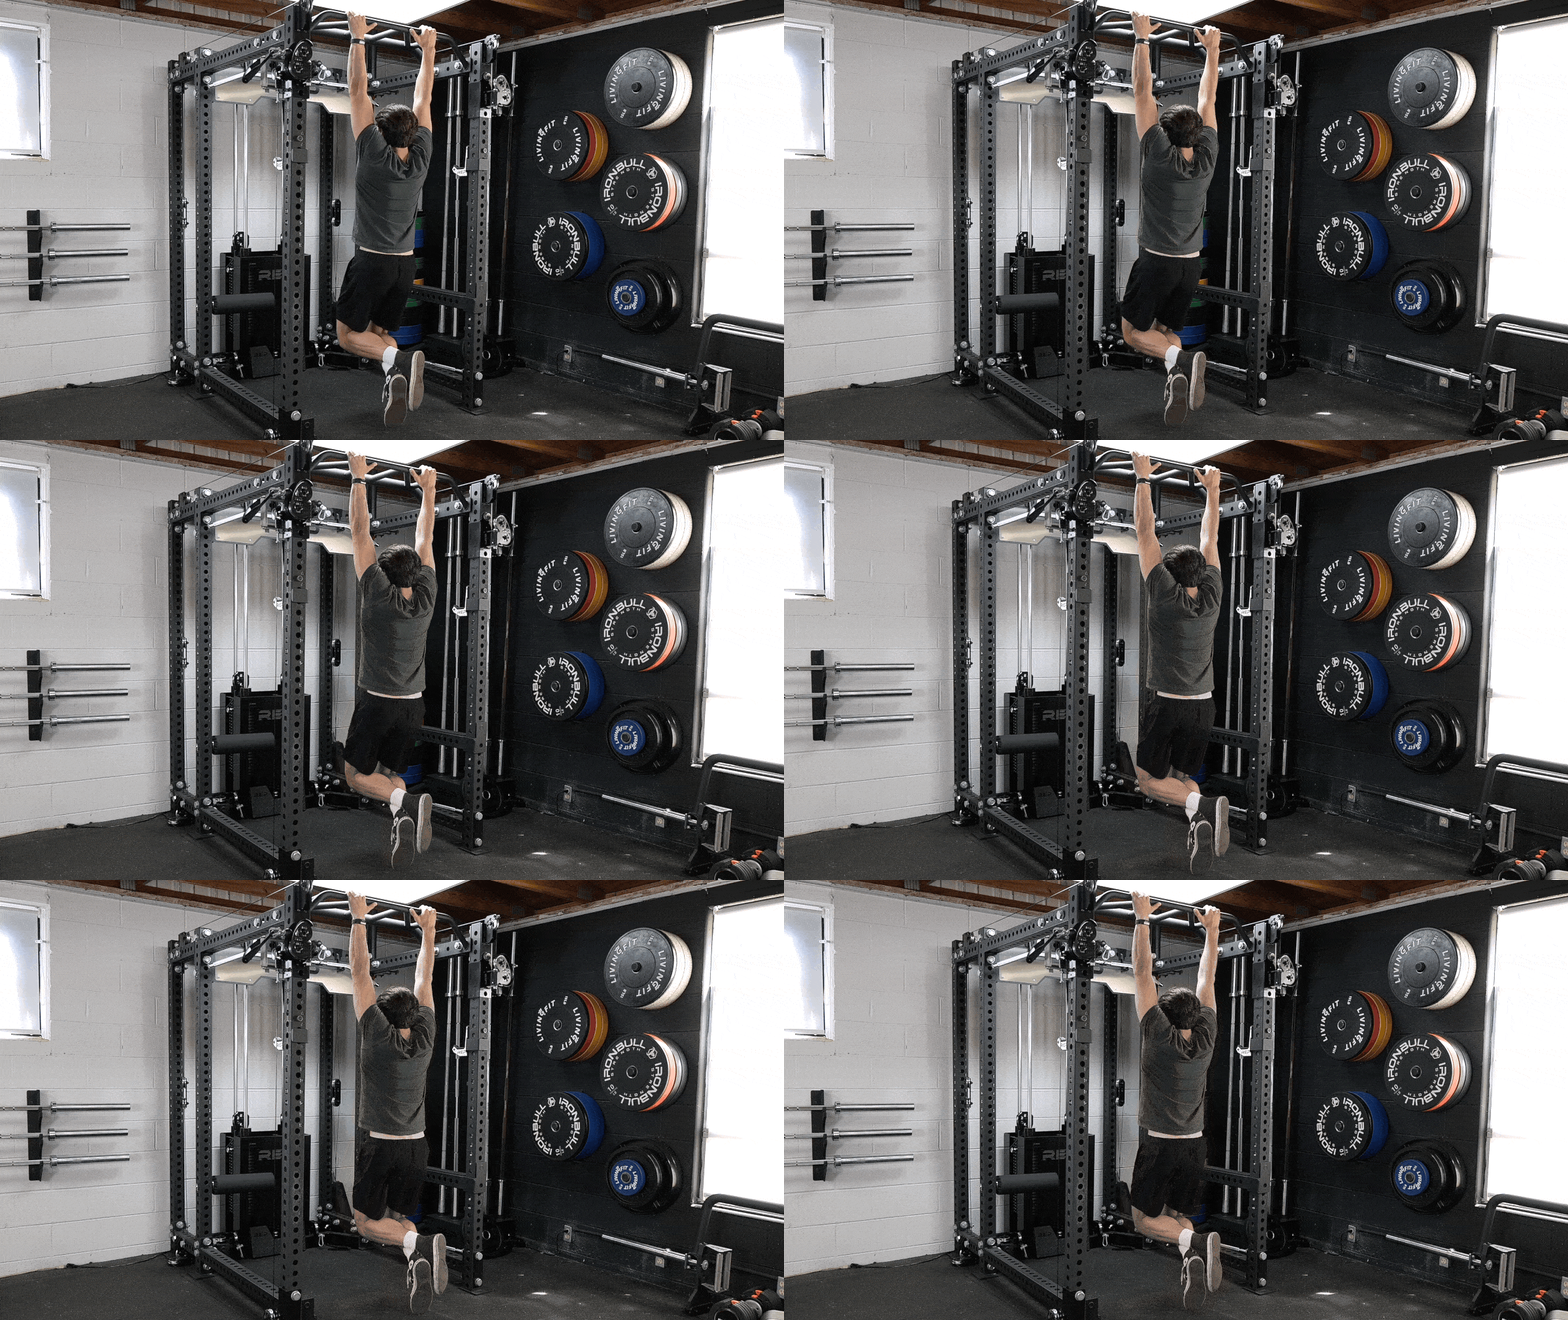
Your grip is an often unsung hero of training. Without a strong and durable set of hands and forearms, you won’t be able to hold onto the weight during many heavier-loaded exercises. Thankfully, training the dead hang is a straightforward way to build up your grip. You literally just have to hang on.
How to Do It:
- Grab onto a pull-up bar using a double-overhand grip with your hands about shoulder-width apart.
- Lower yourself into a stationary dead hang position, with no body sway.
- Hold this isometric contraction for as long as possible.
Modifications
- Make it Easier: Apply a band to your dead hang in a similar way you would for a band-assisted pull-up. Reduce the overall body weight challenge to your hand grip and build it up from there.
- Make it Harder: Try to perform your dead hang training using towels wrapped around the bar instead of the straight bar itself. Loop a towel around the bar (one for each hand) and hang from them instead.
5. Sit-Up
| Equipment Needed | Body weight |
| Muscles Worked | Abdominals |
| Sets & Reps | 3-5 sets of 10-30+ repetitions |
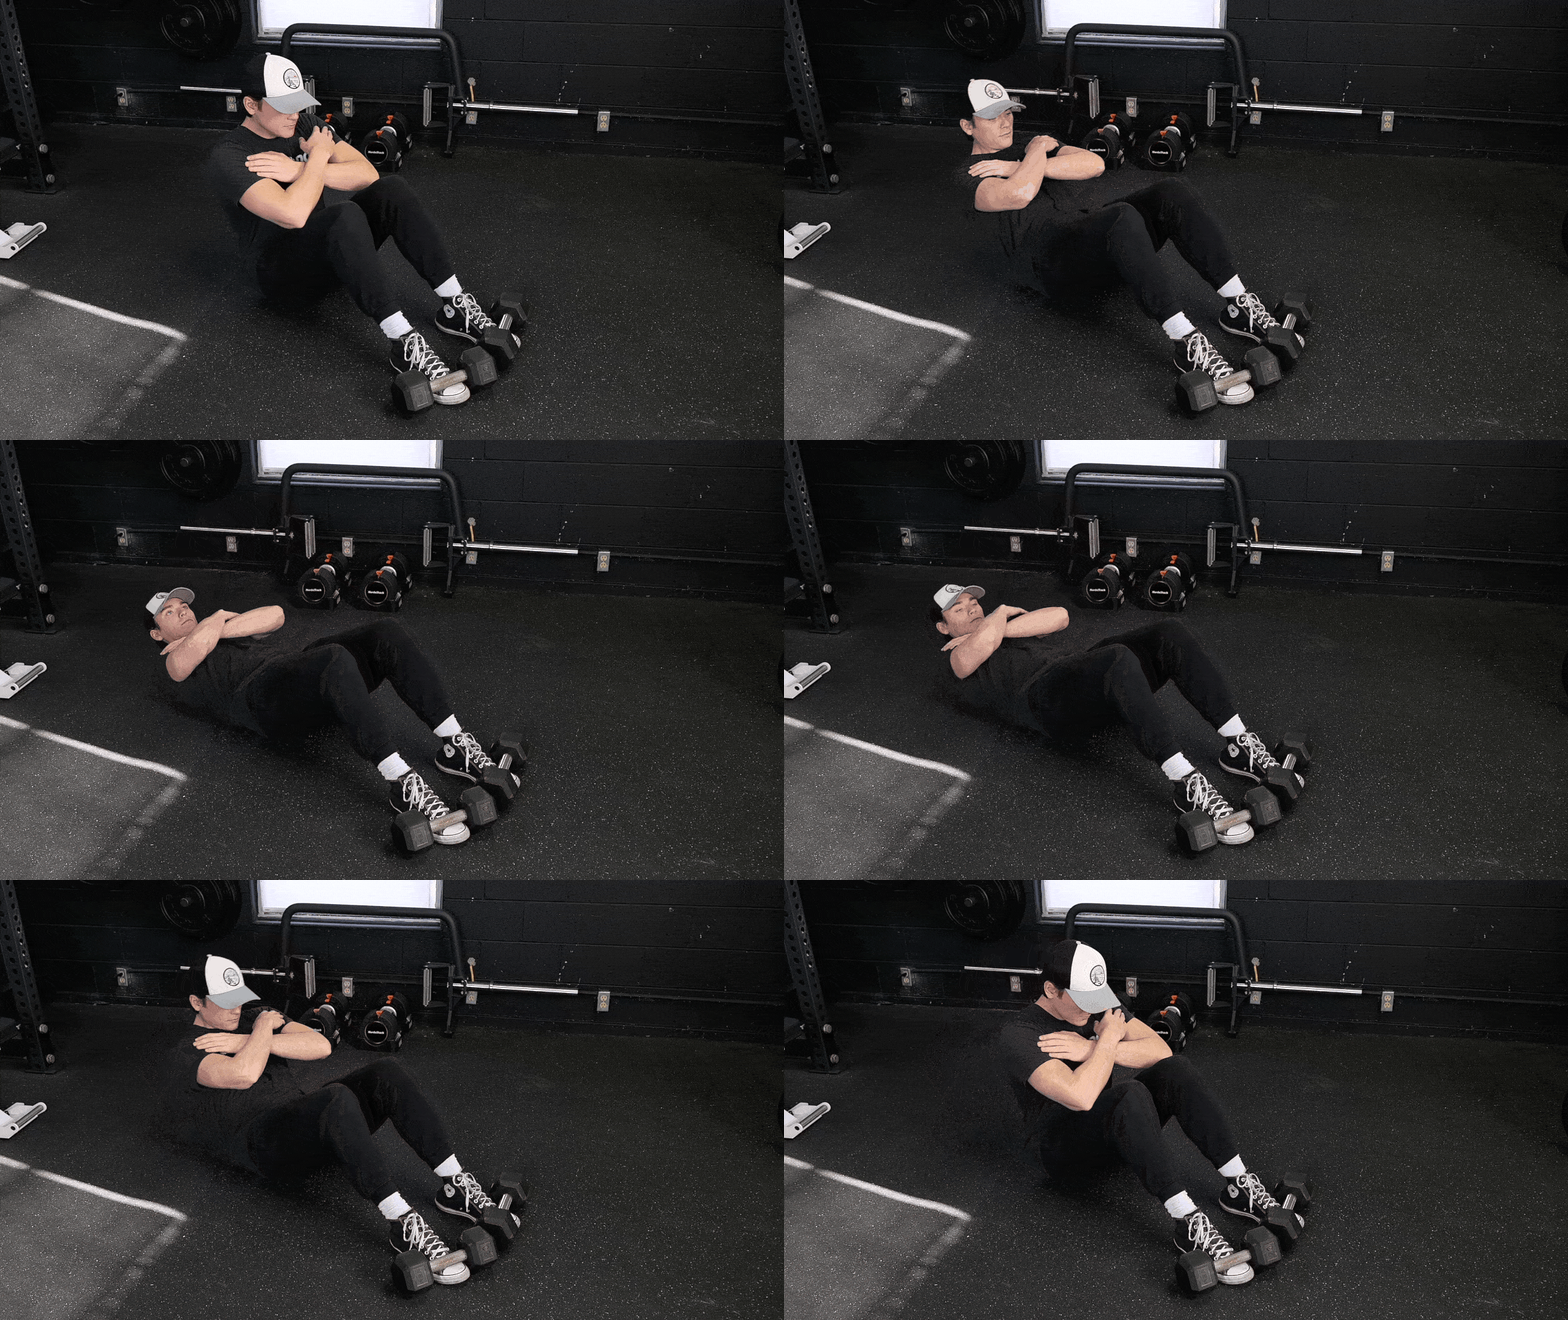
Sit-ups are oft-maligned as a vanity exercise naively done to help develop a six-pack. But sit-ups, done properly, can be a fantastic way to establish core muscular endurance. With no equipment needed, you can lie down and bang out some core durability from anywhere.
How to Do It:
- Lie down on your back with your legs bent to about 45 degrees and keep your feet flat on the floor.
- Keep your chin tucked and contract your abdominals to bring your upper body into a sitting position. Press your feet into the floor.
- Squeeze your abs and slowly return to the starting position.
[Check out our sit-up guide for everything you need to know.]
Modifications
- Make it Easier: Try placing your heels on a bench and creating a 90-degree angle at your knees to reduce the resistance you feel during the sit-up.
- Make it Harder: Extend the range of motion of your sit-ups by performing them on an exercise ball instead of flat ground. Arch your back around the exercise ball to increase the distance of each rep.
6. Overhead Carry
[Read More: The Best Forearm Exercises for Strength, Plus 4 Workouts]
| Equipment Needed | Kettlebells or dumbbells |
| Muscles Worked | Grip, shoulders, and core |
| Sets & Reps | 3-5 sets of max time |
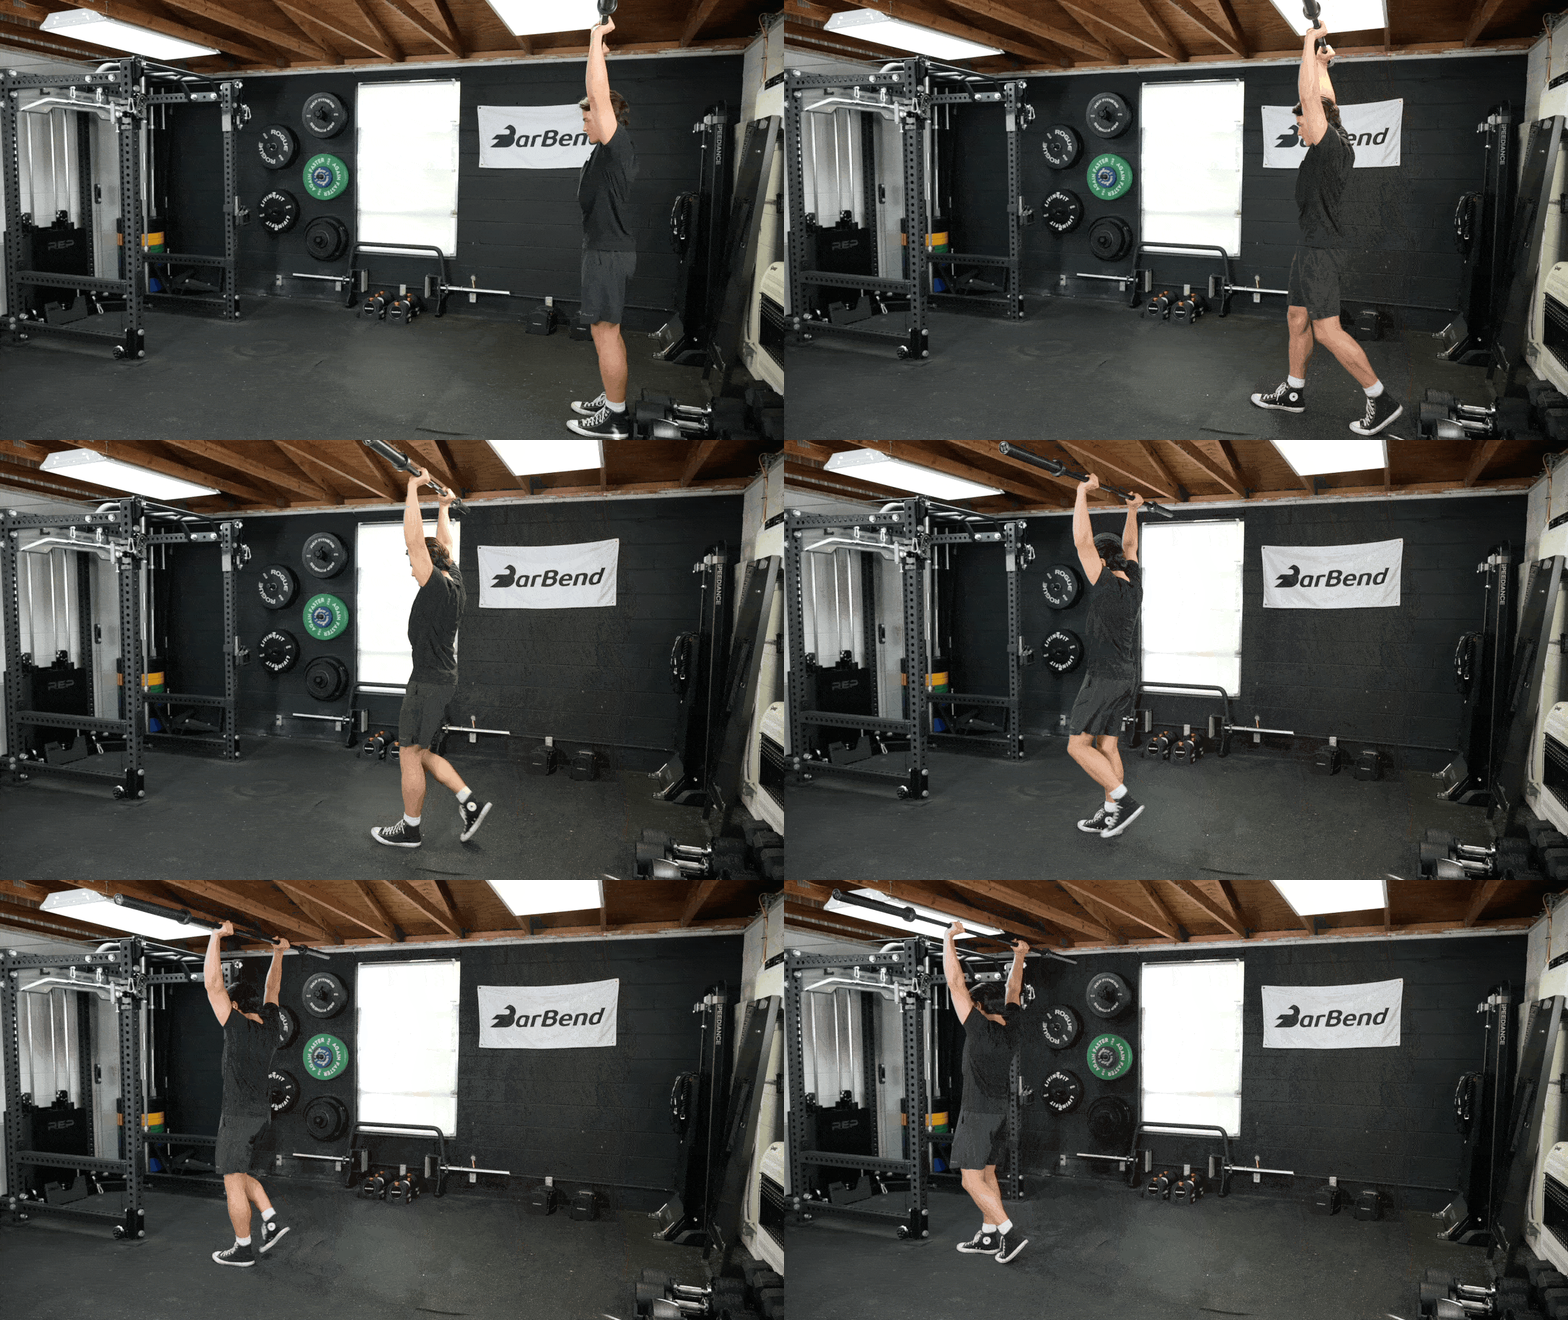
Shoulder stability is one of the most important factors in long-term upper-body training success. Your rotator cuff is often the target of smaller band-based exercises but is also pumped up quite significantly by using muscular endurance exercises. The overhead carry integrates your shoulder stabilizers beautifully into a core exercise that fits into your workout.
How to Do It:
- Grab a pair of dumbbells or kettlebells.
- Place a dumbbell or kettlebell in each hand and raise them to a locked-out overhead position.
- Protract your shoulder blades straight up and hold this position for the duration of the carry.
- Walk forward in a controlled fashion, bracing your core and maintaining a locked-out shoulder until you cannot maintain that position any longer.
[Check out our overhead carry guide for everything you need to know.]
Modifications
- Make it Easier: Start with something simple such as just the weight of your arms. Aim to hold them fully locked out in protraction for a predetermined step count to build your base.
- Make it Harder: Make the overhead carry harder by using a kettlebell turned upside down (in the “bottoms-up kettlebell” position). Hold the handle in your hands with the bell portion facing upwards as you walk.
7. Plank
[Read More: The Best Ab Exercises, Plus 4 Ab Workout Routines From a Trainer]
| Equipment Needed | Body weight, yoga mat optional |
| Muscles Worked | Quads, glutes, shoulders, and core |
| Sets & Reps | 2-3 sets of max time |
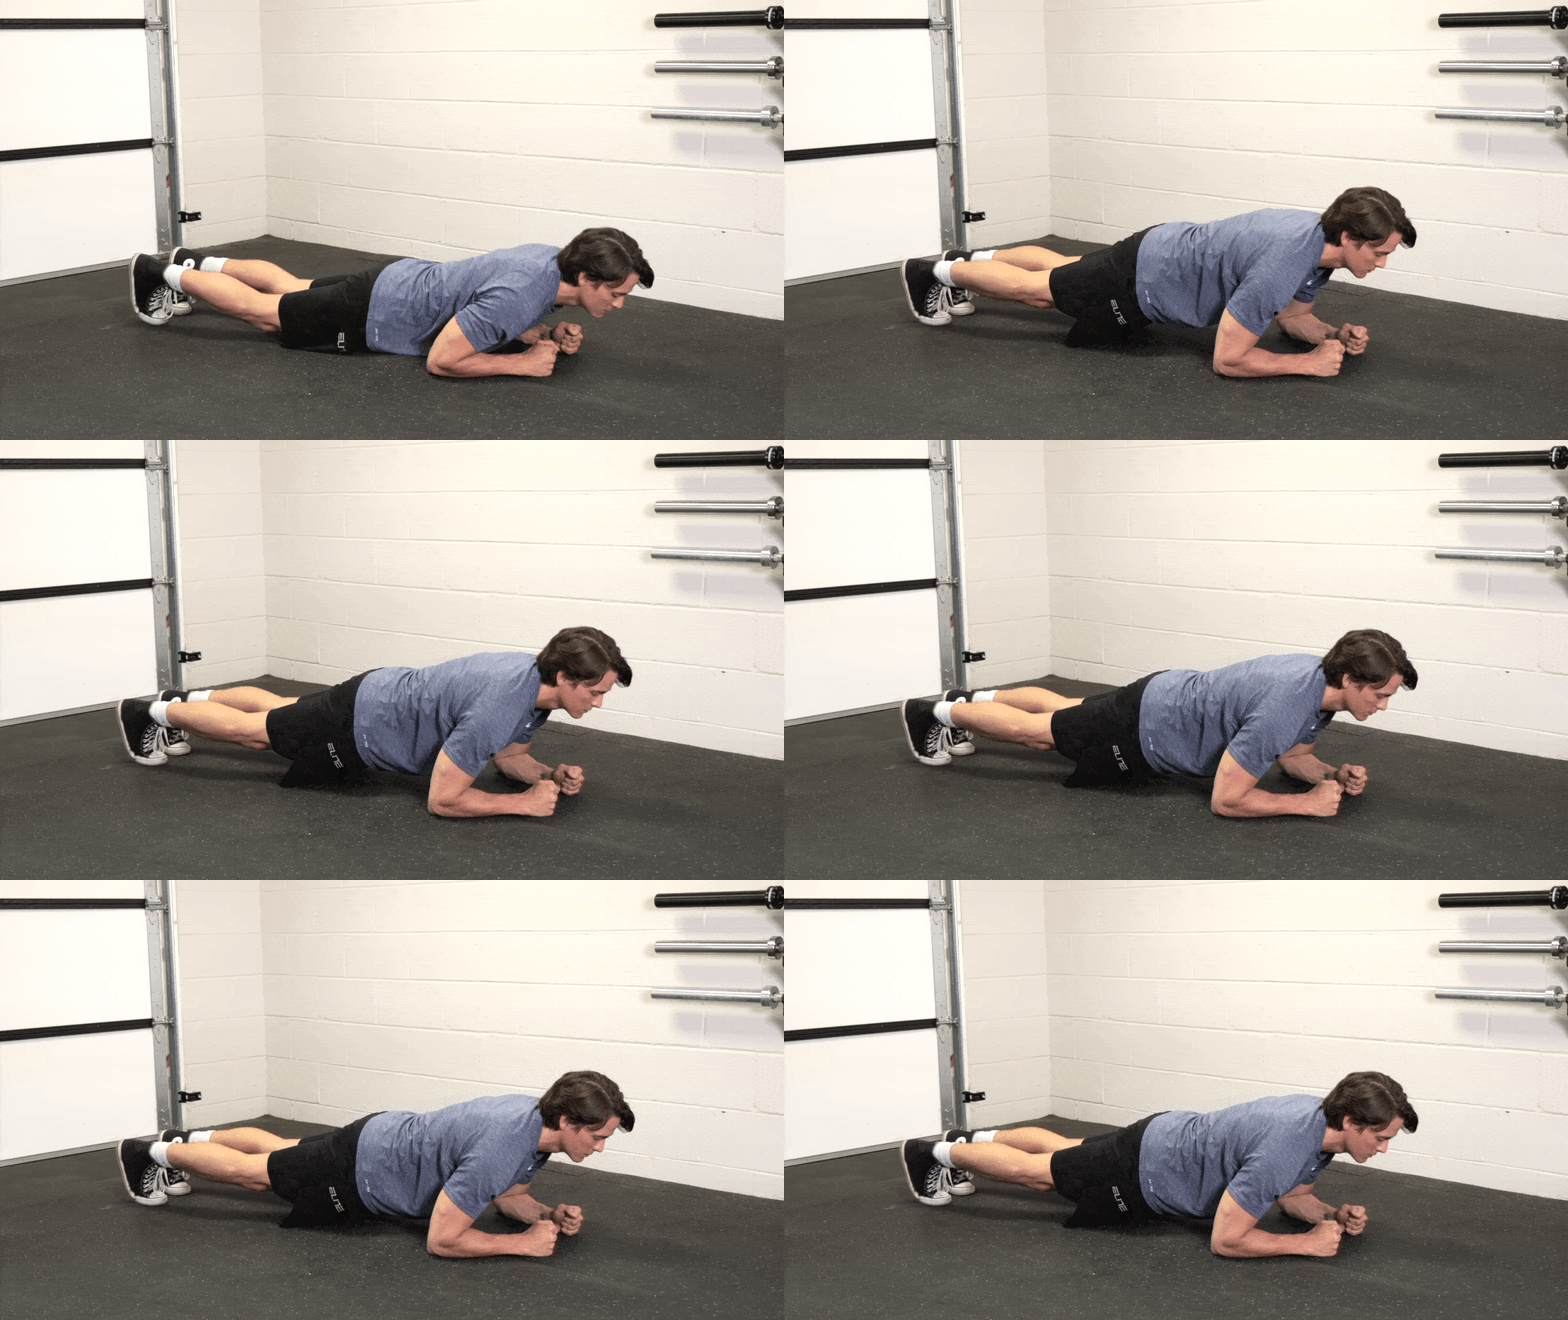
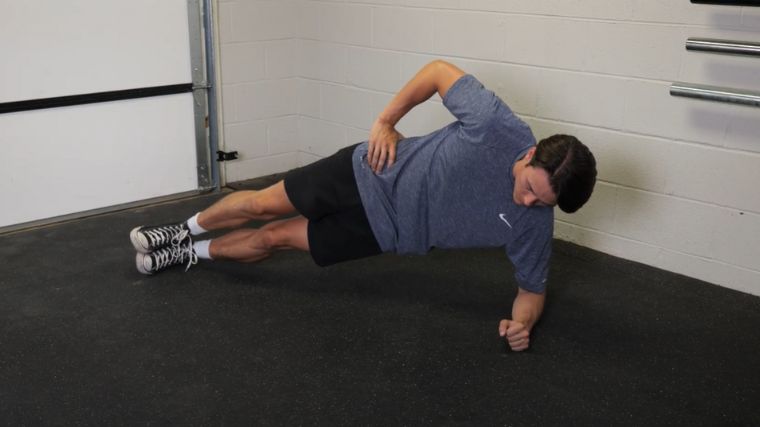
The plank may be one of the most recognizable exercises in any program. From yoga lovers to powerlifters, pretty much every athlete has used one form of plank or another. The plank recruits your major muscle groups to stabilize against spinal extension for an extended period of time. That’s good, because it’s perhaps one of the most important postural endurance components for life and lifting alike.
How to Do It:
- Set up in a push-up position face down on the floor.
- Clasp your hands together to make a triangle out of your forearms, with your forearms resting on the ground. Alternatively, you can keep your hands on the ground with your arms straight out.
- Brace your shoulders, abs, quads, and glutes.
- Pop up onto the balls of your feet and hold full body tension for as long as possible.
[Check out our plank guide for everything you need to know.]
Modifications
- Make it Easier: Perform the plank from your knees or using an elevated surface for your hands or forearms to reduce the resistance experienced by your core.
- Make it Harder: Widen your feet placement, arm placement, or both to increase the challenge of your plank.
8. Step-Up
[Read More: The Best Leg Exercises for Muscle & Strength, According to a PhD]
| Equipment Needed | Body weight, step-up platform |
| Muscles Worked | Quads, glutes, and core |
| Sets & Reps | 3-5 sets of 10-40 repetitions |
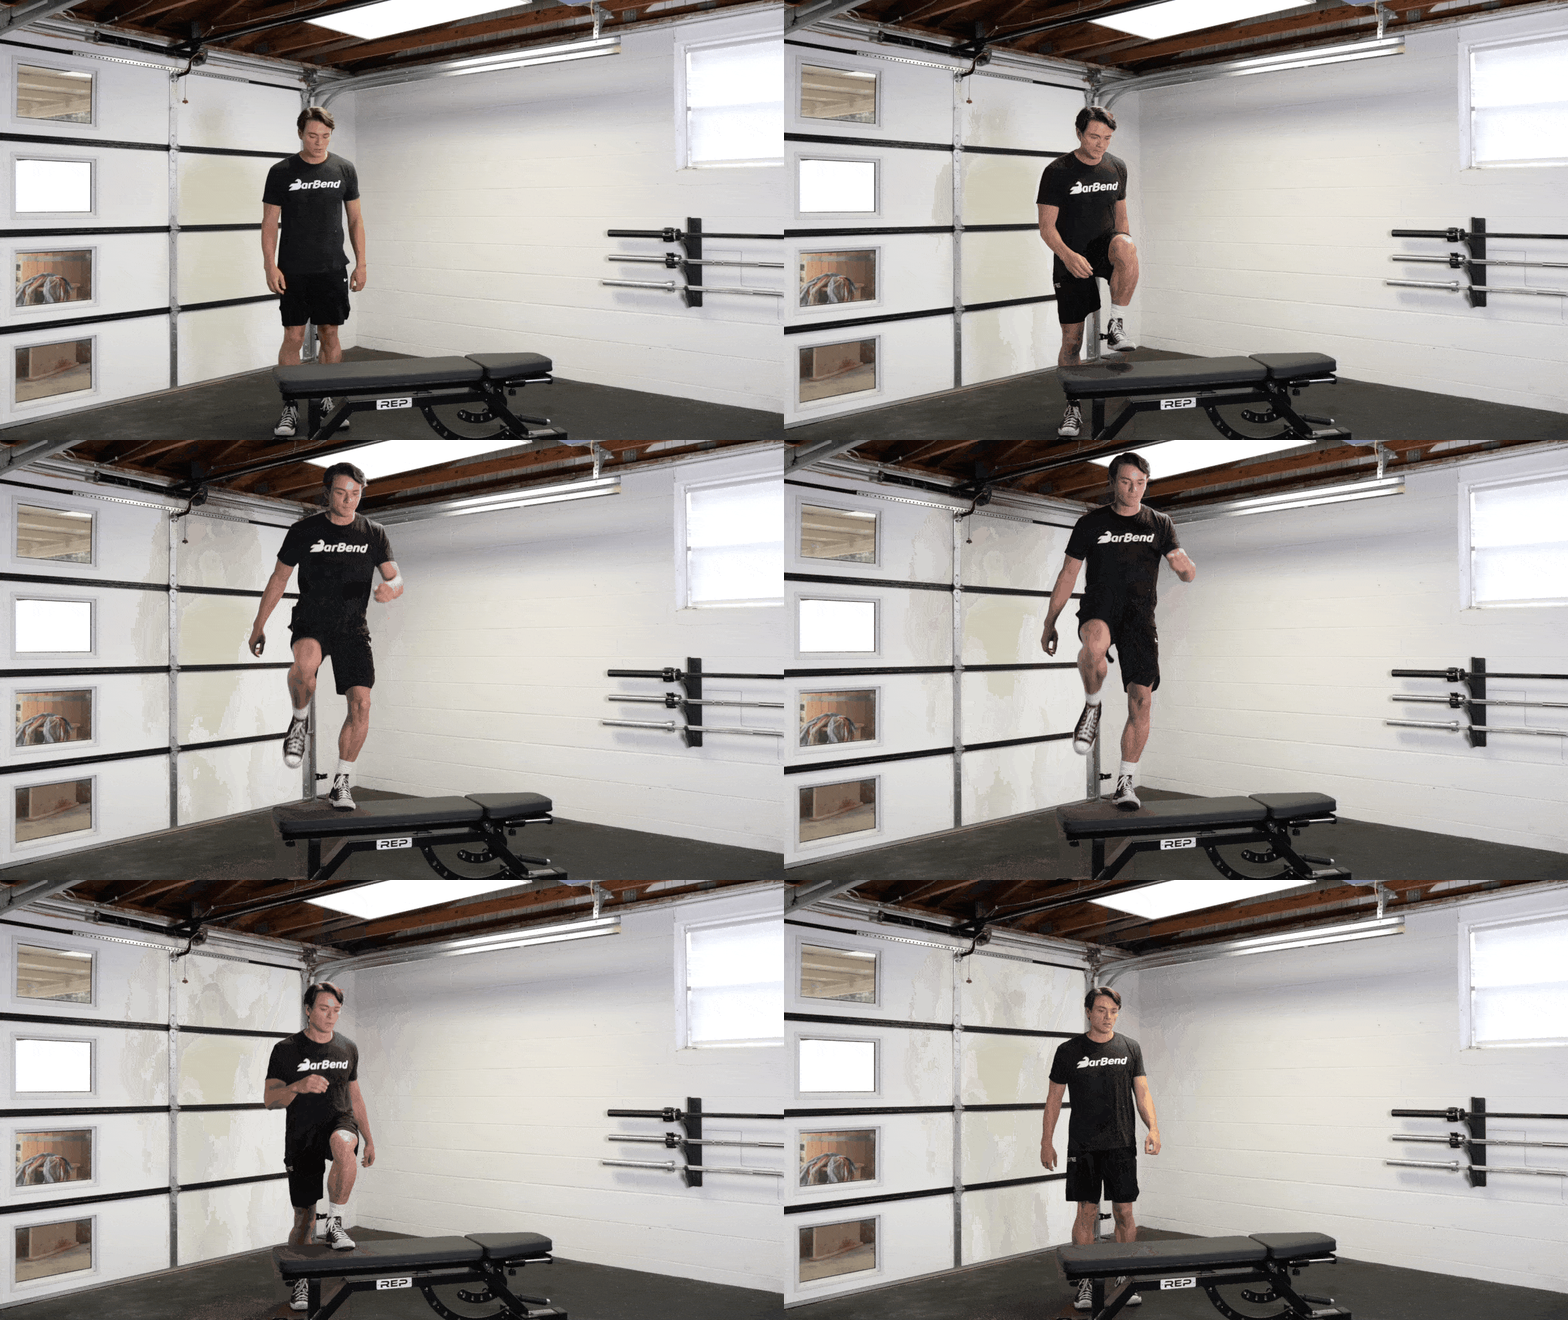
A step-up is an often slept-on training tool — but don’t step away from it too soon. From strength training to muscular endurance, the step-up is a pretty low barrier-to-entry exercise that has tremendous benefits. Individually challenging each leg and incorporating core, coordination, and stamina…what’s not to love?
How to Do It:
- Set up a step-up platform that allows your leg to reach about 90 degrees of knee bend on each repetition.
- Step onto the platform one foot at a time, lifting yourself onto the surface with one leg and then bringing the second leg along with it.
- Step down in the same sequence as you stepped up originally.
- Repeat for even repetitions per side, alternating the lead leg on each repetition.
[Check out our step-up guide for everything you need to know.]
Modifications
- Make it Easier: To reduce the coordination needed, perform all repetitions on one leg before alternating to the opposite side. However, this might fatigue your leg more quickly. Perform your reps next to a wall or stable squat rack to use for balance support.
- Make it Harder: Add resistance to your step-ups to increase the challenge. Try holding onto a dumbbell in each hand or in the goblet position.
9. Walking Lunge
[Read More: The Best Adjustable Dumbbells for Your Home Gym]
| Equipment Needed | Body weight, dumbbells optional |
| Muscles Worked | Quads, glutes, and core |
| Sets & Reps | 2-4 sets of 10-20 repetitions |
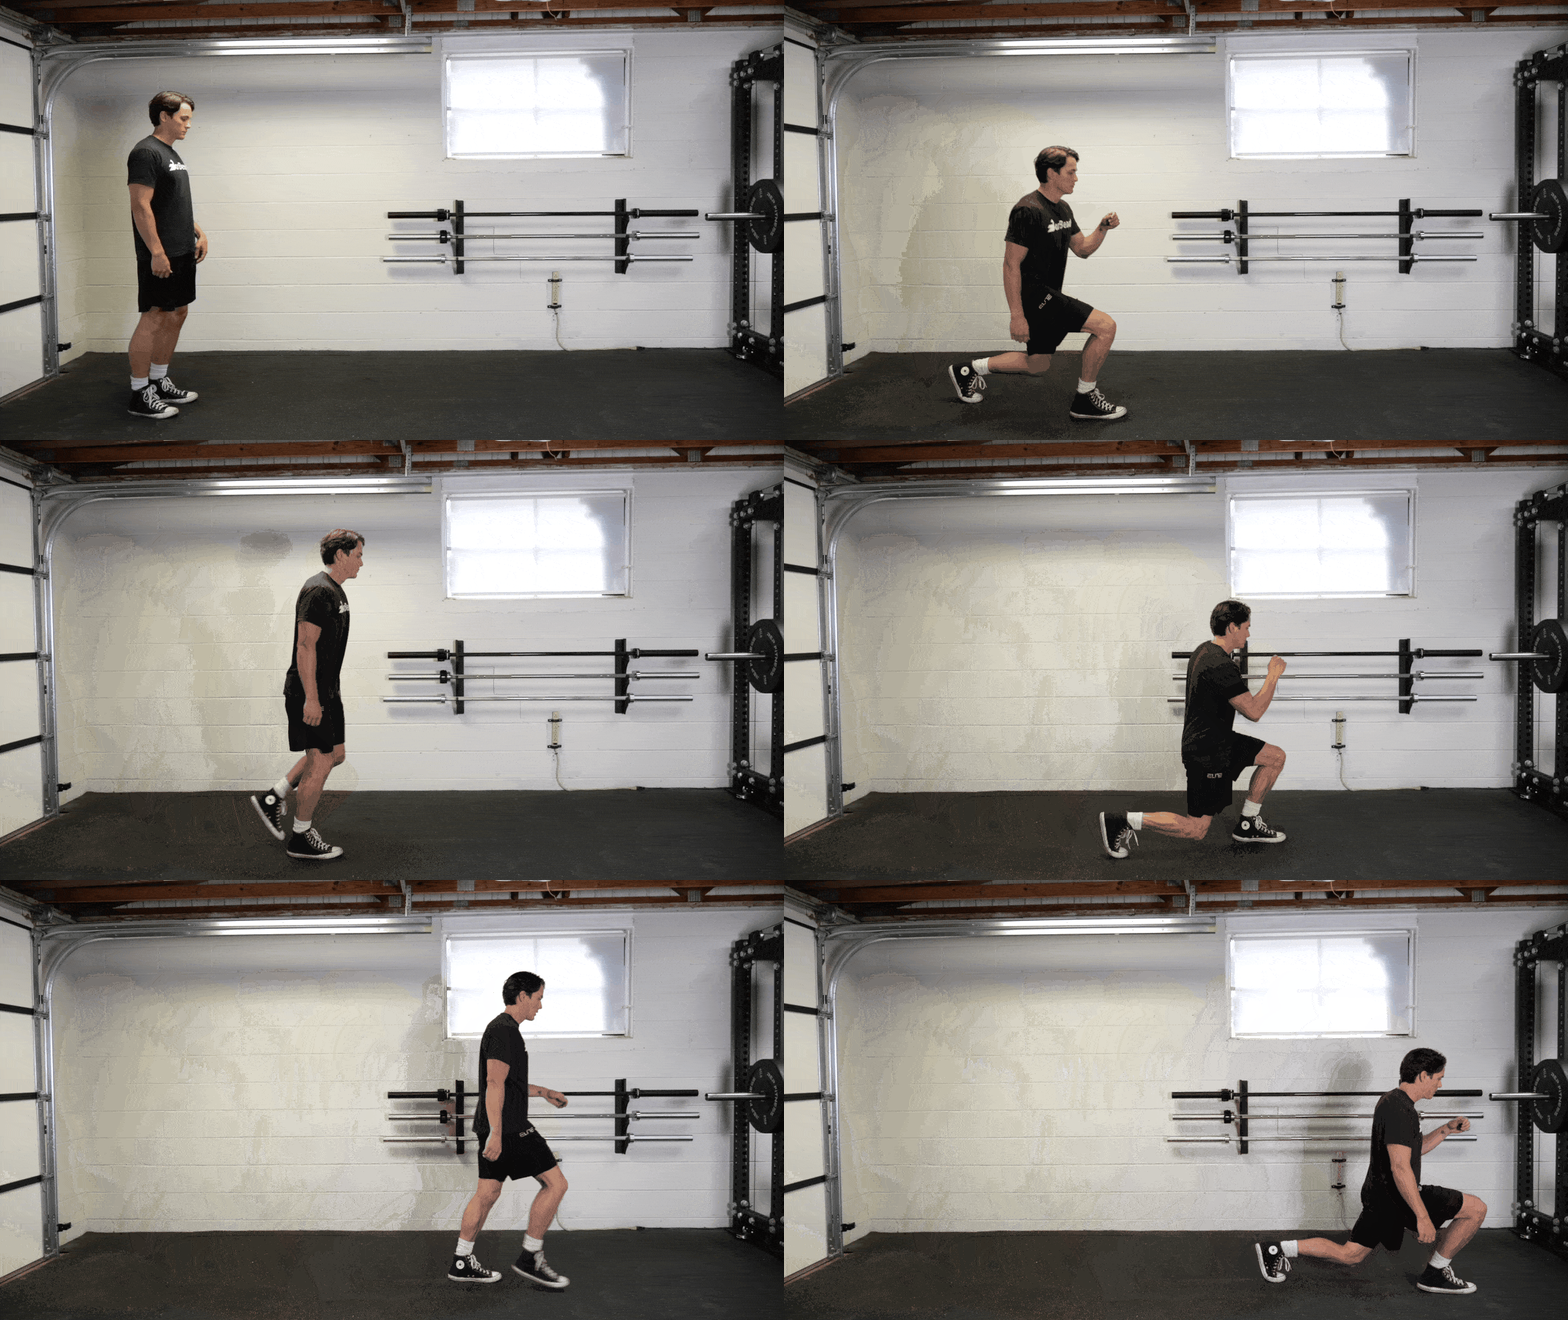
You know what they say: Death, taxes, and lunges. The walking lunge breaks up your lower body resistance training into unilateral efforts. Benefits abound. From mobility and single-leg stability, you’ll also build strength and coordination. Without much complexity at all, the walking lunge is a cardiovascular and muscle endurance tool all at once.
How to Do It:
- Stand tall and place your hand on your hips.
- Tighten your legs, brace your core, and take a long stride forward.
- Aim to maintain about 90 degrees of knee bend in the lead leg per repetition.
- Stand back up by driving through both legs, with most effort on the lead leg.
- Bring your back leg back to center between each repetition. Alternate which leg takes the forward stride per repetition.
[Check out our walking lunge guide for everything you need to know.]
Modifications
- Make it Easier: If you struggle with stability or coordination, try the reverse stationary lunge modification first.
- Make it Harder: The walking lunge has endless modifications to increase the challenge, most of which include adding load. Try using dumbbells and kettlebells in various positions (from alongside the body to an overhead or front rack position) to make them more difficult.
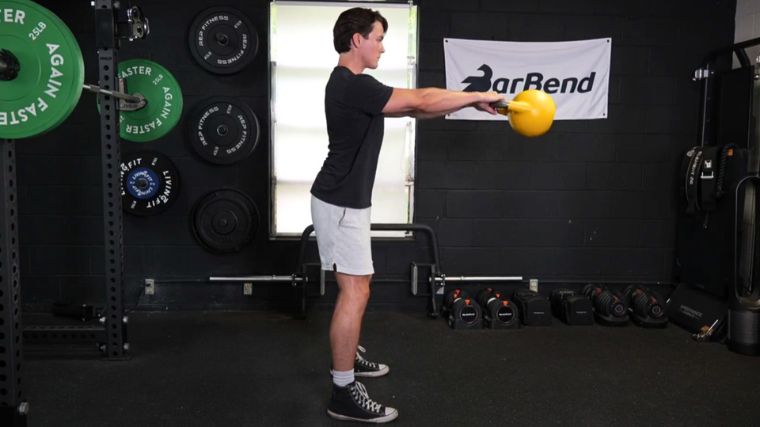
10. Kettlebell Swing
| Equipment Needed | Kettlebell |
| Muscles Worked | Hamstrings, glutes, forearms, and core |
| Sets & Reps | 2-5 sets of 20-50 repetitions |
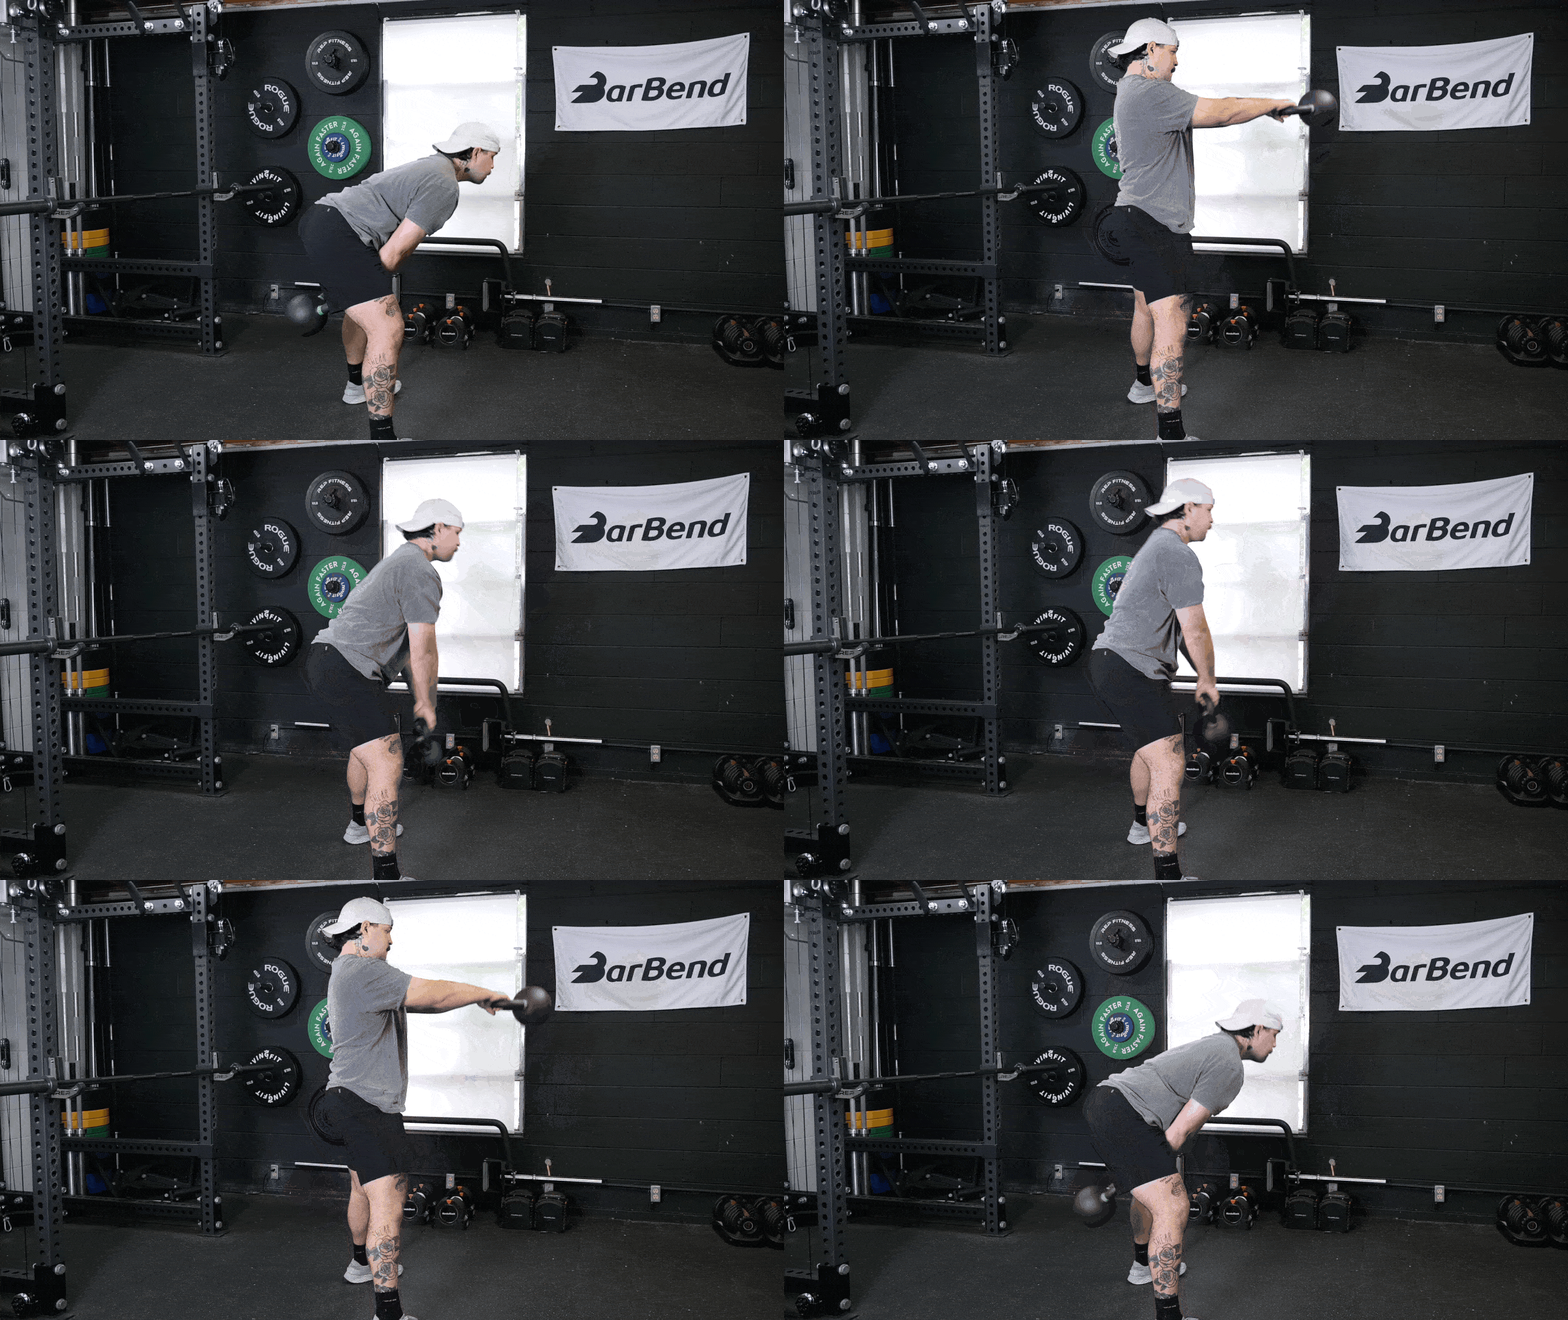
Kettlebell swings are a legendary exercise for muscular endurance. They take the core movement pattern of a hip hinge and transform it into one of the most wildly effective full-body exercises around. From your posterior chain to your heart, nothing escapes a good kettlebell swing workout.
How to Do It:
- Grip a kettlebell by the handle using both hands.
- Stand tall and brace your core. Set your foot stance shoulder-width apart. Place your feet straight forward or slightly turned out.
- Slide your hips backward into the hinge position. Snap the bell back behind you like you’re hiking a football (but don’t let go). Keep the bell above your knees, with your forearms contacting your inner thighs.
- Explosively contract your hips, glutes, and hamstrings to propel the kettlebell forward.
- Maintain your brace and, once your softly bent arms reach chest height, allow the kettlebell to drag you back into the bottom position. Guide the bell back between your legs again and repeat for repetitions.
Modifications
- Make it Easier: Try breaking your kettlebell swing sets up into smaller bursts as you refine your technique and build your confidence.
- Make it Harder: Make the kettlebell swing harder by using two bells at the same time. You can also do alternating swings by starting the lift with one arm, then switching hands mid-swing.
How to Program for Improved Muscular Endurance
You could just bang out high-rep set after high-rep set. But circuit training takes a toll on your muscle’s ability to recover. Program wisely for the most bang for your proverbial buck.
Manipulate Your Rest Periods
Typical weight room sessions — think, deadlifting days — are high-intensity with long rest periods and heavier loads. The goal is to build as much strength or muscle as possible. That makes sense for getting strong.
But many strength athletes have one fear (aside from cardio training): that shortening the rest periods and using correspondingly higher reps and lighter weights will somehow make you weaker and smaller. Rest assured: it won’t.
[Read More: How to do 100 Push-ups a Day]
Using shorter rest periods and higher repetitions lets you focus more on building endurance than max-out strength, sure. But research has started to point out that given enough effort, even lactate and aerobic training styles help with muscle building along the way. (1)
The tl;dr? Use lighter weights, around 60 percent of your max, or just your body weight to max out your reps and build that endurance. But as long as you’re cranking up the effort, you stand to gain muscle and even strength, too.
Use Multi-Joint Movements
There’s no way around it — you almost always need multi-joint exercises (like the ones on our list) for full-body development. And full-body includes your heart. Compared to single-joint moves, multi-joint movements like the ones we’re recommending here can boost your cardiovascular endurance, too. (2)
[Read More: The Best Cable Machines for Small Spaces, Bodybuilders, and More]
So, make sure you’re not just thinking of muscular endurance as endless sets of high-rep cable curls (though those are cool, too). Get that full-body involvement in, and you’ll be setting yourself up for all-around success.
Also Program Isolation Movements
OK, it’s true: sometimes coaches contradict ourselves. While the best muscular endurance exercises are definitely those multi-joint moves we’re mostly talking about, you don’t want to only program them into your weight training.
Instead, make sure you’re peppering in isolation-style exercises like dead hangs and sit-ups, too. These can go a long way toward building that specific endurance in muscle groups that might otherwise get neglected or overpowered by bigger muscles and movements.
[Read More: The Best Online Personal Trainers]
Unless an athlete is ready to try some pre-exhausting routines, I almost always recommend that my clients do their compound, multi-joint exercises first in their workout. That way, you’ll crank out pull-ups when you’re fresh and can save the single-joint curls for when you’re a bit more exhausted.
Don’t (Repeat: Don’t!) Neglect Your Grip
Your back and glutes are strong enough to crank out a CrossFit-style, high-rep deadlift workout. But…your grip tells a different tale. Don’t let your grip become the roadblock to your muscular endurance getting to the next level.
Use moves like dead hangs, pull-ups, kettlebell swings, overhead carries, and weighted walking lunges to really get a grip (get it?) on your endurance. With the exception of pull-ups — which you may want to do fresh — save these for the end of your sessions. You don’t want to pre-exhaust your grip and force your deadlift session to a halt before your bigger muscles feel it.
Sample Muscular Endurance Workout
Muscular endurance workouts take on many forms. Sometimes it’s all about long slogs on the treadmill. But in terms of strength training, you’re really able to lean into your creativity. One of the best ways to capture both local muscular and cardiovascular endurance benefits is by setting up a resistance training circuit.
The Workout
Here, I’ve chosen exercises for you that flow into each other seamlessly. They should account for full body engagement while not needing a ton of awkward transition movements in between.
As a bonus, I’m giving your cardiovascular system a workout, too. (Starting with swings and lunges? Yeah. That’ll do it.).
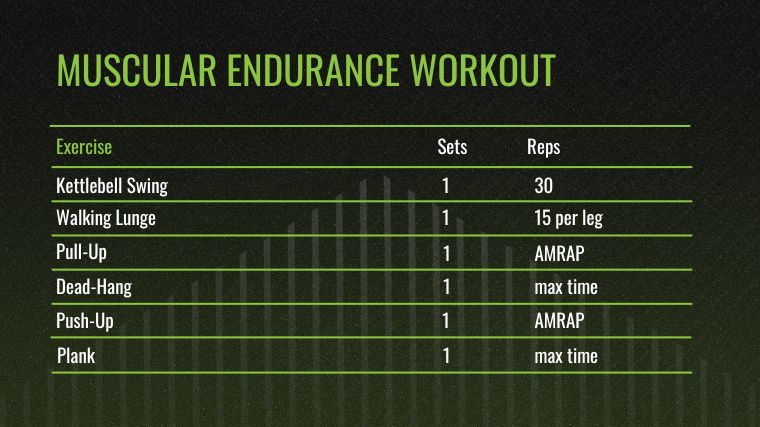
- Kettlebell Swing: 1 x 30 repetitions
- Walking Lunge: 1 x 15 repetitions per leg
- Pull-Up: 1 x AMRAP
- Dead-Hang: 1 x max time
- Push-Up: 1 x AMRAP
- Plank: 1 x max time
Note: Perform this circuit as many times as possible within 30 minutes, resting as minimally as possible between rounds.
How Often to Do This Workout: This workout is full body and involves a lot of eccentric repetitions (for example, kettlebell swings and walking lunges). This means you’ll likely have a lot of soreness the day after. Start by performing this workout no more than twice per week.
Modifications
- Make it Easier: Try using some of the exercise modifications provided above to allow higher repetition counts on your AMRAPs. For example, use incline push-ups or neutral grip pull-ups, especially as the rounds go on.
- Make it Harder: Set a hard rest period timer of 30 seconds between rounds.
Frequently Asked Questions
Training for muscular endurance is something of a rare goal among bench press beasts and squat devotees. Here are some frequently asked questions to clarify what you need to know if you want to get started.
What exercises use muscular endurance?
Almost any exercise requires some form of muscular endurance. If you’re performing more than one repetition, you’re technically calling upon some form of endurance. Isometric exercises like planks or high-repetition squats are extremely common muscular endurance exercises.
What are the three types of muscular endurance?
Three types of muscular endurance are isometric (like a plank), isotonic (like a kettlebell swing), or isokinetic (with a specialized machine). Isometric training and isotonic exercises make up the majority of exercises you’ll find within your programs, while isokinetic moves are rarer and often require specialized equipment.
How many reps should I do for muscular endurance?
Endurance is relative per person. If you’ve never done a bodyweight squat (or it’s been a lot of years since middle school gym class), 10 reps might push your endurance to the brink. As you gain more experience, that number will climb. For more experienced athletes, you tend to start emphasizing endurance around 12 to 15 reps and higher, depending on the exercise.
Although you may need to build a foundation of strength first, aim to get your rep count high for you and reduce your rest periods to accelerate your endurance gains.
Editor’s Note: The content on BarBend is meant to be informative in nature, but it should not be taken as medical advice. When starting a new training regimen and/or diet, it is always a good idea to consult with a trusted medical professional. We are not a medical resource. The opinions and articles on this site are not intended for use as diagnosis, prevention, and/or treatment of health problems. They are not substitutes for consulting a qualified medical professional.
References
- Mang, Z. A., Ducharme, J. B., Mermier, C., Kravitz, L., de Castro Magalhaes, F., & Amorim, F. (2022). Aerobic Adaptations to Resistance Training: The Role of Time under Tension. International journal of sports medicine, 43(10), 829–839.
- Paoli, A., Gentil, P., Moro, T., Marcolin, G., & Bianco, A. (2017). Resistance Training with Single vs. Multi-joint Exercises at Equal Total Load Volume: Effects on Body Composition, Cardiorespiratory Fitness, and Muscle Strength. Frontiers in physiology, 8, 1105.